
When I picked up my first DSLR in 2011, my wedding photos looked like every other beginner’s: a bride in the middle of the frame, the groom centered, and a horizon slashing across the dead center. They were technically fine. They were also completely forgettable. Then I learned the rule of thirds in wedding photos, and my composition changed within a single afternoon of practice.
This guide is the exact system I now teach to second shooters on our team at Kingdom Wedding Photography. We will cover what the rule of thirds actually is, how the 3×3 grid works, and where to place power points in real wedding scenes. You will also learn how to apply the rule during fast-paced ceremonies, first looks, receptions, and formal portraits. By the end, you will have a clear framework for stronger composition, plus five exercises to train your eye so you stop centering everything instinctively.
Table of Contents
What Is the Rule of Thirds in Wedding Photos
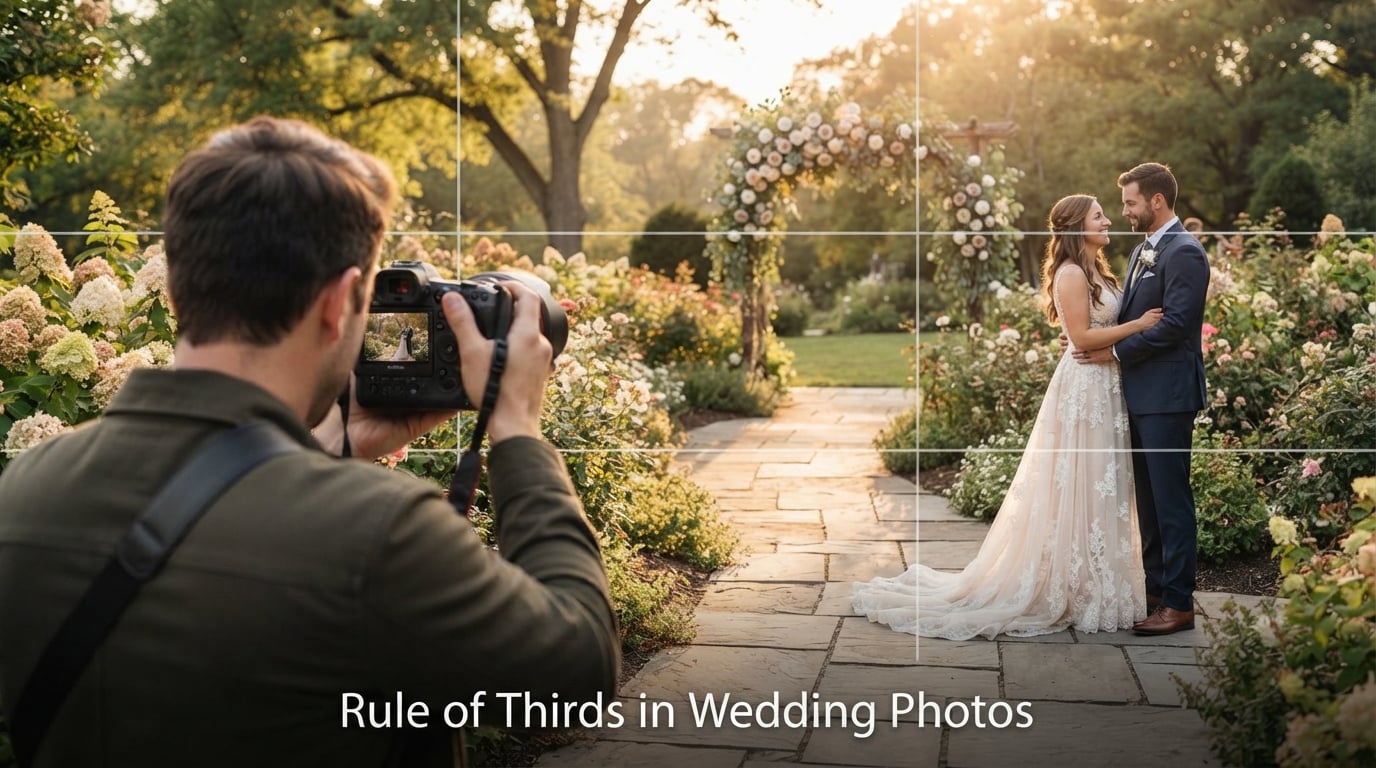
The rule of thirds is a composition guideline that divides your frame into a 3×3 grid of nine equal rectangles, with two horizontal and two vertical lines. You then place the most important parts of your image along those lines or at the four intersections where they meet. In wedding photography, that usually means positioning the bride’s eyes on a top intersection point, running the horizon through the lower horizontal line, or letting the couple occupy the right two-thirds while the aisle fills the left third.
Why does this matter? Centering a subject feels safe, but it also produces a static, symmetrical image with no visual tension. Our eyes naturally look for off-balance elements that suggest movement, story, or relationship. By shifting your subject off-center using the rule of thirds, you create breathing room, lead room, and negative space. The viewer’s gaze enters the frame, lands on the subject, and travels through the rest of the image. That is the difference between a snapshot and a photograph a couple frames on their wall.
Both beginner and experienced wedding photographers benefit. Beginners gain a reliable default that beats centering every shot. Pros use the rule as a foundation, then intentionally break it when a scene calls for symmetry or centered impact. Think of it as your starting position, not your final answer.
The 3×3 Grid Explained
The 3×3 grid is simple once you see it. Picture your viewfinder or LCD screen divided into three columns of equal width and three rows of equal height. The four lines that form this grid (two horizontal, two vertical) become your composition guides. Anything important in the frame should sit on one of these lines rather than in the middle.
In wedding photography, the vertical lines help you position people and architectural elements like doorways, columns, and arches. The horizontal lines help you place horizons, table edges, lines of bridesmaids’ shoulders, and the bride’s eyes in close-up portraits. Most modern cameras and phones let you overlay this grid in the viewfinder. Turn it on by default for the first hour of every wedding you shoot, and your muscle memory will build faster than you expect.
Aspect ratio changes things slightly. On a 3:2 DSLR frame, the grid feels natural. On a 16:9 video frame, the middle third becomes wider, and the rule of thirds works best with subjects on the inner intersection points. On a square crop (great for Instagram albums), the grid lines move closer together, so eye placement on the upper line needs slightly more breathing room at the top.
Intersection Points and Power Points
Intersection points are the four spots where the grid lines cross. Photographers often call them power points, focal points, or crash points because the human eye lands on them first. In a wedding frame, place your highest-priority subject (the eyes, the rings, the kiss) on or near one of these points.
For solo portraits of the bride, I almost always place her eyes on the upper-left or upper-right intersection. Which side depends on which way she is facing and where I want lead room. If she is looking to her right, I shift her slightly left so her gaze has space to travel into the right third of the frame. That empty space is called lead room or nose room, and it is the difference between a portrait that feels open and one that feels trapped.
For group shots, you can place the bride and groom on one power point and a meaningful detail (a bouquet, a child, the officiant) on the diagonal opposite power point. This creates visual tension between the two elements, which our brains read as storytelling. The eye bounces between the couple and the detail, building a relationship between them in the viewer’s mind.
Applying the Rule of Thirds to Wedding Portraits
Wedding portraits are where the rule of thirds shows up most clearly. Start with eye placement. In a tight headshot of the bride, her eyes should sit on the upper horizontal line, with one eye resting on a vertical intersection point. This positioning is what makes portraits feel natural and engaging rather than stiff.
Next, check lead room. If the bride is facing slightly to the right of the frame, leave more empty space on the right than on the left. The space her gaze moves toward is the lead room. Without it, the image feels crowded, like the bride is pressing against the edge of the canvas. I aim for roughly two-thirds subject and one-third lead room in most portraits.
For environmental portraits (couple shots inside a church, vineyard, or hotel lobby), let the architecture play a role. Place the couple on one of the lower power points so the ceiling, chandelier, or stained glass occupies the upper two-thirds. That setup uses the rule of thirds to balance the human element with the place element, and it tells the wedding’s location story without a single extra word.
Wedding Ceremony Shot Composition
The ceremony is fast and emotional, so composition has to become instinct. The rule of thirds gives you a clear decision tree when the moment arrives and you have less than two seconds to react.
For the processional, frame the aisle so the bride walks along the right vertical line, leaving two-thirds of the frame for empty pews or decorative arches on her walking side. For the vows, anchor the bride on one upper power point and the groom on the diagonal opposite, with their joined hands sitting on the lower intersection. For the ring exchange, focus tightly on the hands and let the hands rest on the lower-right intersection, leaving the upper two-thirds for the blurred faces and the officiant.
If you are shooting the ceremony from the back of the aisle, use the rule of thirds horizontally. Place the couple on the lower horizontal line so the upper two-thirds capture the venue’s architecture, lights, or the officiant’s expression. If you are shooting from the side, use the vertical lines to keep the couple off the edge of the frame, with breathing room on the side they face.
First Look Compositions Using the Grid
First look moments are some of the most emotional images you will ever take, and the rule of thirds is your best friend. Start with the back shot of the groom waiting. Frame him on the right vertical line so two-thirds of the frame shows the empty space he is staring into. That emptiness carries the emotional weight of anticipation.
When the bride walks up, shift your composition so the bride approaches from the lower-left intersection, walking toward the upper-right. The diagonal path through the frame creates a sense of motion and purpose. As they touch and turn, recompose so the couple’s faces sit on the upper horizontal line, with their bodies occupying the lower two-thirds.
For the reaction shots, get tight. Frame the bride’s face so her eyes are on the upper intersection and the soft focus of the groom’s shoulder fills the lower-right third. The shallow depth of field plus the rule of thirds placement turns an instant into a portrait that reads like a film still. We have printed these for clients at 30×40 inches, and the composition holds up beautifully at that scale.
Reception and Formal Group Photo Composition
Reception halls are full of visual chaos. The rule of thirds is what keeps your images from feeling like busy snapshots. For group photos, anchor the bride and groom on one of the lower intersection points, then let the wedding party fan out across the lower horizontal line. This positions the most important faces where viewers naturally look first.
For speeches, frame the speaker on the right vertical line if they are looking left, or the left vertical line if they are looking right. Leave the lead room pointing toward the audience or the couple. The viewer’s eye will travel from the speaker to the listener, telling a complete story in one frame.
The first dance is where a lot of photographers default to center. Try this instead: place the couple on the lower horizontal line and let the dance floor lights, chandelier, or string lights fill the upper two-thirds. If the dance includes a spin, time the shot so the bride’s dress sweeps across the right vertical line while the groom occupies the left third. The leading line of the dress does the rest of the compositional work for you.
How to Enable the Grid Overlay on Your Camera
The grid is useless if you forget to turn it on. Here is the fastest way to enable it on the major camera brands we shoot with at Kingdom Wedding Photography.
On Canon mirrorless and DSLR bodies, press the Menu button, go to the Display settings or Shooting information display, and look for Grid display. Enable the 3×3 option. On Nikon, go to Custom Settings, find Shooting/display, then enable Grid lines in the viewfinder. On Sony Alpha bodies, press the Menu button, navigate to Display Quality, and toggle Grid Line to Rule of 3rds Grid.
On iPhone, open Settings, tap Camera, then tap Grid. The 3×3 grid will appear on every shot. On Android, the location varies by brand, but most Samsung, Google Pixel, and OnePlus phones have a grid toggle inside the camera app’s settings menu. Enable it once and leave it on permanently.
One quick tip: turn the grid off when shooting video if you want a cleaner viewfinder, but keep it on for stills. The grid becomes a habit within two or three weddings, and your composition will jump noticeably.
Rule of Thirds vs Golden Ratio in Wedding Photography
The rule of thirds is a simplified version of the golden ratio, an older mathematical pattern found in nature and classical art. The golden ratio (about 1.618 to 1) creates a slightly tighter composition than the rule of thirds. In practice, the difference is small but noticeable in large prints and fine art albums.
Use the rule of thirds for fast-paced wedding coverage. The grid is easier to remember, easier to enable, and gives consistent results when you have half a second to compose. Use the golden ratio (sometimes called the Fibonacci spiral or phi grid) for hero portraits, detail shots, and fine art couple sessions where you have time to fine-tune the placement. The intersections of the golden ratio grid sit closer to the center than the rule of thirds intersections, which produces a slightly tighter, more classical composition.
The two work together, not against each other. Many wedding photographers shoot 90% of the day with the rule of thirds and reserve golden ratio compositions for a handful of hero images per wedding. That blend gives you reliability and a touch of fine art in the final gallery.
When and How to Break the Rule of Thirds
The rule of thirds is a starting point, not a law. Knowing when to break it intentionally is what separates a photographer who follows rules from one who makes deliberate choices. Centered composition works well for symmetry-heavy scenes: a couple framed in a doorway, a bride standing on a staircase with matching railings, or a mirror reflection where left and right balance perfectly.
Centered composition also works for powerful solo moments. A single subject standing dead center against a soft background can feel iconic and timeless. Think of a bride in her wedding dress, framed straight-on in the middle of an open field at golden hour. The centered placement adds gravity and presence. Centering also works for negative space portraits where the subject is small in the frame, surrounded by sky, water, or an empty room.
The key is intentionality. If you center because the rule of thirds is hard to apply in the moment, your images will feel uncertain. If you center because the scene calls for symmetry, presence, or solitude, your images will feel deliberate and powerful. Always know why you broke the rule before you press the shutter.
Training Your Eye: Practice Exercises for Wedding Photographers
The fastest way to internalize the rule of thirds is targeted practice, not passive shooting. Try these five exercises between weddings. Each one takes less than ten minutes.
Exercise 1: The Crop Drill. Take any past wedding image you love and crop it to a perfect square centered on the subject. Then crop the same image to a square using the rule of thirds. Compare the two side by side. You will see the off-center version almost always feels more dynamic.
Exercise 2: The Power Point Walk. Stand in any room with people in it. Without raising your camera, identify where the power points would fall in a horizontal frame. Pick three subjects and decide which intersection they belong on and why. Repeat outdoors with moving subjects like cars or pedestrians.
Exercise 3: The Portrait Test. Have a friend sit for you. Take 10 portraits using the rule of thirds and 10 portraits centering the face. Compare. Notice how the off-center versions give the face room to feel like it has somewhere to look.
Exercise 4: The Lead Room Switch. Take a single portrait, then reframe it so the subject is on the opposite side of the frame. One version will look right and the other will feel cramped. That instant feedback trains your eye to recognize lead room.
Exercise 5: The Wedding Day Grid. On your next wedding, leave the grid overlay on for the entire ceremony. Do not turn it off. By the end of the ceremony, you will be composing with the grid automatically. Most of our team members see a measurable improvement after just one ceremony of grid-on shooting.
Common Mistakes to Avoid
Even with the rule of thirds in mind, certain errors creep into wedding photos again and again. Watch out for these.
Horizon in the middle. If the horizon runs across the center of the frame, the image feels split in half. Move it to the upper or lower horizontal line instead.
Subject hugging the edge. Placing the bride or groom too close to the edge of the frame eliminates breathing room. Aim for at least one intersection point of space between the subject and the nearest edge.
Lead room in the wrong direction. If the subject is looking left, leave more space on the left. Reversing this feels immediately wrong to viewers, even if they cannot explain why.
Grid placement without intent. Slapping the subject on a power point without checking lead room or background balance still produces weak images. The grid is a tool, not a finishing move.
Forgetting the rule in motion. The first dance, recessional, and bouquet toss happen fast. Slow down for half a second, place the subject on a power point, then let the moment happen.
Frequently Asked Questions
When should you not use the rule of thirds in wedding photos?
Skip the rule of thirds when symmetry, centered presence, or negative space tells the story better. Centered composition works for framed couples in doorways, bride portraits against open sky, mirror reflections, and iconic solo shots where the subject commands the frame. The rule of thirds is a starting point, not a requirement, so break it intentionally when the scene calls for balance or stillness.
What is the 30/5 rule for weddings?
The 30/5 rule for weddings is a planning shortcut borrowed from event photography: spend 30 minutes scouting the venue and 5 minutes reviewing the timeline before each new shooting location. It is not a composition rule, but it pairs well with the rule of thirds because scouting lets you pre-visualize where to place subjects along the grid lines.
What is the 20-60-20 rule in photography?
The 20-60-20 rule splits a frame into three horizontal bands. The bottom 20 percent anchors the foreground, the middle 60 percent carries the subject, and the top 20 percent holds the sky or background. It is a useful companion to the rule of thirds when shooting wide environmental wedding portraits where the venue matters as much as the couple.
What makes a good rule of thirds photo?
A good rule of thirds photo places the most important subject on an intersection point or along a grid line, leaves breathing room around the subject, and gives the subject lead room in the direction it faces. Pair the rule with a clear focal hierarchy, intentional background, and clean negative space for the strongest wedding images.
Final Thoughts on the Rule of Thirds in Wedding Photos
The rule of thirds in wedding photos is the single most reliable composition tool you can carry into a wedding day. It works for portraits, ceremonies, receptions, and first looks. It gives you a fast decision tree when the moment arrives and you have half a second to react. Most importantly, it stops the instinct to center everything and replaces it with intentional placement that draws the viewer’s eye exactly where you want it.
Turn your grid overlay on, shoot your next wedding with it enabled for the entire day, and run through the five exercises above between bookings. Within a month, you will notice stronger portraits, more dynamic ceremonies, and a portfolio that feels noticeably more polished. Composition is a habit, and the rule of thirds is the shortest path to building that habit well.