
I still remember the first wedding I shot where the composition fell apart. I had the couple perfectly sharp, beautiful golden hour light, but a random guest in a bright red shirt standing right behind them. The whole frame felt busy. I cropped and burned in post for an hour, wishing I had just stepped three feet to the left.
That moment taught me something every working photographer learns the hard way: wedding photo composition is not about what you put in the frame. It is about what you choose to leave out, where you place your subjects, and how you guide the viewer’s eye. After shooting more than 200 weddings with our team at Kingdom Wedding Photography, I have come to rely on a small set of techniques that work in any venue, at any time of day, with any gear.
In this guide, I will walk you through those techniques the same way I walk our newer associates through a wedding day. We will start with the core rules like rule of thirds and leading lines. Then we will get practical with framing, symmetry, negative space, and layering. We will cover composition for the ceremony, portraits, and reception, and finish with a printable checklist you can actually use on a wedding day.
Table of Contents
What Is Wedding Photo Composition
Wedding photo composition is the intentional arrangement of visual elements inside the camera frame to guide the viewer’s eye, support the story of the day, and create a balanced, emotionally resonant image. It is the difference between a snapshot and a photograph someone wants to print and hang on their wall.
Good composition in wedding photography means three things working together. First, the couple or the moment is clearly the focal point. Second, the surrounding elements support that focal point rather than competing with it. Third, the eye moves naturally through the frame from one element to the next.
Most amateur wedding photos fail at the second point. There is too much happening, no clear hierarchy, and the viewer does not know where to look. Professional wedding photo composition fixes this by using a small library of tested techniques, which I will cover one by one in this article.
One important note before we get into the techniques. Rules are starting points, not laws. I break composition rules often, and so do the best wedding photographers I know. The goal is not to follow every rule on every frame. The goal is to understand why the rules exist so you can break them with intention.
Rule of Thirds for Wedding Photography
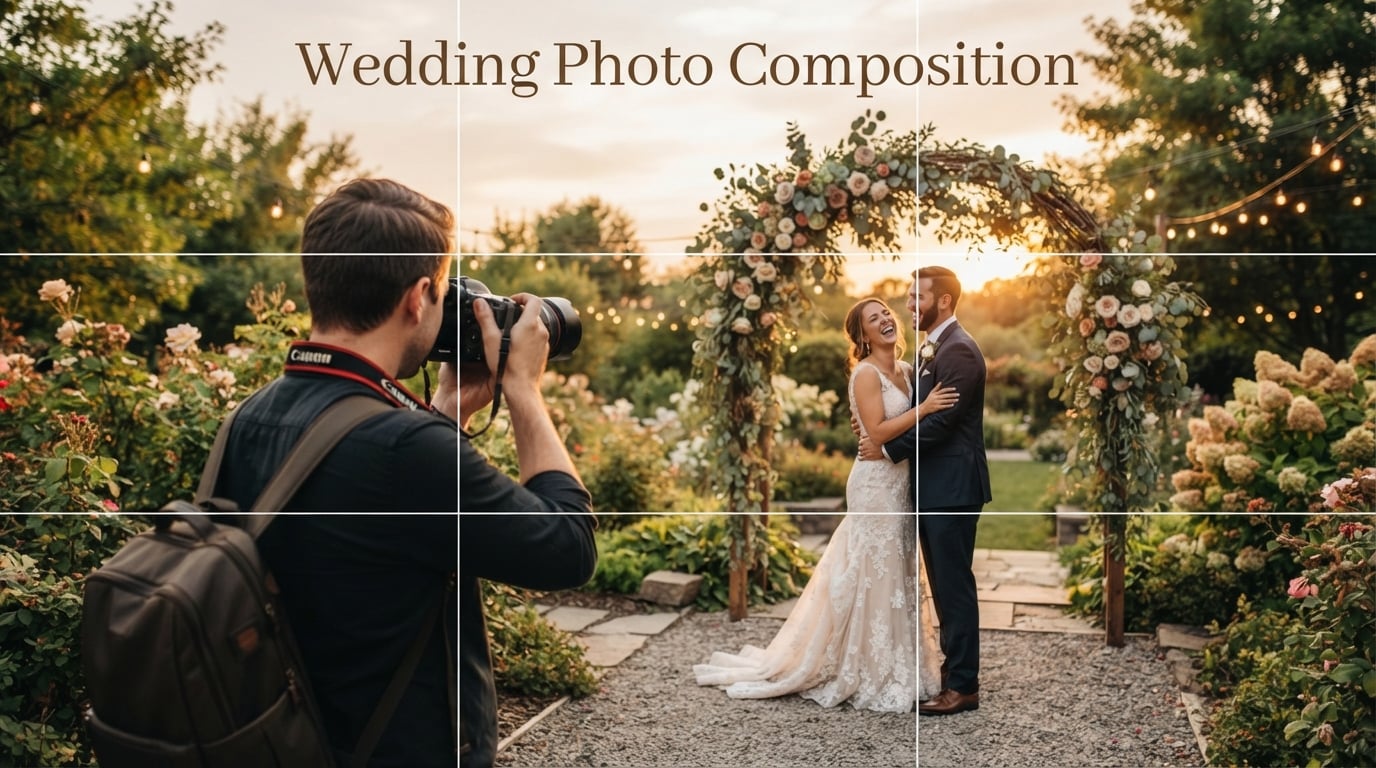
The rule of thirds is a composition technique where you divide the frame into a 3×3 grid using two horizontal and two vertical lines, then place your key subjects along those lines or at their intersections. In wedding photography, this produces more dynamic, balanced images than centering your couple every time.
Here is how I apply the rule of thirds during a real wedding day. For a couple’s portrait, I place their eyes along the upper horizontal line, not in the dead center. For a first look, I put the bride on the right vertical third while the groom enters from the left third. For detail shots of the rings or shoes, the subject sits on one of the four intersection points.
Where to Place the Couple in the Frame
Place the couple’s eyes on the upper third line, especially in standing portraits. This gives breathing room above their heads and draws attention to the expressions. For ceremonies, place the speaking partner on the right vertical third while leaving space for the person they are looking at.
A simple trick I teach every new shooter is to set your autofocus point to the upper center third of the viewfinder. That single habit forces you to think about composition before you press the shutter. Photographers on wedding forums like Reddit’s r/WeddingPhotography have shared the same tip, and it works because it trains your eye.
When to Break the Rule of Thirds
Break the rule when symmetry tells a stronger story. Centered compositions work beautifully for couples holding hands in a doorway, the rings shot from above, or a bride framed in an arch. The rule of thirds is a default, not a rule you apply mechanically.
Leading Lines That Draw the Eye to the Couple
Leading lines are real or implied lines in the scene that direct the viewer’s eye toward your main subject. In wedding photography, these lines can be aisles, walkways, fence rails, staircases, the couple’s arms, or even the seams of a wedding dress train.
Every wedding venue is full of leading lines if you know where to look. Church aisles are obvious. So are garden paths, beach shorelines, balcony railings, and reception table runners. Our team photographs most ceremonies by getting low at the end of the aisle so the runner leads directly to the couple.
How to Use Leading Lines for Portraits
Walk around your couple and look for lines that already exist. A path, a hedge, a row of trees, the edge of a building. Position yourself so the line starts at one edge of the frame and points toward their faces. This creates depth and pulls the viewer into the story.
For a couple’s first look, position yourself behind the partner who is being surprised. Frame the shot so their shoulders form two converging lines pointing toward the approaching partner. The story becomes clear in a single glance.
Framing the Couple in Their Environment
Framing is a wedding photo composition technique where you use elements in the scene to create a border around your subject. The frame can be a doorway, an arch, a window, hanging flowers, the branches of a tree, or even the groom’s shoulders around the bride.
Framing does two jobs at once. It draws the eye to your subject and adds context. A bride framed in a stone archway tells the viewer she is inside a historic church. A couple framed by hanging wisteria tells you it is spring. Without the frame, you lose that story.
Natural Frames I Look for at Weddings
Doorways and arches are the easiest natural frames and they exist at almost every venue. Windows work the same way, especially when you shoot from inside looking out, with the couple standing in soft outdoor light. Foliage, hanging installations, and curtains all create soft frames.
For close-up portraits, try framing with hands. The groom’s hand gently cupping the bride’s face, or two hands holding the rings, creates a tight frame that adds intimacy without feeling staged.
Symmetry and Patterns in Wedding Shots
Symmetry in wedding photo composition means placing matching elements on either side of a central axis so the frame feels balanced and harmonious. Staircases, altar pieces, long banquet tables, reflecting pools, and tree-lined driveways are natural symmetry goldmines.
When I scout a venue, I walk straight down the centerline of every room looking for symmetry. Centered compositions that would feel amateur anywhere else suddenly feel powerful when the architecture supports them. Think of the couple standing dead center at the end of a long church aisle with matching pews on both sides.
Breaking Patterns for Visual Interest
Symmetry is strongest when you break it once. A perfectly symmetric aisle shot becomes more interesting when the bride looks over her shoulder. A row of identical bridesmaid dresses feels alive when one laughs mid-step. Use the symmetry as your foundation, then add one small disruption to create tension.
Negative Space for Emotional Impact
Negative space is the empty area around your subject in the frame, and it is one of the most underused tools in wedding photo composition. Empty sky, a plain wall, a stretch of grass, all of these areas give the eye a place to rest and make the subject feel more important.
Wedding couples often want every photo filled with detail. I encourage them to let me include negative space instead. A bride standing alone against a wide blue sky feels powerful. A groom framed by a vast empty meadow feels calm. Without that empty space, the image feels cluttered and the emotion gets lost.
How Much Negative Space Is Too Much
A good rule of thumb is to give your subject roughly one third of the frame and let the other two thirds breathe. For very emotional moments like the first look or the vows, I push this to one quarter subject, three quarters negative space. The empty area amplifies the feeling of stillness.
Watch the edges of your frame when you add negative space. Random tree branches, exit signs, or patches of bright sky can pull the eye away from the subject. The space around your subject should feel intentional, not accidental.
Layering and Depth in Wedding Composition
Layering in wedding photo composition means building the frame with three distinct planes: a foreground element, a midground subject, and a background element. This creates a sense of depth that flat compositions cannot match.
I use layering constantly during receptions. A guest in the foreground, slightly out of focus. The couple dancing in the midground, sharp and well-lit. String lights or candles glowing in the background. The frame tells three stories at once.
Easy Layering Techniques
Hold a flower, leaf, or veil corner close to your lens to create a soft foreground layer. Shoot through a doorway or window to add architectural framing. Use other guests as foreground layers during candid moments at the reception, just make sure they are out of focus enough not to distract.
Layering takes practice because you are managing three depth planes at once. Start with a wide aperture around f/2.8 so your foreground and background blur nicely while your subject stays sharp. Move your body until the layering feels natural, not forced.
Composition for Specific Wedding Moments
The best wedding photo composition is moment-specific. What works for a ceremony does not work for a reception. What works for a bride’s portrait does not work for a detail shot. Here is how I think about composition in each part of the day.
Ceremony Composition
Ceremonies demand restraint. You cannot move, you cannot use flash, and you cannot ask the couple to repeat anything. Pre-visualize three to five anchor shots before the ceremony starts. The wide establishing shot, the medium shot of the couple at the altar, the close-up of the rings, the reaction of a parent, the recessional.
For the vows, position yourself off to the side so you can capture the listener’s face while the speaker is slightly out of focus in the foreground. This single composition choice turns a wide ceremony photo into a story.
Portrait Composition
Portraits are where wedding photo composition gets to breathe. You control the location, the lighting, the pose, and the background. Use this freedom. Try the rule of thirds, then try centered symmetry. Try a tight close-up with negative space, then try a wide environmental portrait that shows the whole venue.
Change your shooting height. Get low and shoot upward through flowers or grass. Get high and shoot down the aisle or stairway. These two angles, used sparingly, add variety to a wedding album that would otherwise feel repetitive.
Reception Composition
Receptions are layered, chaotic, and dark. Embrace all three. Use the chaos by including foreground guests, midground action, and background bokeh lights. Use the darkness by exposing for highlights like candles and string lights, letting everything else fall into shadow.
For the first dance, shoot through the crowd. The heads and shoulders of guests create an instant frame around the dancing couple. For parent dances, get low and shoot across the floor so the reflection of the dance floor doubles your leading lines.
Detail Shot Composition
Detail shots include rings, shoes, the dress, the bouquet, the invitation suite, and the cake. These are usually shot from directly above using a flat lay approach. Center the main subject, then add supporting elements in a balanced way around the edges of the frame.
For non-flat-lay detail shots, use the rule of thirds and shallow depth of field. A close-up of the rings on the bride’s hand works best when her fingers and the bouquet fade softly into the background.
Common Wedding Photo Composition Mistakes to Avoid
Even experienced photographers make composition mistakes under pressure. Here are the most common ones I see in wedding photos that come back from editing, and exactly how to avoid them.
- Busy backgrounds. Watch what is directly behind your couple’s head. A tree growing out of their scalp, a bright exit sign, or a guest in loud clothing can ruin an otherwise perfect frame. Take two steps left or right before you press the shutter.
- Too much headroom. Empty sky above the couple’s head pulls attention away from their eyes. Crop tight or zoom in until the head sits comfortably in the upper third of the frame.
- Tilted horizons. Architecture shots are unforgiving. A level horizon in a church interior keeps the image feeling grounded and professional.
- Cutting off limbs. Be careful at the joints. A crop at the wrist or ankle looks awkward. Either go wider or crop tighter to a flattering mid-section.
- Same height for every shot. Standing at eye level for every photo flattens a wedding album. Vary your height. Shoot low, shoot high, and the album feels alive.
- Ignoring the edges. Bright spots, parked cars, photographers’ gear, and trash cans all sneak into the edges of the frame. Scan the edges of the viewfinder before every shot.
One photographer on Reddit told me they realized half their composition mistakes only after importing the photos at home. That is exactly why a quick scan of the edges and the background before you click saves hours in editing.
Wedding Photo Composition Checklist
Use this quick checklist at every wedding. I keep a printed copy in my camera bag and glance at it during slow moments like cocktail hour. It is the same list I built after reviewing 5,000 of my own wedding photos and noticing which compositional issues came up again and again.
- Check the background behind the couple’s head before every shot
- Place eyes along the upper third line for portraits
- Look for one leading line in every scene before composing
- Find a natural frame when possible: doorway, arch, foliage
- Use negative space around emotional moments like vows and the first look
- Build three depth planes: foreground, midground, background
- Break one pattern or rule per scene for visual interest
- Vary shooting height across the day: standing, low, high
- Scan all four edges of the viewfinder for distractions
- Confirm the horizon is level for architecture-heavy scenes
- Recompose if a bright color or moving object pulls the eye
- Take three frames per shot: wide, medium, and tight
This is the same checklist I would give a photographer joining our team on their first wedding. It is not exhaustive, but it catches 90% of the composition mistakes that show up later in editing.
How to Practice Wedding Photo Composition Before the Wedding Day
Composition skills improve with deliberate practice, not just hours on the job. I shoot personal projects every month to keep my eye sharp. Here is what works.
Shoot the same location three different ways using rule of thirds, centered symmetry, and negative space. Compare them. You will start to feel which approach a scene wants. Shoot friends, family, or even your dog using leading lines, framing, and layering. The subject does not matter. The composition muscles you build matter.
Review your own wedding photos every week and tag the composition choices you made. Did you use the rule of thirds? Did you frame the couple? Did you include foreground elements? Patterns reveal themselves after a few months. You will start to notice what you reach for automatically and what you avoid.
Finally, study the masters. Look at wedding work from photographers like Jerry Ghionis, Jose Villa, and Elizabeth Messina. Notice how each one approaches composition differently. Steal the techniques you love, then make them your own.
Wedding Photo Composition Frequently Asked Questions
What are the best composition techniques for wedding photography?
The best composition techniques for wedding photography are rule of thirds, leading lines, framing, symmetry, negative space, and layering. Use rule of thirds as your default, add leading lines from aisles or paths, frame couples with doorways or arches, look for symmetry in architecture, include negative space for emotion, and layer foreground and background for depth. Each technique works best for a specific moment of the day, so vary your approach across the ceremony, portraits, and reception.
What is the rule of thirds in wedding photography?
The rule of thirds in wedding photography is a composition guideline where you divide the frame into a 3×3 grid and place key subjects along the grid lines or at their intersections. For portraits, place the couple’s eyes on the upper third line. For ceremonies, place the speaking partner on a vertical third with space for the person they face. The rule of thirds produces balanced, dynamic images and is the most-used starting point for wedding photo composition.
How do you master composition in wedding photography?
You master composition in wedding photography by learning one technique at a time and applying it deliberately until it becomes instinct. Start with the rule of thirds for every portrait. Add leading lines by walking around the venue. Add framing by looking for doorways, arches, and foliage. Practice layering by including foreground and background elements. Review your own photos weekly to identify patterns. Within 6 to 12 months of consistent practice, the techniques become automatic and you can break them with intention.
How can I improve my wedding photo composition skills?
Improve wedding photo composition skills by shooting personal projects regularly, studying other photographers’ work, and reviewing your own images with a critical eye. Practice one technique per week until it becomes natural. Use a quick composition checklist on wedding days to catch common mistakes like busy backgrounds or too much headroom. Set your autofocus point to the upper third of the frame to train your eye. Above all, accept that composition is a skill built over years, not days.
Final Thoughts on Wedding Photo Composition
Wedding photo composition is the foundation of every memorable wedding image. Once you understand rule of thirds, leading lines, framing, symmetry, negative space, and layering, you have a toolkit that works in any venue, at any time of day, with any couple.
Practice these techniques one at a time until they become instinct. Use the checklist on every wedding day. Review your work weekly. Within a season, your wedding photo composition will feel stronger, your editing will get faster, and your couples will love the results even more. Updated for 2026, this guide will stay current as you grow your own wedding photography style.