
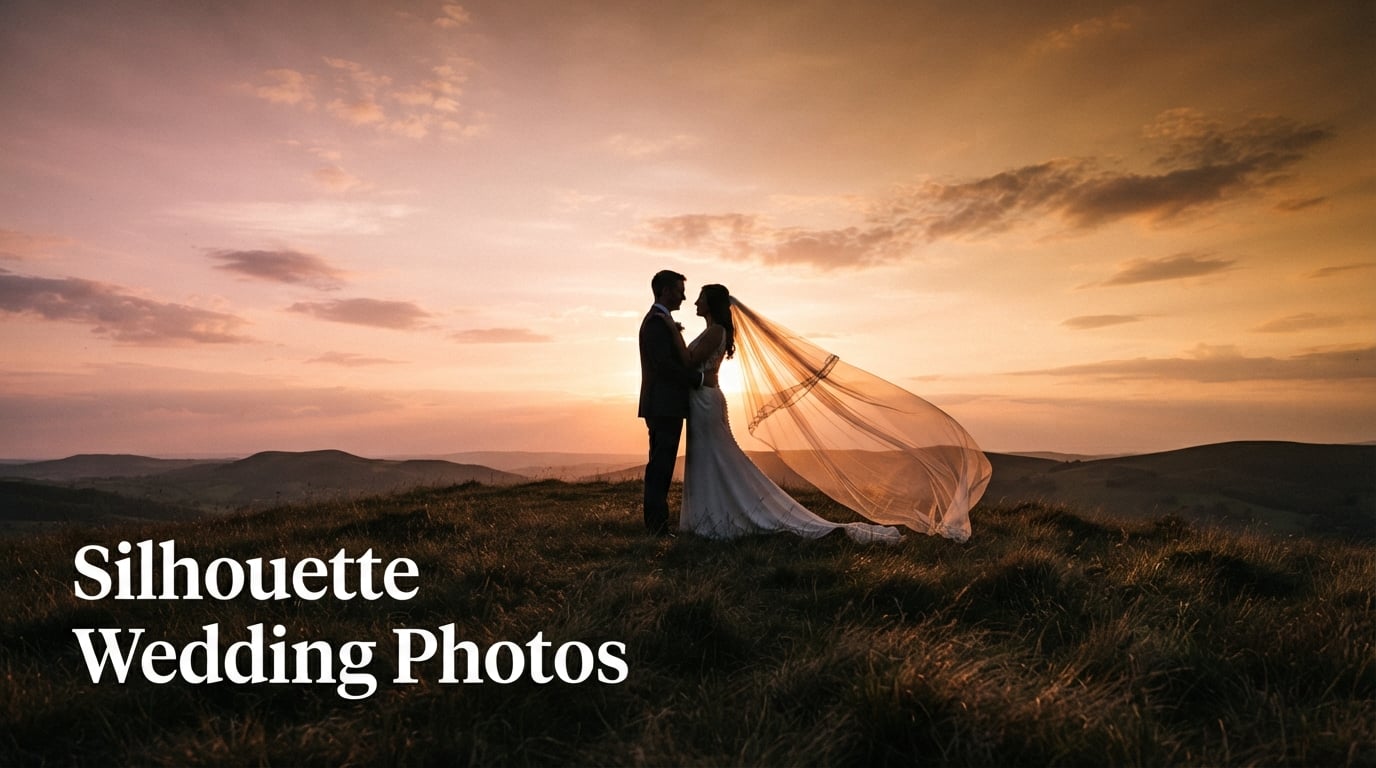
Silhouette wedding photos are some of the most striking images you can add to your album. I have been photographing couples for over a decade, and silhouettes consistently end up as the favorites in every gallery. They turn simple shapes into something emotional, dramatic, and timeless. In this guide, I will walk you through exactly how to plan, shoot, and edit silhouettes that look professional and personal.
Table of Contents
What Are Silhouette Wedding Photos
Silhouette wedding photos are images where the couple appears as a dark, detailed outline against a bright background. The subject becomes a shadow of recognizable shape, while the sky, sun, or light source glows behind them. The meaning of silhouette in wedding photography is simple: shape and emotion matter more than fine detail.
This style works because it strips away distractions like skin tones and background clutter. What stays is the story: two people, a dress in motion, a kiss at sunset. I love silhouettes because they feel cinematic, almost like a movie still from your day.
Why Silhouette Wedding Photos Are So Popular
Couples love silhouette wedding photos because they feel artistic without being staged. You do not need to smile at the camera or worry about a stray hair. The image still feels personal because the pose, the setting, and the light are all yours.
From a photographer’s perspective, silhouettes add variety to a wedding album. They break up the traditional portraits with something moody and graphic. I have found that backlit wedding photos also create strong contrast, which makes them pop in printed albums and on social feeds.
Best Times of Day for Silhouette Wedding Photos
The best time for silhouette wedding photos is during golden hour, the hour before sunset. The sun sits low on the horizon, the sky glows orange and pink, and the light is bright enough to overpower your subject. Blue hour, which begins just after sunset, also works beautifully for cooler, softer tones.
Many couples assume they need a sunset, but you can shoot silhouettes any time the light behind your subject is brighter than the light on them. Overcast skies at midday, bright windows indoors, or even a doorway with daylight pouring through can all create strong backlit wedding portrait opportunities.
Golden Hour vs Blue Hour for Silhouettes
Golden hour gives you warm yellows, oranges, and pinks. Blue hour gives you deep purples and cool blues. For sunset wedding silhouettes, golden hour is the classic choice. For something more dramatic and modern, blue hour is my secret weapon. I usually schedule both, since each lasts only about 20 minutes on a typical wedding day.
Essential Techniques for Capturing Silhouettes
Shooting a clean silhouette comes down to four things: backlighting, exposure, positioning, and subject separation. Get those right, and you will get a great shot almost every time.
Shoot Against the Light
Always position your couple so the brightest light source is directly behind them, facing your camera. The sun, a large window, or even a white wall can serve as your background light. Your camera will then expose for the bright background, dropping your subjects into shadow.
Expose for the Sky
Set your camera to spot or center-weighted metering, then meter for the brightest part of the sky. Lock that exposure using manual mode or exposure lock. If your subjects still look gray instead of black, dial in negative exposure compensation until they are fully silhouetted.
Stay Away From Clutter
Silhouettes lose their power when the background is busy. Power lines, signs, parked cars, or tree branches crossing the couple all distract the eye. I always scout my location 15 minutes before the shoot to find a clean patch of sky or a smooth background.
Pay Attention to Outlines
A great silhouette is recognizable from its shape alone. Arms should not blend into the body. Heads should not overlap awkwardly. Dresses should flow visibly. I coach my couples to slightly separate their poses so each body part reads as a distinct shape against the bright background.
Types of Silhouette Wedding Shots
Once you understand the technique, you can build a whole series of silhouette wedding photos around one golden hour window. Here are the variations I rely on for every wedding.
Couple Silhouettes
The classic couple silhouette features both partners facing each other or the camera. A forehead touch, a slow dance, or a quiet conversation all read beautifully in silhouette form. These are the heart of any wedding silhouette photography collection.
Bride Alone Silhouettes
A bride alone, framed by her veil or train, makes for one of the most romantic silhouette photos you can take. The flowing fabric catches the backlight, creating a glowing halo effect. I usually shoot these from behind so the veil catches the sun.
Reflection Silhouette Shots
Still water doubles your composition. Pools, lakes, and even wet pavement create mirror-like reflections that turn a single silhouette into a symmetrical work of art. Sunset wedding silhouettes over water are some of my favorite shots of any wedding season.
First Dance and Ceremony Silhouettes
Indoor silhouettes can be just as powerful. A first dance under string lights, a ceremony exit through a doorway, or a couple framed by stained glass all work as silhouette shots. The trick is finding a strong directional light source inside the venue.
Locations and Backgrounds That Work Best
The best silhouette locations give you a clean, bright background. Open fields, beaches, hilltops, rooftops, and waterfronts are all classics. I look for spots where the horizon is unbroken and the sky takes up most of the frame.
Inside, look for large windows, French doors, or open barn doors. Anything that lets in strong natural light can become your background. Even a well-lit dance floor at the reception can work if you angle the couple toward the DJ lights.
What to Wear for Silhouette Wedding Photos
Wear outfits with clear, recognizable shapes. A-line or ballgown wedding dresses photograph beautifully in silhouette because the skirt flares visibly. Form-fitting suits and flowing dresses both work, but avoid busy patterns or ruffles that break up the outline.
Veils, capes, and long sleeves all add movement and drama. I always tell my brides that veil length matters here: a cathedral veil creates a sweeping shape, while a short veil barely registers against the sky.
Common Mistakes to Avoid
The biggest mistake I see is underexposing the background by mistake. If your subjects are dark but the sky looks gray and dull, your exposure is too dark. Meter for the sky first, then trust the camera to make your subjects black.
Other common mistakes include shooting from too close (cutting off the outline), letting limbs touch and merge into one shape, and forgetting to check the background for distracting elements. Always take three test shots, then review them on your LCD at full brightness before continuing.
Editing Tips for Silhouette Wedding Photos
Editing silhouettes is faster and easier than editing traditional portraits. The goal is to deepen the blacks, clean up the background, and keep the colors of the sky rich. I start by dropping the shadows and blacks until my subjects are pure black, then boost the highlights for a glowing sky.
Use a gradient mask on the sky to enhance the sunset tones without affecting the subjects. Remove any sensor spots, and dodge the brightest part of the sky if it looks blown out. A slight vignette helps draw the eye to the couple.
You can also convert silhouettes to black and white for a classic look. For sunset silhouettes, I usually keep the color but desaturate slightly for a more cinematic feel.
FAQs
What is the meaning of silhouette in wedding photography?
A silhouette in wedding photography is an image where the couple appears as a dark shape against a bright background. The outline becomes the focus, while colors and fine details fade away to create a dramatic, romantic effect.
What should I wear for a silhouette wedding photo?
Wear outfits with clear, recognizable outlines such as A-line or ballgown dresses, flowing fabrics, veils, and form-fitting suits. Avoid busy patterns, heavy ruffles, or anything that breaks up your shape against the sky.
What is the 30 5 rule for weddings?
The 30 5 rule for weddings is a planning guideline that suggests spending 30 percent of your photography budget on the ceremony and 5 percent on small detail shots, while reserving the rest for portraits and reception coverage. It helps couples balance their photo priorities.
How do I get the best silhouette shots at a wedding?
Schedule your silhouette session during golden hour, position the couple with the sun directly behind them, expose for the sky, and keep the background clean. Coach your couple to separate their poses so each body part reads as a clear shape against the bright light.
Final Thoughts on Silhouette Wedding Photos
Silhouette wedding photos are worth the planning. They add drama, romance, and artistry to any album, and they are achievable even with a basic camera and a willing couple. Pick your light, find a clean background, expose for the sky, and trust the shape to tell the story.
Whether you are a photographer building a portfolio or a couple planning your timeline, schedule at least 20 minutes during golden hour for silhouette shots. You will walk away with images that feel like art, and that is the kind of memory worth keeping forever.