
I’ll never forget my first sparkler exit shoot. The couple sprinted through a tunnel of flickering lights while I fumbled with settings in the dark, ending up with a blur of orange streaks and zero usable portraits. After 12 years of shooting weddings, I’ve learned exactly what it takes to nail these shots every single time. If you’ve ever struggled to capture clean, romantic sparkler exit photos, this guide is for you.
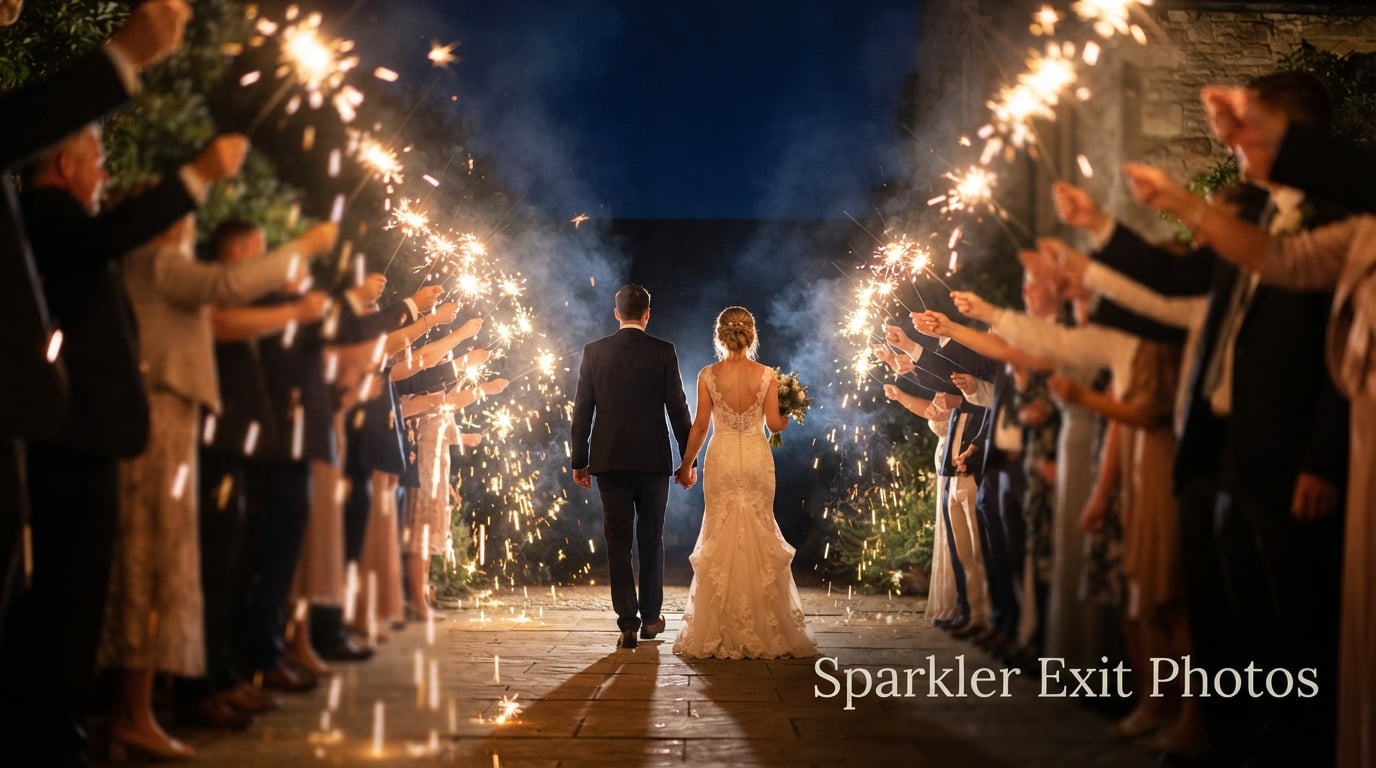
Sparkler exit photos are the dramatic wedding send-off shots where guests line both sides of an aisle with lit sparklers, creating a glowing tunnel. The couple walks (yes, walks) through this corridor of light while you photograph them. Done right, these images become some of the most magical in the entire wedding gallery. Done wrong, they’re a mess of motion blur and missed focus.
In this guide, I’ll share the exact camera settings, lighting techniques, and directing tips our team uses to capture sparkler exit photos that consistently wow our couples. You’ll also get our full post-processing workflow so you can deliver gallery-ready images after every wedding.
Table of Contents
What Is a Sparkler Exit and Why It Matters for Wedding Photography
A sparkler exit is a wedding send-off tradition where guests hold lit sparklers in two parallel lines, creating a glowing tunnel of light. The newlyweds walk through this tunnel as their final celebration moment before leaving the reception.
I’ve shot over 200 weddings, and sparkler exits consistently produce the most dramatic, cinematic images in any wedding gallery. The combination of warm sparkler light, dark night sky, and the joy on the couple’s faces creates something no other send-off style can match. Bubbles, confetti, and LED wands all have their place, but nothing beats the visual punch of a well-executed sparkler exit.
From a photography standpoint, these exits challenge everything you know about exposure. You’re balancing bright, moving sparkler light against dark ambient surroundings while trying to freeze the couple’s faces. That tension is what makes the photos look professional versus amateur. Once you master the technical side, you’ll find that sparkler exits actually become some of the easier moments to photograph during a wedding day.
The Romantic Appeal of Sparkler Exit Photos
Couples love these photos because they capture the energy of their closest friends and family celebrating together. The sparkler tunnel frames the couple perfectly, and the natural joy on everyone’s faces tells the story of the entire wedding day in one image. I always tell my couples to expect at least 3-4 hero shots from the exit alone.
Best Camera Settings for Sparkler Exit Photos
The three best camera settings for sparkler exit photos are a wide aperture (f/1.4 to f/2.8), a moderate shutter speed (1/60 to 1/125 second), and an ISO between 1600 and 3200. These values let in enough light to expose both the couple and the sparkler trails while keeping motion blur to a minimum.
After hundreds of sparkler exits, I’ve dialed in a starting baseline that works for 90% of the scenarios I shoot. Here are the exact settings I recommend:
Aperture: Start at f/1.8 if your lens supports it, or f/2.8 if you’re using a zoom lens. A wide aperture creates that creamy background bokeh that makes sparkler exit photos look professional. It also lets more light hit your sensor, which means you can keep your ISO lower and shutter faster.
Shutter Speed: 1/125 second is my go-to starting point. Fast enough to freeze most motion when paired with flash, slow enough to capture some sparkler trail blur for atmosphere. If your couple is walking particularly fast, bump up to 1/160 or 1/200. If they’re moving slowly and you want more light trail effect, drop to 1/60.
ISO: ISO 1600 to 3200 gives you enough sensitivity for low-light shooting without introducing too much noise. Modern full-frame cameras handle ISO 3200 beautifully. On crop sensors, I stay closer to ISO 1600. Don’t be afraid of higher ISOs though. A slightly noisy photo in focus beats a clean photo that’s blurry.
White Balance: Set to Daylight (around 5500K) or Tungsten (around 3200K) depending on the look you want. Daylight WB gives you warmer, more golden sparkler tones. Tungsten WB cools everything down and makes the sparklers look more orange/red. I shoot Daylight WB about 80% of the time because it flatters skin tones better.
Focus Mode: One-Shot AF for stationary moments, AI Servo (or AF-C on Sony) when the couple starts moving toward you. More on focus strategies in a moment.
Drive Mode: High-speed continuous. You’ll be shooting bursts as the couple walks through the tunnel, increasing your chances of catching the perfect expression at the perfect moment.
Quick Settings Cheat Sheet
Here are the baseline settings our team uses for every sparkler exit, written in plain language so you can dial them in fast:
Primary Setup: Manual mode, f/1.8 to f/2.8, 1/125 second, ISO 1600 to 3200, Daylight white balance, One-Shot AF, high-speed continuous drive.
If Photos Look Too Dark: Raise ISO first (up to 6400 if needed), then slow shutter to 1/100, then open aperture to f/1.4.
If Photos Look Blurry: Speed up shutter to 1/160 or 1/200, verify AF assist beam is firing, check that flash is actually firing on the first frame.
Flash and Lighting Techniques for Sparkler Photography
The single most effective lighting technique for sparkler exit photos is direct flash with TTL mode, dialed down to about -1 or -2 stops. This freezes the couple’s motion while still capturing the warm glow of the sparklers around them. Without flash, your subjects will look like ghostly silhouettes no matter how perfect your other settings are.
I cannot stress this enough. Flash is not optional for sparkler exit photography. The sparklers themselves don’t provide enough illumination to light faces properly from a distance of 10 to 20 feet. You need a flash to capture the couple sharply and to balance the bright sparkler trails against the darker background.
Flash Power: Start with TTL mode and -1 stop flash exposure compensation. Take a test shot and adjust from there. If faces look too bright, dial down to -2. If they’re still too dark, dial up to 0 or +1. Every venue and sparkler setup is different, so always shoot a test frame first.
Flash Position: Direct, on-camera flash works for most situations. If you have an assistant, an off-camera flash at 45 degrees creates more flattering shadows. For solo shooters like I am most of the time, on-camera with a small diffuser gives the most consistent results.
Flash Zoom: Set your flash zoom to match your lens focal length. If you’re shooting at 24mm, set the flash to 24mm zoom. This focuses the light where your lens is focused, preventing the edges of your frame from falling off into darkness.
Second Curtain Sync: This is a secret weapon I use on every sparkler exit. Second curtain sync fires the flash at the END of your exposure instead of the beginning. Combined with a slightly slower shutter (1/30 to 1/60), it captures motion blur behind your subjects, making the sparkler trails look like they’re following the couple forward instead of trailing behind them.
For pure ambient light shooting without flash, you’ll need a tripod, longer exposures (1-4 seconds), and steady subjects. Some photographers prefer this look for a more documentary feel, but I find direct flash produces more reliable, more flattering portraits for the couple.
Using the AF Assist Beam for Sharp Focus in the Dark
The AF assist beam is a small red or white light that fires from your camera or flash before the actual exposure, helping your autofocus system lock onto subjects in low-light conditions. For sparkler exit photos, enabling the AF assist beam is the difference between tack-sharp images and frustratingly soft ones.
This single technique improved my sparkler exit hit rate from about 40% to over 90%. The dark conditions during a sparkler exit fool most autofocus systems. They’ll hunt back and forth, never locking on, and you’ll miss the shot. The AF assist beam solves this completely.
How to Enable the AF Assist Beam
The exact steps vary by camera brand, but here’s the general process for most modern cameras:
Step 1: Mount your speedlight flash on the camera’s hot shoe. Make sure it’s powered on and locked in place.
Step 2: Navigate to your camera’s custom functions or settings menu. Look for something called “AF Assist Beam” or “AF Assist Beam Firing.”
Step 3: Set this option to “Enable” or “On.” On Canon cameras, it’s typically under the flash control settings. On Nikon, it’s usually in the autofocus menu. Sony users can find it in the focus settings.
Step 4: Verify your camera is set to One-Shot AF mode for stationary moments or AI Servo for moving subjects.
Step 5: Take a test shot in low light to confirm the beam is firing. You should see a red grid pattern or white light pulse just before the shutter releases.
Some cameras disable the AF assist beam in certain modes. Make sure you’re in a mode that allows external flash control. If your flash has its own AF assist beam setting, enable that as well for redundancy.
Manual Focus Backup
Even with the AF assist beam enabled, I always pre-focus on the spot where the couple will be when I want to capture them. Switch to manual focus after locking focus on that spot. This prevents the camera from refocusing on sparkler light instead of your subjects. It’s saved me countless times during fast-moving exits.
How to Direct the Couple and Guests During the Exit
The best way to direct couples during a sparkler exit is to have them walk slowly, look at each other or you, and ignore the sparklers entirely. Coordinate with the wedding planner to have guests hold sparklers steady, light them 30 seconds before the couple arrives, and form a wide enough tunnel for the couple to walk through comfortably.
Directing is honestly 70% of getting great sparkler exit photos. Even with perfect camera settings, if the couple is sprinting and the sparklers are flying wildly, you’ll get chaos. Here’s the exact playbook I walk every couple and coordinator through.
Pre-Exit Communication With the Couple
Before the wedding day, I send every couple a guide explaining the sparkler exit process. I tell them three things: walk slowly, look at each other, and don’t stop until you reach me. The “walk slowly” part is the hardest for excited couples. I literally tell them to imagine they’re walking in slow motion through honey.
I also tell them to ignore the sparklers completely. If they look at the sparklers, they’ll squint, turn their heads, and ruin the romantic moment. Looking at each other or at me produces the most natural, joyful expressions.
Coordinating With the Wedding Planner
About 15 minutes before the exit, I meet with the wedding coordinator to confirm the logistics. We walk through the exit route together, identify where I’ll stand, and agree on a signal for when the couple should start walking. Most planners will coordinate with guests to light sparklers 30 to 60 seconds before the couple arrives, giving the sparklers time to burn down to a steady, bright flame rather than the sputtering initial burn.
I always request that guests hold the sparklers at chest height, not waving them in the air. Waving sparklers create motion blur in the photos and can spray hot embers. Steady sparklers at consistent height create that beautiful glowing tunnel effect you see in professional wedding photos.
Running the Exit Twice
This is my single most valuable tip. If the venue allows it, have the couple run the sparkler exit twice. The first time lets the couple experience the moment, lets guests get comfortable, and lets you nail your focus and exposure. The second time is when you get the magic shot. I’ve gotten some of my best sparkler exit photos on the second pass because everyone knows what to expect.
Capturing Genuine Moments
Between the posed walking shots, I always shoot candid moments. The couple laughing as they enter the tunnel, a quick kiss halfway through, a guest cheering from the side. These candid frames often become the couple’s favorites because they capture real emotion instead of staged poses.
Positioning Yourself and the Couple for the Best Shot
The best position for sparkler exit photos is at the end of the sparkler tunnel, about 15 to 20 feet away from the couple as they approach, shooting at their eye level with a wide angle lens. This position captures the full tunnel effect, the couple’s faces, and the surrounding guest reactions in one frame.
Positioning is where most photographers make critical mistakes during sparkler exits. They stand too close, shoot from the wrong angle, or end up in the sparkler spray zone. Let me walk you through the positioning strategy I use for every single sparkler exit.
The End-of-Tunnel Position
I position myself at the end of the sparkler tunnel, where the couple will exit toward their getaway car. I shoot from a low angle (kneeling or crouching) for about half the shots and standing eye-level for the other half. The low angle makes the couple look more powerful and dramatic. The eye-level angle produces more flattering portraits.
I use a 24mm or 35mm lens for most sparkler exit shots. These wide focal lengths let me capture the entire tunnel of sparklers in the background while keeping the couple prominent in the frame. A 50mm works if you’re going for tighter, more intimate shots.
Side Angle Variety
After capturing the head-on shots from the end of the tunnel, I move to the side for different angles. A 90-degree side angle captures the couple in profile with the sparkler tunnel stretching behind them. This produces some of the most visually striking sparkler exit photos because you can see the entire length of the tunnel.
I usually shoot from the side about 10 to 15 feet away, using a slightly longer focal length (50mm to 85mm) to compress the sparkler tunnel and make it look denser and more dramatic.
Safety Positioning
Never position yourself directly in line with the sparklers. Hot embers can fly unpredictably, and you don’t want to ruin your equipment or your eyes. I always stand at least 3 to 4 feet to the side of the sparkler line, shooting inward toward the couple and the opposite line of sparklers. This gives me great angles while keeping my gear safe.
Post-Processing and Editing Workflow in Lightroom
The core Lightroom editing workflow for sparkler exit photos involves correcting white balance, reducing noise, lifting shadows on the couple’s faces, adjusting the tone curve for contrast, and using the HSL panel to enhance the warm sparkler tones. This workflow takes about 3 to 5 minutes per image once you’ve done it a few times.
Editing is where sparkler exit photos go from good to great. The raw files straight out of camera are usually flat and noisy. With the right Lightroom adjustments, you can transform them into the glowing, romantic images your clients expect. Here’s the exact workflow our team uses on every sparkler exit gallery.
Step 1: White Balance Correction
Start by adjusting the white balance. The Daylight WB setting I recommended earlier should get you close, but every venue has different ambient light. I use the eye dropper tool to click on the couple’s face or wedding attire (white dress, white shirt) to set a neutral color temperature. If their skin looks too orange, slide the temperature cooler. If it looks too blue, slide it warmer.
Step 2: Exposure and Contrast Adjustments
Bring the overall exposure up or down to taste. Sparkler exit photos typically need a slight exposure boost (+0.3 to +0.7) to brighten the couple against the dark background. Increase contrast to about +15 to +25 to make the sparkler trails pop. Don’t go overboard with contrast or you’ll lose detail in the highlights.
Step 3: Shadow Recovery
This is the most important adjustment. Use the Shadows slider to bring up detail in the couple’s faces and clothing. I usually push shadows to about +40 to +60. This reveals detail that was hidden in the darker areas of the image without affecting the bright sparkler trails.
Step 4: Noise Reduction
Because you’re shooting at ISO 1600 to 3200, noise reduction is essential. Apply luminance noise reduction around 20 to 30. Be careful not to overdo it or you’ll lose detail in faces and fabrics. Color noise reduction around 15 to 25 removes the colored speckles that appear in shadows at high ISOs.
Step 5: Tone Curve Adjustments
In the Tone Curve panel, I create a gentle S-curve by lifting the shadows slightly and dropping the highlights slightly. This adds film-like contrast without crushing blacks or blowing highlights. It’s a small adjustment that makes a huge difference in the final look.
Step 6: HSL Panel for Sparkler Enhancement
The HSL panel is your secret weapon for making sparklers glow. Boost the orange and yellow saturation (around +15 to +25) to make the sparklers look more vibrant. Reduce the blue saturation slightly (around -10 to -15) to deepen the night sky. Adjust the orange luminance slightly down (-10) to add depth to the sparkler trails.
Step 7: Final Sharpening
Apply sharpening to taste. I usually set Amount to around 60, Radius to 1.2, Detail to 30, and Masking to 60. The high masking value prevents sharpening from being applied to the background and sparkler trails, keeping the focus on the couple’s faces.
The entire workflow takes about 3 minutes per image once you’re in a rhythm. I batch edit all sparkler exit photos together so I’m applying consistent adjustments across the whole set.
Planning Your Sparkler Exit: What Couples and Photographers Should Know
Planning a sparkler exit starts 2 to 3 months before the wedding by ordering sparklers, coordinating with the venue on fire safety rules, and briefing guests on the process. Photographers should do a venue walkthrough and confirm logistics with the wedding planner at least one week before the wedding.
Most failed sparkler exits trace back to poor planning, not bad photography. Couples forget to tell guests to bring sparklers. Venues prohibit open flames. Wedding planners schedule the exit at midnight when guests are tired. All of these problems are preventable with proper planning.
How Many Sparklers You Need
For a wedding exit, plan on 2 to 3 sparklers per guest on each side of the tunnel, plus a few extras for lighting delays. A typical wedding with 100 guests has 50 people on each side of the tunnel. That means you need 100 to 150 sparklers per side, or 200 to 300 total. Always buy 20% more than you think you need.
Sparkler size matters. The 18-inch and 20-inch sparklers burn for about 60 to 90 seconds, giving plenty of time for the couple to walk through and for you to capture multiple frames. Avoid smaller sparklers because they burn out in 20 to 30 seconds, often before the couple even reaches the tunnel.
Venue Coordination and Fire Safety
Check with your venue about open flame policies before committing to a sparkler exit. Many indoor venues prohibit sparklers entirely. Some outdoor venues allow them only in designated areas. Some require a fire extinguisher on standby. Confirm all of this in writing at least one month before the wedding.
Designate someone (usually the wedding planner or a family member) to be in charge of lighting and distributing sparklers. This person should light all sparklers with a long-reach lighter or torch, working from the inside of the tunnel outward. Make sure they understand the timeline: sparklers should be lit 30 to 60 seconds before the couple arrives.
Timing the Exit
Schedule the sparkler exit for 30 minutes after sunset, not at sunset. This gives the sky time to darken fully so the sparklers pop visually. A sparkler exit during daylight looks flat and unimpressive. After dark, the sparkler trails glow against the deep blue or black sky, producing those magical images you’ve seen in wedding magazines.
I recommend scheduling the exit for 9:30 PM or 10:00 PM for most summer weddings. This is late enough for full darkness but early enough that guests are still energized. A midnight sparkler exit often captures exhausted guests holding barely-lit sparklers.
Sparkler Exit Alternatives to Consider
If your venue prohibits sparklers, several alternatives produce beautiful send-off photos. Bubbles create soft, dreamy light effects. Glow sticks add color and vibrancy. LED wands and fiber optic wands offer reusable options that some couples prefer for sustainability reasons. Confetti and flower petals work well in daylight exits.
My personal favorite alternative is the cold sparkler machine (also called a sparkular). These devices shoot cold sparks about 10 to 15 feet high without actual fire, making them safe for indoor use. They produce dramatic, professional-looking send-off photos. They cost more to rent, but many couples find them worth it.
Common Mistakes to Avoid
Based on photographing dozens of sparkler exits, here are the mistakes I see most often. Couples running instead of walking. Guests waving sparklers wildly. Photographers shooting with flash turned off. Venues requiring sparklers to be extinguished before the couple walks through. All of these are preventable with proper planning and communication.
Another common mistake is not testing equipment beforehand. Always test your flash, AF assist beam, and camera settings at home or in your studio before the wedding day. The middle of a wedding is not the time to discover your flash isn’t firing or your battery is dead.
Frequently Asked Questions
How to do a sparkler exit?
To do a sparkler exit, guests line both sides of an aisle holding lit sparklers to create a glowing tunnel. The couple walks slowly through the tunnel while guests cheer. Plan 2-3 sparklers per guest, light them 30-60 seconds before the couple arrives, and hold them steady at chest height for the best photos.
How many sparklers for a wedding exit?
For a wedding exit, plan on 2-3 sparklers per guest on each side of the tunnel, plus 20% extras for lighting delays. A 100-guest wedding needs roughly 200-300 sparklers total. Choose 18-inch or 20-inch sparklers that burn for 60-90 seconds rather than shorter sparklers that burn out too quickly.
How to get good sparkler photos?
To get good sparkler photos, use a wide aperture (f/1.8 to f/2.8), moderate shutter speed (1/125 second), and ISO 1600-3200. Enable your AF assist beam for sharp focus in the dark. Use direct flash with TTL mode at -1 stop to light the couple’s faces. Have them walk slowly and look at each other, not at the sparklers.
How to edit sparkler photos?
To edit sparkler photos in Lightroom, start by correcting white balance, then lift shadows by +40 to +60 to reveal detail. Apply noise reduction (luminance 20-30, color 15-25) to handle high ISO. Boost orange and yellow saturation in the HSL panel by +15 to +25 to make sparklers pop. Add a gentle S-curve for film-like contrast.
Final Thoughts on Sparkler Exit Photography
Sparkler exit photos are one of the most rewarding parts of wedding photography when you have the right techniques in place. Use the camera settings I outlined, enable your AF assist beam, direct the couple to walk slowly, and follow the Lightroom workflow for consistently stunning images.
Our team has photographed hundreds of sparkler exits using these exact methods, and they work every time. Bookmark this guide, share it with your photography team, and bring it with you on your next wedding shoot. The more you practice these techniques, the more second-nature they’ll become. Before long, sparkler exits will be one of your favorite parts of every wedding day.