
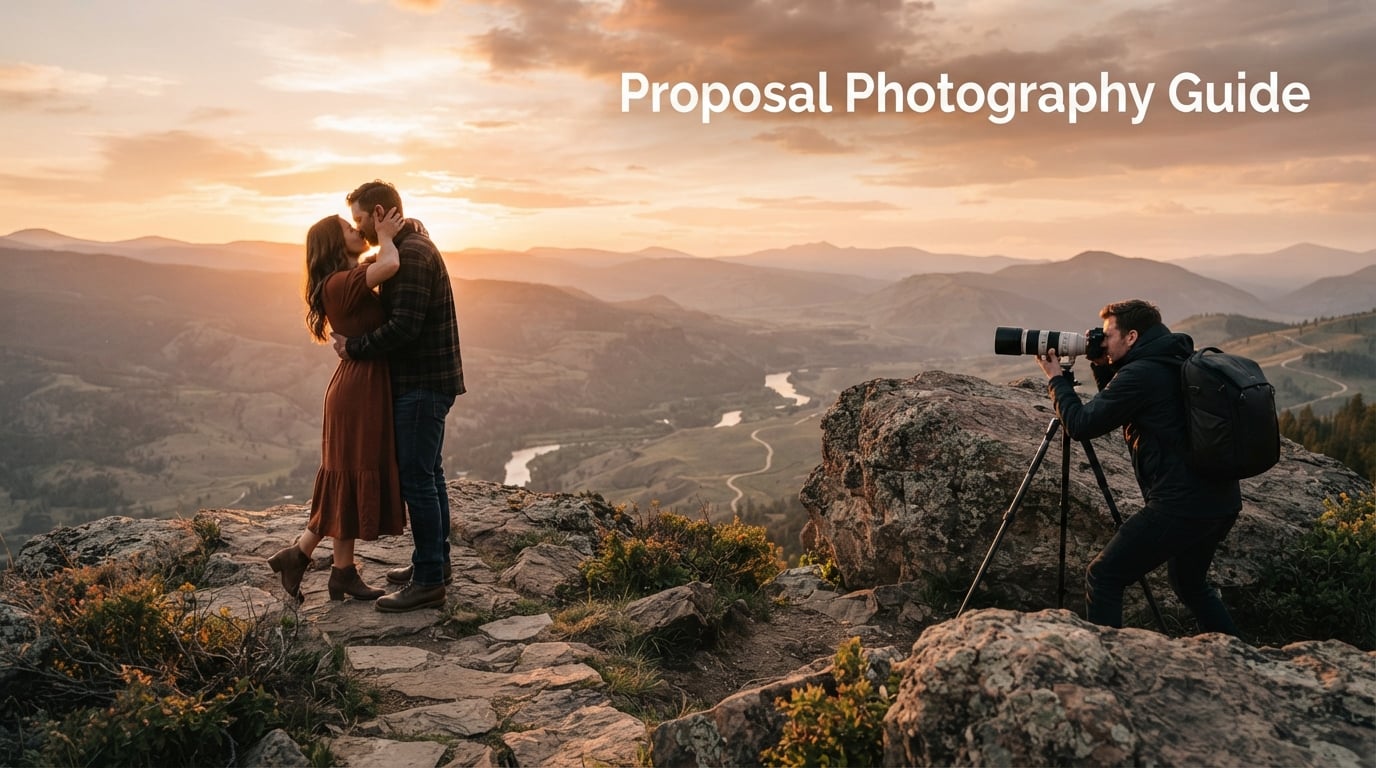
A marriage proposal is a one-shot moment. Once the question is asked and the answer is given, you can never recreate the genuine surprise that crossed your partner’s face. That is exactly why a thorough proposal photography guide matters: the moment deserves to be preserved by someone who knows exactly what they are doing.
I have photographed dozens of proposals over the years, from quiet beach sunsets to crowded city plazas and remote mountain overlooks. Each shoot taught me something new about timing, light, and reading the nervous energy of a person who is about to change their life. The strategies in this proposal photography guide come from real experience, not theory.
This guide serves two audiences. If you are a photographer adding surprise proposal photography to your service menu, you will find a complete workflow that runs from first client consultation through final gallery delivery. If you are a couple planning a surprise proposal, you will learn what to expect from your photographer, what questions to ask, and how to choose the right professional for your moment.
Proposal photography sits at the crossroads of documentary photojournalism and posed portraiture. You are part storyteller, part coordinator, and part calm presence for a proposer whose hands are shaking. The best proposal photos come from preparation the couple never sees on camera.
Throughout this guide I walk you through the exact process my team uses for every surprise proposal. We cover pre-proposal planning, location scouting, equipment choices, stealth positioning, capturing the reaction, and the post-proposal portrait session that turns one fleeting moment into a full storytelling gallery.
You will also find practical scripts for client meetings, a weather contingency framework, and answers to the questions couples and photographers ask most often. Everything here is field-tested and updated for 2026.
Read on for the full breakdown. Whether you are shooting your first surprise proposal or your fiftieth, the framework in this proposal photography guide will help you capture authentic reactions and deliver galleries that couples treasure for the rest of their lives.
Table of Contents
Pre-Proposal Planning Starts With a Detailed Client Consultation
Pre-proposal planning begins with a detailed client consultation where you learn exactly how the proposer envisions the moment unfolding. This conversation shapes every decision that follows, from location to lens choice to positioning.
I always schedule a video call at least two weeks before the proposal date. Phone calls work, but video lets me read body language and build trust with a nervous client. The proposer is putting enormous faith in you to capture a once-in-a-lifetime moment, and that trust starts here.
During the call I work through a questionnaire that covers the essentials. Where will the proposal happen? What time of day? Will there be family or friends hiding nearby? Is the partner camera-shy or photogenic? Has the proposer already purchased the ring, and do they have it sized?
The emotional side of this conversation matters as much as the logistics. Most proposers are terrified. They worry about forgetting what to say, dropping the ring, or being so nervous they cannot smile. I always reassure them that the camera will be invisible during the actual moment and that I have a clear plan for capturing every angle.
I also ask about the partner’s preferences. Do they love candid photography or prefer posed portraits? Are there family members who should be included in the post-proposal portraits? Has the couple discussed marriage openly, or is the entire engagement a surprise?
One question I never skip: does the partner know a proposal is coming at all? Some couples have discussed marriage openly, and the only surprise is the timing and setting. In those cases the proposer is often more relaxed. Other proposers are keeping the entire engagement a secret, and that changes how visible I can be during setup.
We also confirm the signal. This is the agreed-upon cue the proposer will give me to indicate the proposal is about to happen. Common signals include taking off a jacket, dropping to one knee, or saying a specific phrase. One proposer I worked with agreed to “fix his shoe” as his signal.
I always end the consultation with a written recap email. It includes the date, time, location, signal, backup weather plan, and any special requests. This document protects both of us and gives the proposer something concrete to focus on while they are panicking on the big day.
For photographers building a proposal service, I recommend creating a downloadable client questionnaire. Mine covers 18 questions and has become one of my most-shared lead magnets. The questionnaire saves consultation time and gives couples something to fill out at their own pace.
The consultation is also your chance to upsell. I always mention the mini engagement session that follows the proposal itself. Once the partner says yes, the nervous energy evaporates and couples are usually thrilled to take a few posed portraits while the emotion is still raw. Offering this as part of a package increases your average booking value and gives the couple more usable images.
Pricing matters here too. Proposal photography rates vary widely based on location, experience, and deliverables. I charge a flat fee that covers pre-proposal planning, the shoot itself, and a set number of edited images. Be transparent about what is included so there are no surprises later.
Location Scouting Is the Single Most Important Factor in Proposal Photography
Location scouting is the single most important factor in proposal photography, and it deserves more time than any other part of your preparation. The right location gives you clean sightlines, flattering light, and a natural place to hide.
I always scout the proposal location in person at least a few days before the shoot. If the proposal is in another city or a remote area, I arrive a day early. Walking the site in advance reveals details photos on Google Maps simply cannot show: where the sun falls at the exact proposal time, where foot traffic flows, and which angles are blocked by trees or buildings.
The walkthrough is the most valuable pre-shoot step. I meet the proposer at the location and we literally walk through the proposal together. We pick the exact spot where they will kneel, the direction they will face, and where I will position myself. This removes guesswork on the day and gives the proposer confidence.
Light dictates everything. My favorite proposal light is golden hour, that soft warm glow in the hour before sunset. Golden hour flatters skin tones, softens shadows, and creates a romantic mood that matches the moment. For morning proposals I aim for the first hour after sunrise.
I use the PhotoPills app to track the sun’s position on the exact proposal date and time. It shows me exactly where the light will fall and helps me position the couple so the light hits their faces rather than backlighting them into silhouettes. For backlit proposals I bring a reflector or plan to expose for the shadows.
Harsh midday sun is the hardest condition for proposal photography. If the proposer insists on a noon proposal, I look for open shade under a tree, awning, or architectural overhang. Direct overhead sun creates dark eye sockets and blown highlights that are difficult to fix in editing.
Timing the proposal also means thinking about crowds. A popular tourist spot at peak hour means strangers walking through your frame and a higher chance someone bumps the proposer. I always recommend weekday mornings or early weekday evenings for public locations.
Weather is the wildcard. I check the forecast obsessively starting a week out and right up until the morning of the shoot. Overcast skies actually create beautiful soft light for proposal photography, so a cloudy day is not a dealbreaker. Rain is.
For every proposal I scout two locations: the primary spot and a covered backup. The backup needs to be within a short drive and offer similar emotional impact. A rooftop proposal with a city view might back up to a covered terrace in the same building. A beach proposal might back up to a nearby covered pavilion.
I share the backup plan with the proposer during the consultation so they are not surprised if we pivot on the day. The decision to switch is mine to make, not theirs, because they will be too nervous to think clearly. I text them the morning of the shoot with a go or switch call.
Terrain matters too. I once scouted a beautiful cliffside proposal spot only to realize the only place I could hide was on a steep gravel slope that would have been dangerous with a camera and two lenses. Knowing the terrain in advance lets you plan safe positioning.
One more timing consideration: sunset proposals that run late can leave you shooting in near-darkness. If the proposal is timed for sunset, I build in a 15-minute buffer so the post-proposal portraits happen while there is still usable light. I also pack a small portable LED panel for the just-in-case scenario.
A Telephoto Lens Is Non-Negotiable for Proposal Photography
The right equipment for proposal photography is built around one core principle: you need to capture fast-moving, once-in-a-lifetime moments from a distance without being noticed. Your gear choices flow from that requirement.
A telephoto lens is non-negotiable. My go-to is a 70-200mm f/2.8, and almost every working proposal photographer I know uses the same. The 70-200mm lets me shoot from 30 to 50 feet away, far enough that the partner almost never notices me until after they say yes. The f/2.8 aperture gives me clean shots in low light and creates the shallow depth of field that makes the couple pop from the background.
Wide apertures come with a trade-off. At f/2.8 on a 200mm lens your depth of field is razor-thin, and if the couple moves forward or backward even a few inches they can slip out of focus. I usually stop down to f/4 or f/5.6 if I have enough light, trading a bit of background blur for more keepers.
I always sling two camera bodies. The primary body carries the 70-200mm for the wide establishing shots and the proposal moment itself. The secondary body carries a 35mm or 50mm prime for the post-proposal portraits and any detail shots of the ring. Two bodies mean I never miss a moment while swapping lenses.
Silent shutter mode is your best friend. The electronic shutter on most modern mirrorless cameras is completely silent, which means I can fire off a burst of 20 frames during the proposal without the partner ever hearing a click. If you are still shooting on a DSLR, learn your camera’s quiet shutter mode and accept that you will hear a soft mechanical sound.
Memory cards fail. Batteries die. I pack four fully charged batteries and at least four 128GB memory cards for every proposal. Redundancy is the difference between delivering a gallery and having to apologize to a couple for losing their moment.
My baseline camera settings for outdoor proposals in daylight: shutter speed 1/500 or faster, aperture f/4, ISO 100 to 400 depending on light. Fast shutter speed matters because the proposer drops to one knee fast, and motion blur ruins the key moment.
For low-light proposals at dusk or indoors, I open the lens to f/2.8, push ISO to 1600 or 3200, and keep shutter speed at 1/250 or faster. Modern full-frame cameras handle ISO 3200 cleanly, but I would rather have a grainy sharp photo than a clean blurry one.
I shoot in continuous burst mode for the proposal moment itself. The drop to one knee, the ring reveal, the partner’s first reaction, and the embrace all happen in about five seconds. Burst mode gives me 30 to 40 frames to choose from in that window.
A tripod is optional. I bring one but rarely use it during the proposal itself because it locks me into one position. I do use it for the post-proposal portraits if the light is fading and I need slower shutter speeds.
Position Yourself to Stay Invisible Until After the Yes
Positioning is what separates proposal photographers who capture the moment from those who miss it. The goal is to be close enough to fill the frame with the couple’s faces but far enough away to stay invisible until after the answer.
I always claim my shooting position at least 30 to 60 minutes before the proposal time. Arriving early gives me time to set up without drawing attention, test my angles, and blend into the environment. If I am shooting in a park, I might sit on a bench with a book. In a city plaza I might pretend to photograph architecture.
Hiding in plain sight is more effective than hiding behind a tree. A person crouching behind a bush looks suspicious. A photographer with a long lens standing near a wall looks like every other tourist. The trick is to dress for the location: neutral colors, comfortable shoes, and nothing that screams professional photographer.
I never wear branded photography vests or carry a giant camera bag during the proposal. I pre-position my backup gear somewhere accessible, then move to my shooting spot with just the primary camera. The less I look like I am working, the better.
I always identify two shooting positions during the walkthrough. The primary position is where I will be when the proposer drops to one knee. The secondary position is where I will move to after the partner says yes, so I can capture the embrace from a different angle. Moving during the celebration is easy because by then everyone is hugging and crying.
Sightlines are everything. I need a clear view of the proposer’s face and the partner’s face at the moment of the drop. If the proposer faces east and I am positioned to their west, I am shooting the back of their head. I confirm the facing direction during the walkthrough and position myself accordingly.
Elevation helps. If the location allows, shooting from slightly above gives me a clear view of both faces over the proposer’s shoulder. A second-floor terrace, a low wall, or even a park bench can give me the height I need. I scope these options during the walkthrough.
For urban proposals I scout background distractions. A fire hydrant growing out of the proposer’s head, a brightly colored sign behind the partner, or a passing bus can ruin an otherwise perfect frame. I pick positions where the background stays clean even if the couple shifts.
Stealth during setup also means controlling your phone. I silence all notifications, turn off the flashlight feature, and put the phone on airplane mode if I am using it as a signal receiver. A ringing phone in a quiet park will give away your position instantly.
Communication with the proposer on the day is minimal and discreet. We agree in advance that I will not text them once I am in position. The signal is one-directional: they signal me when the moment is coming, and I do not respond until after the proposal.
The biggest stealth mistake new proposal photographers make is moving too much. Once you are in position, stay still. Resist the urge to zoom in and out constantly or adjust settings. Set your exposure, frame your shot, and wait.
Capture the Reaction Through Burst Mode and Trust in Your Autofocus
Capturing the reaction is the entire point of proposal photography, and it happens in about five seconds. Your preparation determines whether you nail it or miss it.
When the proposer gives the signal, I lock focus on their face and switch to continuous autofocus. Modern eye-tracking autofocus is incredible for this moment: it locks onto the proposer’s eye and tracks them as they drop to one knee. I trust the autofocus and concentrate on timing.
The shot sequence I aim for goes like this. First, the proposer reaching into their pocket or jacket. Second, the drop to one knee. Third, the partner’s face in the instant they realize what is happening. Fourth, the ring reveal. Fifth, the answer. Sixth, the embrace.
That sixth shot, the embrace, is the one couples print and frame. The partner rushes forward, the proposer stands, and they collide in a hug. I shoot this moment in burst mode from at least two angles if I can move during the celebration.
I keep shooting through the entire sequence without chimping. Chimping is the habit of checking your LCD after every shot. In a proposal you do not have time to check. Trust your settings and your autofocus and keep firing.
Telling a complete story means more than just the drop and the yes. I look for the small moments in between: the proposer’s hand shaking as they hold the ring, the partner covering their mouth, the laugh after the tears, the moment one of them looks around to see if anyone else saw.
I also shoot wide environmental shots that show the location and any hidden family or friends watching. If the proposer arranged for family to be secretly present, the moment the partner spots them is a second emotional peak worth capturing.
The ring shot deserves its own moment. Once the ring is on the finger, I ask the partner to hold their hand up against a clean background, often the sky or a soft patch of light. I switch to my second camera with the 35mm or 50mm prime and shoot a few frames of the ring on the hand.
Candid moments after the proposal are often better than the proposal itself. The couple is giddy, laughing, and completely unaware of the camera for the first few minutes. I keep shooting during this window because these unguarded moments are the ones that feel most real.
Stay in the lens longer than feels comfortable. New photographers often lower the camera the moment the embrace ends. I keep shooting for at least two full minutes after the yes, because the emotional aftermath produces some of the strongest frames of the entire shoot.
If the partner says anything memorable during the proposal, those words become part of the story. I jot them down immediately after the shoot so I can include them in the couple’s gallery or social media captions. One partner I photographed screamed “are you kidding me right now” three times before saying yes, and the couple still quote it in their anniversary posts.
One contingency to plan for: the rare case where the partner needs a moment before answering. I keep shooting quietly and do not interrupt. The emotional processing is part of the story, and the photos of that hesitation are often the most honest of the set.
Turn the Single Moment Into a Full Gallery With a Mini Engagement Session
The post-proposal portrait session is where a single surprise moment becomes a full gallery. Once the initial emotion settles, I introduce myself to the partner and transition into a short engagement-style shoot.
I always approach the couple slowly with a smile and a clear introduction. “Hi, I am the surprise photographer. Congratulations.” The partner is usually shocked that a hidden photographer was nearby, and that surprise becomes part of the story. I give them a moment to process before directing any poses.
The mini engagement session that follows typically runs 20 to 40 minutes. I keep it relaxed and let the couple interact naturally rather than forcing stiff poses. They are glowing, giddy, and more in love than they have ever been, and that energy translates directly into the photos.
I start with simple walking shots. The couple walks toward me or away from me, holding hands, talking, laughing. Walking loosens them up and produces natural movement. From there I move into gentle prompts: whisper something into their ear, kiss their forehead, look at the ring together.
Location variety matters in the post-proposal session. If we proposed at a viewpoint, I move the couple to a nearby spot with different background for variety. A gallery of 30 photos all from the same angle feels monotonous. Three or four distinct backgrounds make the set feel like a real shoot.
Light is still a factor. If the proposal happened at sunset, I am racing the clock for the portrait session. I prioritize the most important shots in the best light and save detail shots and ring close-ups for when the light is too dim for portraits.
I always include a few ring detail shots in the post-proposal session. The newly engaged partner is usually thrilled to show off the ring. I find a clean background, use natural light if possible, and shoot the ring from multiple angles. A macro lens or extension tube helps here.
For photographers, the post-proposal session is also a marketing opportunity. I deliver a few sneak peek images within 24 hours so the couple can announce their engagement on social media. These watermarked images travel far and bring in referral business.
I always ask permission before sharing any proposal images on my own social media or website. Most couples say yes immediately, but a small percentage prefer privacy, and that preference deserves respect. This is one ethical consideration every proposal photographer should take seriously.
The full edited gallery typically delivers 40 to 80 images depending on the package. I edit for consistent color and tone, then deliver through an online gallery the couple can share with family and friends.
Frequently Asked Questions About Proposal Photography
How to do proposal photography?
Proposal photography requires coordinating secretly with the proposer, scouting the location in advance, positioning yourself discreetly with a telephoto lens like the 70-200mm, capturing the candid reaction in burst mode, and then conducting a short post-proposal portrait session. The process flows in five steps: client consultation, location walkthrough, equipment preparation, stealth positioning, and reaction capture followed by mini engagement portraits.
What to look for in a proposal photographer?
Look for a proposal photographer with a portfolio full of authentic candid moments, experience with stealth positioning using long lenses, clear communication during planning, backup equipment including two camera bodies, and a written contingency plan for weather or unexpected location changes. Bonus points if they offer a walkthrough session and a mini engagement session after the yes.
What is the 80 20 rule in photography?
The 80 20 rule in photography means 80 percent of your results come from 20 percent of your effort. In proposal photography this translates to spending most of your preparation time on location scouting, client consultation, and walkthroughs, since those steps produce the majority of your final keepers. The actual proposal moment is only five seconds long, but the hours of preparation before it decide whether those seconds become a story.
What are the 5 C’s of photography?
The 5 C’s of photography are composition, cropping, color, contrast, and clarity. These five elements form the foundation of strong image-making and apply directly to evaluating and editing proposal photographs. Composition frames the moment, cropping refines it, color sets the mood, contrast adds depth, and clarity preserves the emotion of the scene.
How much does proposal photography cost?
Proposal photography rates vary widely based on location, photographer experience, and deliverables. Typical packages range from a short surprise-only session covering just the proposal moment to a full package that includes pre-proposal planning, the proposal itself, a mini engagement session, and a gallery of edited images. Always ask what is included and how many final edited photos you will receive.
Can you do proposal photos with just an iPhone?
An iPhone can capture usable proposal photos in good light if you position yourself well, but it cannot match the reach and low-light performance of a telephoto lens on a dedicated camera. For a once-in-a-lifetime moment, hiring a professional photographer with a 70-200mm lens and silent shutter is the safer choice. Use an iPhone as a backup only.
A Great Proposal Gallery Comes From Preparation Meeting Emotion
A great proposal photography guide comes down to preparation meeting emotion. The technical side, scouting, gear, positioning, and settings, exists to serve the human moment when one person asks another to spend their life together.
The photographers who consistently deliver stunning proposal galleries are not the ones with the best cameras. They are the ones who plan obsessively, communicate clearly with nervous clients, and stay calm when the moment finally arrives. The gear matters, but the process matters more.
If you take one thing from this proposal photography guide, let it be this: do the walkthrough. Meeting the proposer at the location in advance and literally walking through the proposal together eliminates more potential problems than any other single step.
Whether you are building a proposal photography business or planning your own surprise moment, the framework in this proposal photography guide gives you a proven process. Adapt it to your style, your location, and your clients, and you will capture moments couples treasure forever.