
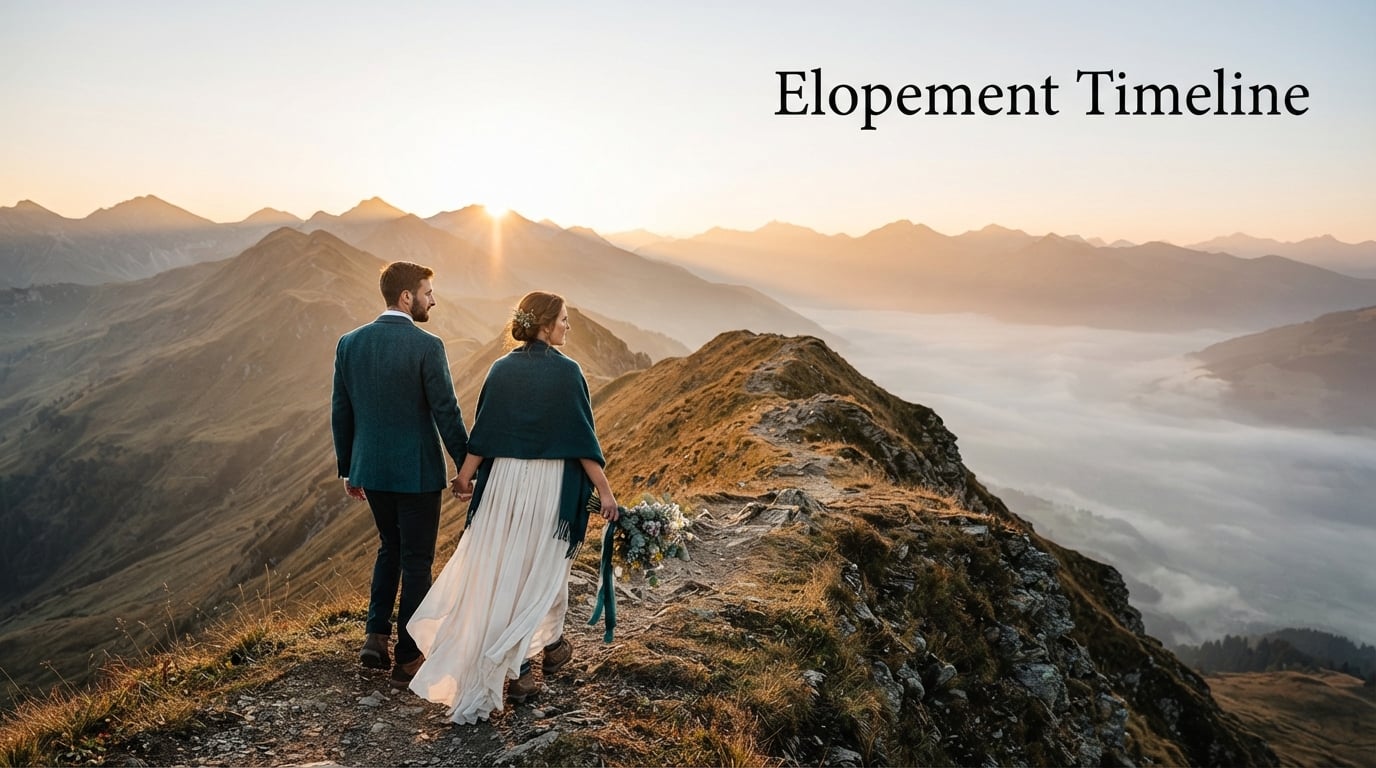
An elopement timeline is the single most useful document you will create while planning your wedding day. I have walked hundreds of couples through this process at our studio, and I can tell you with absolute certainty: the couples who build a clear timeline before their elopement spend less time stressing on the actual day and more time being present with each other. This guide is the same framework we use with our own clients, refined over 2026 and many real weddings.
You will learn what an elopement timeline actually is, why it matters even for the most relaxed elopements, every element you should include, and exactly how long to plan for depending on the kind of day you want. I will share four complete sample timelines (4-hour, 6-hour, 8-hour, and 12-hour versions) so you can copy the structure and adapt it to your own plans. You will also get a five-step process for building your timeline from scratch, plus our honest advice on ceremony timing, vendor coordination, weather backups, multi-day options, and emotional preparation.
By the time you finish reading, you will have a printable roadmap for your elopement day. Whether you are planning a sunrise ceremony on a mountain ridge, a sunset elopement on a quiet beach, or a full-day adventure with multiple locations, the same principles apply. Let me walk you through them.
Table of Contents
What Is an Elopement Timeline (and Why It Matters)
An elopement timeline is a written schedule that lists every event and activity of your wedding day, from the moment you wake up to the moment you go to sleep. It includes specific times, locations, vendor details, and built-in buffer windows so nothing feels rushed or chaotic. In short, an elopement timeline is what you and your vendors use to keep the day organized while you focus on each other.
Think of it less like a rigid agenda and more like a thoughtful map. A timeline tells your photographer when to arrive, your officiant when to start the ceremony, your florist when to deliver the bouquet, and you when to slow down and breathe. It is not about controlling every minute. It is about creating space for the moments that matter.
The best elopement timelines are simple, intentional, and built around two anchor points: the time of your ceremony and the light you want for portraits. Everything else flows backward from those anchors. When we sit down with couples in our planning calls, we ask one question first: when do you want to say your vows? Once we know that, the rest of the day builds itself.
Why You Need a Timeline for Your Elopement Day
Many couples start planning their elopement thinking they do not need a timeline. After all, the whole point of eloping is to skip the rigid schedule of a traditional wedding, right? I get the appeal. But here is what I have seen over years of photographing elopements: the couples who skip the timeline end up making decisions under pressure on the day itself. They rush their portraits, miss the best light, or feel a low hum of anxiety because they do not know what comes next.
A timeline gives you freedom, not restriction. When you know what is happening at each hour, you can relax into the present moment. You do not have to wonder whether you have enough time for sunset portraits or whether your officiant will arrive on schedule. The plan handles it.
It also helps your vendors do their job well. Your photographer needs to know when the ceremony starts so they can position themselves. Your florist needs a delivery window so the bouquet is fresh and ready. Your officiant needs to know the exact location and time. A shared timeline eliminates guesswork and gives every vendor the information they need to serve you well.
Finally, a timeline protects your energy. Elopement days are emotional and full. Without structure, you can burn out before the sunset portraits you have been dreaming about. A good timeline paces the day so you have energy for the moments you most want to remember.
Key Elements to Include in Your Elopement Timeline
Every elopement timeline should include a handful of core elements. I have grouped them below so you can use this list as a checklist while you build your own schedule.
Personal anchors
- Wake-up time and breakfast together
- Getting ready and detail photos
- First look (if you want one)
- Private vow exchange (separate from the legal ceremony)
- Ceremony start time and end time
- Champagne toast, cake cutting, or any small reception activity
- Sunset or golden hour portrait session
- Dinner reservation or picnic
- End-of-day reflection or send-off
Logistics
- Marriage license signing time and location
- Officiant arrival and contact
- Florist delivery window
- Photographer arrival, mid-day break, and departure
- Travel time between locations (with a 15-30 minute buffer)
- Parking details and permits (if needed)
- Backup indoor or alternate location
- Cell phone coverage and emergency contact list
Environmental notes
- Sunrise and sunset times for your date and location
- Golden hour windows (about 60 minutes before sunset)
- Tide times for beach elopements
- Weather forecast check-in times
- Sun position at the ceremony site (so you are not squinting)
Emotional beats
- Slow morning buffer with coffee and no rush
- Quiet moment alone after the ceremony
- Letters or gifts to read mid-day
- Space to cry, laugh, and breathe without schedule pressure
When you have these elements on your timeline, your day has room for everything that matters: the photos, the vows, the meals, and the quiet in-between.
Understanding How Long an Elopement Takes
Most elopements run between 4 and 8 hours of photographer coverage, but the total length of your day can range from a quick 2-hour ceremony to a multi-day adventure. The right length depends on what you want to include. Here is a simple breakdown based on what we see most often.
A 2-hour elopement is a quick ceremony plus a short portrait session. It works for couples who want the legal formality and a handful of photos without a full day of coverage. You can fit in a short first look, the vows, and a 30-minute portrait window. There is no travel, no getting ready, and no real buffer.
A 4-hour elopement is the sweet spot for a classic ceremony and portrait session. It gives you getting ready photos, the ceremony, a first look or private vows, and a sunset portrait session. You also have time for travel to one secondary location. This is the most popular length we book at our studio.
A 6-hour elopement adds room for two locations and a relaxed meal. You can start with getting ready, do a first look, hold the ceremony, take portraits at a primary spot, drive to a secondary location for more portraits, and end with a small dinner or champagne toast. It is the most balanced option for couples who want depth without exhaustion.
An 8-hour elopement covers a full day from morning to night. It includes getting ready, a first look, the ceremony, a primary portrait location, travel to a second location, golden hour portraits, and a dinner. This is ideal for couples who want one of every kind of moment, including slow morning time and a quiet evening together.
A 10-12 hour elopement is for couples who want a true adventure. It might include hiking to a remote location at sunrise, a mid-day break for lunch, a ceremony at sunset, and portraits in different light conditions. This is also the length that fits a multi-location day with significant travel.
A multi-day elopement is its own category. It might span a long weekend with a welcome dinner the night before, the ceremony on day two, and a recovery brunch the morning after. Couples who want both adventure and family time often choose this option.
Sample Elopement Timelines (4, 6, 8, and 12 Hour Examples)
Below are four complete sample timelines you can adapt. They are based on real elopements our team has photographed, with names and locations changed. Each starts from a sunrise or midday anchor and builds out from there. Use the one that matches the length of photographer coverage you plan to book.
4-Hour Elopement Timeline (Afternoon into Sunset)
This is our most-requested length. It works beautifully for a single location and finishes at golden hour.
- 1:00 PM – Photographer arrives at your getting ready location
- 1:15 PM – Detail photos (rings, shoes, invitations, bouquet)
- 1:45 PM – Getting ready photos for both partners
- 2:30 PM – First look at a nearby scenic spot
- 3:00 PM – Private vow exchange (optional but recommended)
- 3:30 PM – Travel to ceremony location (15-30 min drive)
- 4:00 PM – Ceremony with officiant
- 4:30 PM – Immediate family or guest photos (if applicable)
- 5:00 PM – Couple portrait session begins
- 5:30 PM – Sunset portrait session at primary location
- 6:00 PM – Champagne toast and short celebration
- 6:15 PM – Photographer coverage ends
6-Hour Elopement Timeline (Two Locations + Dinner)
Choose this length if you want both a primary and secondary portrait location, plus a small meal to close the day.
- 11:00 AM – Photographer arrives at Airbnb or hotel
- 11:15 AM – Detail photos and getting ready for partner one
- 12:00 PM – Partner two gets ready, candid moments
- 12:45 PM – Both partners finishing touches, first look setup
- 1:00 PM – First look
- 1:30 PM – Private vow exchange
- 2:00 PM – Travel to ceremony location
- 2:30 PM – Ceremony
- 3:00 PM – Family and group photos (if applicable)
- 3:30 PM – Portrait session at primary location
- 4:30 PM – Travel to secondary location (scenic overlook, beach, etc.)
- 5:00 PM – Portrait session at secondary location
- 5:45 PM – Sunset and golden hour portraits
- 6:15 PM – Travel to dinner reservation
- 6:45 PM – Intimate dinner or private chef experience
- 7:30 PM – Photographer coverage ends
8-Hour Elopement Timeline (Full Day Coverage)
This length covers the day from morning to evening and is the most generous single-day option.
- 9:00 AM – Photographer arrives at getting ready location
- 9:15 AM – Detail photos: rings, invitations, attire, florals
- 10:00 AM – Partner one getting ready photos
- 10:45 AM – Partner two getting ready photos
- 11:30 AM – Letters or gifts to read (if exchanging)
- 12:00 PM – First look
- 12:30 PM – Private vow exchange in a quiet spot
- 1:00 PM – Lunch break (catered or pre-prepared)
- 2:00 PM – Travel to ceremony location
- 2:30 PM – Ceremony
- 3:00 PM – Family and small group portraits
- 3:30 PM – Couple portrait session begins at primary location
- 4:30 PM – Travel to secondary location
- 5:00 PM – Portrait session at secondary location
- 5:45 PM – Sunset and golden hour portraits
- 6:30 PM – Champagne toast or cake cutting
- 7:00 PM – Dinner reservation or private dining experience
- 8:00 PM – Photographer coverage ends
12-Hour Elopement Timeline (Sunrise to Sunset)
This is the marathon option. It includes sunrise portraits, a midday break, ceremony, and sunset. It works for couples who want a true adventure day.
- 4:00 AM – Wake up and quick breakfast
- 4:30 AM – Photographer arrives
- 4:45 AM – Travel to sunrise location (mountain, overlook, beach)
- 5:15 AM – Sunrise portraits at first location
- 6:30 AM – Detail and getting ready photos at Airbnb
- 8:30 AM – Mid-morning portrait session
- 10:00 AM – Mid-day break, lunch, rest
- 12:30 PM – First look
- 1:00 PM – Private vow exchange
- 1:45 PM – Travel to ceremony location
- 2:30 PM – Ceremony
- 3:15 PM – Family and guest photos
- 3:45 PM – Portrait session at primary location
- 5:00 PM – Travel to secondary location
- 5:30 PM – Portrait session at secondary location
- 6:15 PM – Sunset ceremony or sunset portraits
- 7:00 PM – Dinner under string lights or private dining
- 8:00 PM – Dusk and blue hour portraits
- 9:00 PM – Photographer coverage ends
You can also find a downloadable timeline template linked on our home page if you want a fillable version.
Step-by-Step: How to Create Your Elopement Timeline
Building a timeline does not have to be complicated. Follow this five-step process and you will have a clear plan in an afternoon.
Step 1: Anchor Your Day With Two Non-Negotiable Times
Pick the ceremony start time and the golden hour portrait start time. These are the two anchors everything else moves around. If you want a sunset ceremony, your anchor is the sunset time. If you want a sunrise ceremony, your anchor is the sunrise time. Lock these in first.
Step 2: List Every Moment You Want to Include
Write down everything you want to experience: getting ready, first look, private vows, ceremony, family photos, portraits, dinner, and any rituals or traditions that matter to you. Do not worry about order yet, just make the list.
Step 3: Assign a Realistic Duration to Each Moment
Getting ready photos take about 30-45 minutes per partner. A first look runs 15-20 minutes. A ceremony is usually 15-30 minutes. Portrait sessions need 60-90 minutes for relaxed, beautiful images. Add 15-30 minutes of travel buffer between every location change.
Step 4: Build Backward From Your Anchors
Start with the ceremony time and work backward to the morning. Then start with golden hour and work backward from there to fill the rest of the afternoon. Plug in your list from Step 2 with the durations from Step 3. You will start to see the shape of the day.
Step 5: Add Buffer Time and Share With Your Vendors
Pad every transition with 15-30 minutes of buffer. Things run late. Hiking takes longer than expected. Sunset comes faster than you think. Once you have the buffer, share the final timeline with your photographer, officiant, florist, and any guests who need to know. Ask each vendor to confirm timing and flag any conflicts.
Best Time of Day for Your Elopement Ceremony
The best time of day for your ceremony depends on what kind of experience you want. Here is a quick comparison of the most popular options.
Sunrise Ceremony
- Pros: quiet locations, soft light, cooler temperatures, fewer crowds
- Cons: early wake-up, less sleep, dimmer light for indoor photos
- Best for: mountain elopements, beach elopements, summer heat
Midday Ceremony
- Pros: relaxed morning, easy logistics, more energy
- Cons: harsh overhead light, busiest locations, less romantic feel
- Best for: indoor elopements, courthouse ceremonies, small family gatherings
Sunset Ceremony
- Pros: beautiful golden hour light, romantic atmosphere, can sleep in
- Cons: most popular time means busier locations, vendors book up fast
- Best for: desert elopements, coastal ceremonies, most adventure locations
Blue Hour Ceremony
- Pros: dreamy twilight, fewer crowds, soft glow
- Cons: dark for traditional photos, requires off-camera lighting
- Best for: experienced adventure couples, photographers comfortable in low light
My honest recommendation: if light matters most to you, choose a sunset ceremony and book your photographer for the full day so you also get portraits at golden hour. If you want quiet and solitude, choose a sunrise ceremony and embrace the early start. If you want ease, choose midday and let the rest of the day breathe.
Travel Time and Buffer Time Considerations
Travel time is the single biggest reason elopement timelines fall apart. Couples underestimate how long it takes to drive, park, gather gear, and walk to a ceremony site. We have seen couples plan 20 minutes for what is actually a 50-minute transition. Build in buffer time for every move.
Here are the rules our team uses:
- Add 15 minutes for any drive under 30 minutes
- Add 30 minutes for any drive over 30 minutes
- Add 30-45 minutes for any hike to a ceremony site
- Add 15 minutes for parking and walking from the car to the location
- Add 10 minutes for outfit touch-ups, shoe changes, and restroom breaks
If your ceremony is at a remote location, plan for an extra 30 minutes of buffer. Weather, road conditions, and unexpected detours can throw off even the best schedule. If you finish early, you will have breathing room. If something runs late, the buffer absorbs it.
Also think about the order of locations. When possible, visit locations in a geographic loop so you are not backtracking. If you have a hike-in ceremony, start the day near the trailhead. If you have a beach ceremony, finish portraits on the sand before you head to dinner. Smart sequencing saves you 30-60 minutes of drive time across a long day.
Managing Vendors and Their Arrival Times
Your vendors are the people who make the day happen. Coordinating their arrival times keeps everything running smoothly. Share your final timeline with each vendor at least two weeks before the elopement and ask them to confirm any questions.
Your photographer should arrive 30 minutes before the first scheduled photo moment to scope locations and prepare gear. Your officiant should arrive 15-20 minutes before the ceremony to review logistics and set up. Your florist should deliver the bouquet 60-90 minutes before the first look so stems can hydrate and you can do detail photos. Your hair and makeup team should plan for finishing touches 30 minutes before you need to be dressed for photos.
If you are flying in a videographer or a second photographer, give them the full timeline plus your phone number. They will want to coordinate angles and timing with your lead photographer.
Create a shared contact list before the day and send it to every vendor. Include each vendor’s name, role, phone number, email, and the location they are arriving at. This small step prevents confusion if something needs to change on the fly. It also makes it easy for vendors to coordinate directly with each other without running everything through you.
Finally, designate a single point of contact for the day. Usually this is your photographer or your planner, since they are the most present throughout. If a vendor runs late or a question comes up, that person handles it so you and your partner can stay focused on each other. You should not be the project manager of your own wedding.
Guest Considerations for Small Elopements
Most couples assume an elopement means no guests, but the modern elopement often includes a small group of 2 to 20 loved ones. If you are inviting guests, your timeline needs to account for their experience too. Here are the most important things to consider.
First, give guests a clear arrival window. They need to know when to show up at the ceremony site, where to park, what to wear, and what to bring. Send a printed or digital welcome packet one to two weeks before the day. Include the timeline, a map, weather backup information, and your phone number for day-of questions.
Second, plan a group photo window directly after the ceremony. Most guests want at least one photo with you, and it saves time to gather everyone for a 10-15 minute mini-session right after the vows. Then, if guests want to give a toast or a small celebration, schedule it right after the group photos so the energy carries forward.
Third, think about whether guests stay for portraits. If you want private couple portraits after the ceremony without an audience, give guests a clear next step: cocktail hour at a separate location, a guided hike, or free time until dinner. They will appreciate the structure as much as you will.
Fourth, plan a small reception if guests are traveling. Many couples host a private dinner for guests the night before or the night of the ceremony. This gives everyone a chance to connect without crowding the elopement day itself. Add this dinner into your multi-day timeline so it does not feel like an afterthought.
Multi-Day Elopement Timeline Options
Multi-day elopements have become one of the fastest-growing trends in adventure weddings. They give you space to include adventure, family time, and recovery without cramming everything into a single day. If you are considering a multi-day format, here is how to structure it.
Three-Day Weekend Framework
- Day 1 (arrival day): Travel, check-in, welcome dinner with guests, casual group activity (hike, sunset walk, hot tub hangout)
- Day 2 (elopement day): Getting ready, first look, ceremony, portraits, dinner celebration
- Day 3 (recovery day): Brunch with guests, optional morning portrait session, departures
Two-Day Adventure Format
- Day 1: Travel to location, light adventure activity, casual dinner, early bed
- Day 2: Full elopement day with getting ready, ceremony, portraits, and celebration dinner
Four-Day Immersive Option
- Day 1: Arrival and settling in
- Day 2: Welcome dinner with guests, optional adventure day
- Day 3: Full elopement day
- Day 4: Recovery brunch, optional sunrise portraits, goodbyes
Multi-day elopements cost more because they require more photographer coverage, more accommodation, and more meals. But they also give you the most relaxed experience possible. If budget allows, this is the format I recommend most often to couples who want both adventure and family connection.
Weather Backup Plans for Your Elopement Day
Weather is one of the few things you cannot control on your elopement day. The best way to handle it is to plan for it. Build a Plan B into your timeline before you need it.
Choose a backup location that is within 30 minutes of your primary site. A covered pavilion, a hotel lobby, an Airbnb with great natural light, or even a tree line that shields from rain can save the day. Talk to your photographer about lighting at the backup spot so they can prepare.
Check the forecast three days out, again 24 hours out, and again the morning of. Decide on Plan A or Plan B by the morning of, not at the ceremony site. Once you commit, do not second-guess the decision. The day will be beautiful either way.
Pack a small emergency kit: clear umbrellas, a change of shoes, towels for wet grass, a jacket for sudden temperature drops, and a small sewing kit for any wardrobe issue. These items take up little space and save the day when something unexpected happens.
How to Choose Photographer Coverage Hours
Choosing how many hours to book with your photographer is one of the most important decisions in your planning. Here is how to think about it.
Ask yourself what moments matter most. If you only care about the ceremony and a few portraits, 2-4 hours is enough. If you want getting ready, a first look, the ceremony, and sunset portraits, 6-8 hours is the sweet spot. If you want a full adventure day with multiple locations and light conditions, 10-12 hours is the right call.
Talk to your photographer about their style. Some photographers work best with longer coverage because they need time to build rapport and capture candid moments. Others are efficient and can deliver a stunning gallery in just a few hours. Be honest about your priorities and budget.
Do not book more hours than you will use. Extra coverage is not always better. If you do not have activities planned for the time, it can lead to awkward filler photos. Pick the length that matches the day you actually want.
Preparing Emotionally for Your Elopement Day
This is the part almost no competitor talks about, and it might be the most important section in this guide. An elopement is not just logistics. It is an emotional experience that you will carry for the rest of your life. Take time to prepare your heart, not just your schedule.
The week before your elopement, slow down. Reduce work commitments if you can. Drink water. Sleep well. Write a letter to your future self about how you are feeling right now. On the morning of the day, give yourself at least an hour of quiet before the timeline starts. Coffee, music, a slow stretch, anything that grounds you in your body.
During the day, let yourself feel everything. There will be tears. There will be laughter that surprises you. There will be moments when you forget the camera is there, and those are the moments your photographer will treasure. You do not have to perform. You do not have to be photogenic. You just have to be yourself.
If you are including private vows, practice reading them out loud once before the day. Not to memorize, just to hear them in your own voice. It will help you deliver them with confidence when the moment arrives.
After the ceremony, take a real pause. Stand together. Look at each other. Let the moment land. Then, when you are ready, move into the next part of the day. The structure of the timeline will carry you through, but the emotion is what you came for.
Elopement Timeline Frequently Asked Questions
What is an elopement timeline?
An elopement timeline is a written schedule that lists every event and activity of your wedding day, from waking up to going to sleep. It includes specific times, locations, vendor details, and built-in buffer windows so nothing feels rushed or chaotic.
How long does an elopement take?
Most elopements run between 4 and 8 hours of photographer coverage. The full day can range from a quick 2-hour ceremony to a multi-day adventure weekend depending on how many moments you want to include.
What is the best time for an elopement ceremony?
Sunset is the most popular ceremony time because of the golden hour light and romantic atmosphere. Sunrise is best for couples who want quiet locations and cooler temperatures. Midday works well for indoor elopements and small family gatherings.
How do you plan an elopement timeline?
Start by anchoring your day with two non-negotiable times: the ceremony start time and the golden hour portrait start time. List every moment you want to include, assign realistic durations, build backward from your anchors, then add 15-30 minutes of buffer for every transition.
How many hours do you need for an elopement?
You need 2 hours for a quick ceremony and short portrait session, 4 hours for a classic ceremony and sunset portraits, 6 hours for two locations and a relaxed meal, and 8-12 hours for a full adventure day with multiple locations and light conditions.
What should be included in an elopement timeline?
Your elopement timeline should include personal anchors like getting ready, first look, private vows, ceremony, and portraits. It should also include logistics like marriage license signing, vendor arrival times, travel buffers, parking, and backup locations.
Do you really need a timeline for an elopement?
Yes. A timeline gives you freedom, not restriction. It tells your vendors when to arrive, helps you stay on schedule for portraits and ceremony, and reduces stress so you can be present with each other throughout the day.
How far in advance should I create my elopement timeline?
Build a rough timeline 2-3 months before your elopement so you can share it with vendors. Finalize the schedule 2-3 weeks before the day once you have weather updates and final vendor confirmations.
Final Thoughts on Building Your Elopement Timeline
An elopement timeline is more than a schedule. It is a thoughtful plan for the most important day of your life so far. When you put in the work to build it before the day, you give yourself the gift of presence on the day. You can trust the structure, follow your photographer through the light, and stay open to whatever unfolds.
Start with the four sample timelines in this guide. Adapt the one that matches your photographer coverage and the kind of day you want. Build in buffer. Share it with your vendors. And then, when the morning of your elopement arrives, give yourself permission to slow down, to feel everything, and to step into the day you planned together.
If you want help building your elopement timeline or want to see how we plan elopement days for our clients, you can return to our home page for more planning resources and recent elopement galleries.