
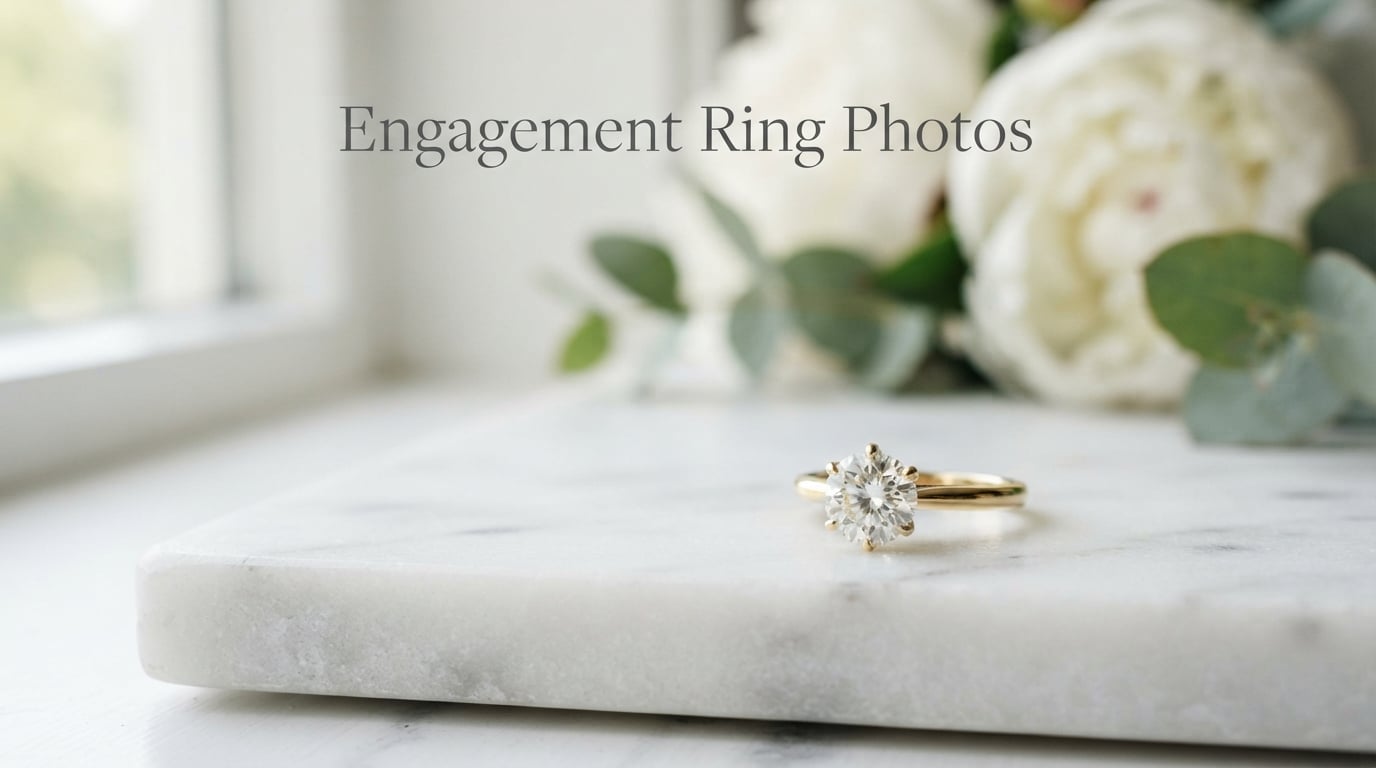
If you’ve just slid a ring onto someone’s finger, congratulations. You’re probably already scrolling through your camera roll planning the announcement post, and you want engagement ring photos that actually feel like the moment you just lived.
Over the past nine years, I’ve shot engagement sessions, proposal moments, and hundreds of detail shots at weddings. I know how much weight that single image carries. It’s the photo you’ll share with family, pin on a board, and probably print for a frame. Done right, it tells a story before anyone reads a caption.
This guide covers everything you need to create beautiful engagement ring photos in 2026, whether you’re working with a phone on the kitchen counter or hiring a professional. I’ll walk through the technical settings that make diamonds sparkle, 15 creative concepts you can try today, and the lighting tricks that change ordinary ring shots into keepsakes.
No gear lists longer than a wedding registry. No fluff. Just the methods that consistently deliver.
Table of Contents
How to Take Stunning Engagement Ring Photos at Home
The best engagement ring pictures don’t require a studio. They require a clear plan, two minutes of setup, and patience for the moment when the light hits the stone the right way. Here’s the exact workflow I use and recommend to every couple.
Pick up the right window light
Set up near a north or east-facing window where the light is soft and indirect. Direct sun creates harsh reflections and turns the diamond into a white blob. A cloudy day is honestly a gift, because it gives you diffuse light from every direction, which is what pro photographers pay thousands for in softboxes.
Position your ring 12 to 18 inches from the window with the stone facing toward the light source. The goal is gentle reflection bouncing inside the diamond so it shows its facets instead of looking flat.
Stabilize the shot
Sharp focus is non-negotiable at this magnification, and handshake at close range is the number one reason ring photos come out soft. Stack three heavy books on the table and rest your elbows on them. Rest a ring box on top of a coffee mug to get the right height. Anything that removes shake.
If you have a tripod or even a phone tripod, use it. A two-second timer or a Bluetooth remote eliminates the final shake from pressing the shutter.
Set your aperture wide, but not too wide
On a DSLR or mirrorless camera, an aperture between f/4 and f/5.6 gives you enough depth of field to keep the whole ring sharp while blurring the background. Going wider than f/2.8 risks leaving only a sliver of the stone in focus, and that looks amateurish more often than artistic.
On a smartphone, use Portrait mode if your phone has it. The iPhone 14 Pro and newer, plus the Pixel 8 Pro and Samsung Galaxy S24 series, all produce usable ring shots in good light. Tap the ring on your screen to lock focus and lock exposure by long-pressing.
Use a macro lens for true detail
If you want engraving to be readable or the pave band to look crisp, a dedicated macro lens is worth it. The Canon RF 100mm f/2.8L and the Nikon Z MC 105mm are both mirrorless favorites. For under $150, the Sony SEL30M35 gives you 1:1 magnification on a budget.
Smartphone clip-on macro lenses from Moment or Xenvo run between $30 and $60 and turn any phone into a detail camera.
Focus stack when you need it all sharp
Even at f/8, an engagement ring is a tough subject because the top of the diamond is closer to the camera than the bottom of the band. Focus stacking fixes this. Take 5 to 10 shots, each with the focus plane slightly further back, then combine them in Photoshop, Affinity Photo, or the free tool CombineZP.
I used focus stacking on roughly 40% of the ring detail shots in our last wedding season and it almost always produced crisper images than a single frame.
15 Creative Engagement Ring Photo Ideas Worth Trying
You don’t need a styling budget or a Pinterest studio to get original engagement ring photos. These 15 ideas come from real shoots our team has done or seen, and each can be done with a phone.
1. The Classic Hand-Over-Hand Pose
One partner’s hand rests palm-up while the other slides the ring on or holds it just above. The pose has survived decades because it shows the ring at a flattering angle and captures a small gesture, not just a static object.
For the cleanest version, ask both people to relax their hands. Tense fingers distort the ring and the fingers themselves. Shoot from slightly above so the diamond catches the light.
2. Ring on a Reflective Surface
A marble countertop, a black phone screen on silent, a mirror, or even a dark wooden table will reflect the ring and double the visual interest. The reflection adds depth, and a darker surface lets the diamond pop.
This is the technique I recommend most often to couples shooting at home. You already own the surface, and it changes everything.
3. Nestled in Flowers
Lay the ring inside a loose bouquet of seasonal flowers. Peonies in late spring, dahlias in early fall, eucalyptus year-round. The organic texture contrasts with the stone, and the colors add warmth without pulling attention from the diamond.
To keep the diamond visible, push it slightly above the petals, then shoot from a 30-degree angle.
4. Next to the Engagement Announcement Sign
If you ordered a custom “She Said Yes” sign or painted a chalkboard for the proposal, lean it against a wall and rest the ring at its base. The text gives the photo its story instantly.
This works especially well for “hard launch” social media posts, where viewers scroll past quickly and need context in under a second.
5. Ring on the Wedding Invitation Suite
Place the ring on top of your save-the-date or invitation, slightly off-center. The paper texture provides scale, and the typography adds personal context. Flat lay is the easiest composition here, taken from directly above.
6. Sparkling with Bokeh Lights
Hang fairy lights or string lights in the background, get close to the ring with a wide aperture, and let the lights turn into glowing circles. The effect is romantic and forgiving of imperfect focus on the band.
For best results, place the lights 4 to 6 feet behind the subject. The further back, the softer the bokeh.
7. In a Coffee Cup or Wine Glass
Drop the ring into an espresso cup, a stem of champagne, or even a whiskey glass right after a toast. The liquid refracts light and produces a uniquely moody shot. Wipe the ring first so fingerprints don’t catch the flash.
8. By the Water or Poolside
A ring resting on a wet stone at the beach, by a fountain, or near a pool gives you natural shimmer and movement. Shoot quickly because water spots change the look every minute.
9. With a Pet in the Frame
If the dog was part of the proposal, snap a quick portrait with the pup’s paw or collar in the same frame as the ring. Pets add personality that no studio ring shot can replicate. Expect to take 30 to 40 shots to get one where eyes, paws, and ring all line up.
10. Detail Shot During the Proposal
If someone in your friend group is fast with a phone, ask them to capture the moment the ring is presented, not just the follow-up pose. Candid detail shots during a proposal are some of the most-shared images we see at weddings, and they’re hard to recreate later.
11. Engraved-Close-Up Detail
Whatever date or phrase is inscribed on the inside of the band, capture it as a tight macro. Couples treasure this 10 years later when they want to remember the exact words.
You’ll need true macro capability here. Phone clip-on lenses struggle with the inside of a band, so use a dedicated macro lens or borrow a friend’s mirrorless with a 90mm or 100mm prime.
12. The Champagne Toast Moment
Get a tight photo of the ring resting on the rim of the celebratory glass before anyone drinks from it. The bubbles, the etched glass, and the sparkle make for a magazine-worthy shot that looks elaborate but takes 20 seconds.
13. On a Vintage Book or Letter
Repurpose a beloved paperback, an old letter from a grandparent, or a handwritten recipe. The connection between the ring and the personal artifact gives your photo emotional weight that props can’t buy.
14. Hanging from a Ribbon
Tie a satin ribbon to the band and hang the ring against a plain wall. The diamond catches light while suspended and you avoid the cluttered look of rings sitting on busy surfaces. Use painter’s tape on the wall behind to keep it discreet.
15. Silhouette in Natural Light
Hold the ring up between the camera and the window, expose for the bright background, and let the ring turn into a recognizable silhouette. You won’t see the diamond, but the shape tells the whole story. This works beautifully for moody or cinematic Instagram posts.
Lighting Setups That Make Diamonds Sparkle
Light is the single biggest difference between a flat engagement ring photo and a glowing one. None of these setups require a softbox or a flash you don’t own. They use what you already have.
Window light for the win
Place the ring 12 to 18 inches from a window with the stone angled about 30 degrees toward the light. The light enters the top of the diamond, bounces around the facets, and exits as the sparkle you want. Light from the side or behind tends to wash the stone out.
Skip the on-camera flash
Direct flash is the most common reason engagement ring photos look dull. The light hits the top of the diamond and bounces straight back into the lens, creating a flat white blob with no visible facets.
If you must use flash, bounce it off a white ceiling or a piece of cardboard held at 45 degrees behind the ring. The diffused light keeps the sparkle alive.
Diffuse harsh light with a white sheet
Direct sunlight through a window can still be too strong on a clear morning. Hang a thin white curtain or a sheet of tracing paper between the window and the ring, and you’ll get magazine-quality soft light in seconds.
Add a reflector for the shadow side
The side of the ring away from the window turns dark and loses detail. Hold a white piece of paper, a foam board, or even a paperback book on that side to bounce light back into the shadows. The contrast in the final image drops, and the diamond looks like it’s glowing rather than just sitting there.
Best Props, Backgrounds, and Surfaces for Ring Photos
The ring is the subject, but the background tells the story. These are the surfaces we reuse across hundreds of shoots because they work every time.
Marble, slate, or wood
Cold, hard textures read as luxurious and keep the focus where you want it. White marble with grey veining is the long-time favorite for solitaire settings. Black slate works for warm gold bands. A weathered wood plank adds rustic warmth that suits vintage and nature-inspired proposals.
Soft fabrics and textiles
Linen napkins, velvet ribbon, raw silk, and burlap all produce good engagement ring photos. They avoid the trap of competing with the sparkle, and they’re easy to source from a fabric store or even your own closet.
Florals and botanicals
Loose petals, eucalyptus stems, baby’s breath, and fern fronds are easy to find at most grocery stores. Layer them organically rather than arranging them in a perfect circle. Imperfect looks intentional.
Personal heirlooms
A grandmother’s brooch, a pocket watch from the groom’s grandfather, or a wedding photo of the couple’s parents in the frame adds storytelling. The ring then becomes part of a family story, not just a piece of jewelry on a counter.
Smartphone vs Professional Camera: What You Get
You don’t need a $3,500 camera body to get great ring photos. But it’s worth knowing what you give up when you shoot only with your phone, and when a professional makes sense.
What smartphones do well
Phone cameras in 2026 have computational modes that handle detail, sharpness, and noise better than any $1,000 setup from five years ago. For social media posts and family announcements, a phone is more than enough, especially with the lighting tips above.
What smartphones struggle with
True macro, low light without flash, consistent color across many shots, and shallow depth of field control. The last one is the limitation most couples bump into. If you want that creamy background separation where the diamond seems to float, you need a real camera and a fast lens.
When to hire a pro
If the photos are part of a larger engagement session, professional wedding day detail photography, or an advertising-quality announcement to a wide audience, hiring a photographer for one hour pays for itself. Most couples pay $150 to $400 for a short ring-focused shoot, less than a full engagement session.
Sharing Your Engagement Ring Photos on Social Media
The shoot is only half the job. The post spreads the joy, and the format you choose changes how the photo lands.
Instagram carousels and Reels
Open with the most dramatic shot, close with the most personal one. If you’re recording motion, a 6 to 10 second Reel showing the ring on a slowly rotating surface outperforms static posts. Add a trending but subtle audio track and check that the caption doesn’t repeat text shown in the first frame.
Pinterest-ready crops
Pinterest’s algorithm favors vertical 2:3 ratios and tall images. Crop your ring photo so the band is in the lower third and the diamond is in the upper third, leaving negative space at the top for their text overlay.
TikTok motion ideas
Quick ring reveals, “How he proposed” voiceovers, and “Get ready with me for the engagement session” clips all perform. Keep raw clips short, under 12 seconds, and stay still on the ring for at least 2 seconds so viewers can savor the sparkle.
Hashtags that help and hurt
Mix broad tags like #engagement and #engaged with specific tags like #solitairering or #ovalengagementring. Avoid hashtag-stuffing more than 15 to 20 tags; it looks desperate and platforms have started throttling reach on posts that do.
Common Ring Photography Mistakes and How to Fix Them
After reviewing hundreds of reader-submitted shots and forum posts, these are the slip-ups I see most often. None of them require new gear to fix.
The diamond looks dull or flat
Almost always a lighting problem. Move closer to the window, angle the stone toward the light source, and tilt the ring until you see a bright facet pop. No amount of editing fixes a diamond that never caught the light in the first place.
Background steals focus
If you can read text or identify objects behind the ring, the background is too busy. Cover it with a piece of paper, a folded cloth, or your own jacket. Out of focus is good, but readable distracts.
Fingers look distorted
Wide-angle phone lenses stretch fingers at the edges of the frame. Move the hand closer to the center of the photo, or shoot a detail-only image without hands in it at all. Combining a hand-held ring shot with a separate ring-only macro is a classic pro move.
Reflections of the photographer
On glass, marble, or water, your phone or your face can show up in the ring. Shift your position 6 inches in any direction to clear the reflection, or shoot at a slightly different angle.
Frequently Asked Questions About Engagement Ring Photos
How do I photograph my engagement ring with an iPhone?
Use Portrait mode or tap to lock focus on the ring, then drag the exposure slider down slightly. Place the ring 12 to 18 inches from a window with indirect light, rest your elbows on a stack of books to steady the shot, and shoot from a 30-degree angle above the ring.
What settings should I use for ring photography?
On a DSLR or mirrorless camera, use aperture-priority mode at f/4 to f/5.6, ISO 100 to 400, and a shutter speed of 1/125 or faster. Pair that with a 90mm to 100mm macro lens for true close-up detail. Focus on the diamond first, then on the band, or use focus stacking for full sharpness.
How do I make a diamond sparkle in photos?
Position the ring so the diamond faces a soft window light at about a 30-degree angle. Avoid direct flash and direct sunlight, which both create flat reflections. Use a white reflector on the shadow side so the diamond doesn’t go dark, and tilt slowly until a bright facet catches the light.
Can I take engagement ring photos without a professional photographer?
Yes. Most couples take their own ring photos with a smartphone and a window. For more polished results, consider hiring a photographer for an hour, which typically costs $150 to $400. This gives you access to macro lenses, professional lighting, and styling experience.
What is the best background for engagement ring photos?
Clean, simple surfaces photograph best. Marble, slate, raw wood, linen, and velvet all work well because they add texture without competing with the diamond. Choose a background that complements the metal color of the ring, silver tones for white gold and platinum, warm tones for yellow and rose gold.
Final Thoughts: Capturing Memories That Last
Engagement ring photos are deceptively simple and surprisingly easy to get wrong. The good news is that with a window, a clean surface, and 10 minutes of patience, you can create something beautiful in 2026 that you’ll still look at a decade from now.
Pick one idea from the list above, set up near your brightest window, and shoot 30 frames. Pick the sharpest one. Share it with the people you love. That’s the whole craft.
And if the moment you capture becomes the photo you frame, change profile pictures with, or print on your save-the-date, you’ve already done what most couples never manage to. You’ve made the ring feel like the story it is, not just the object in the box.