
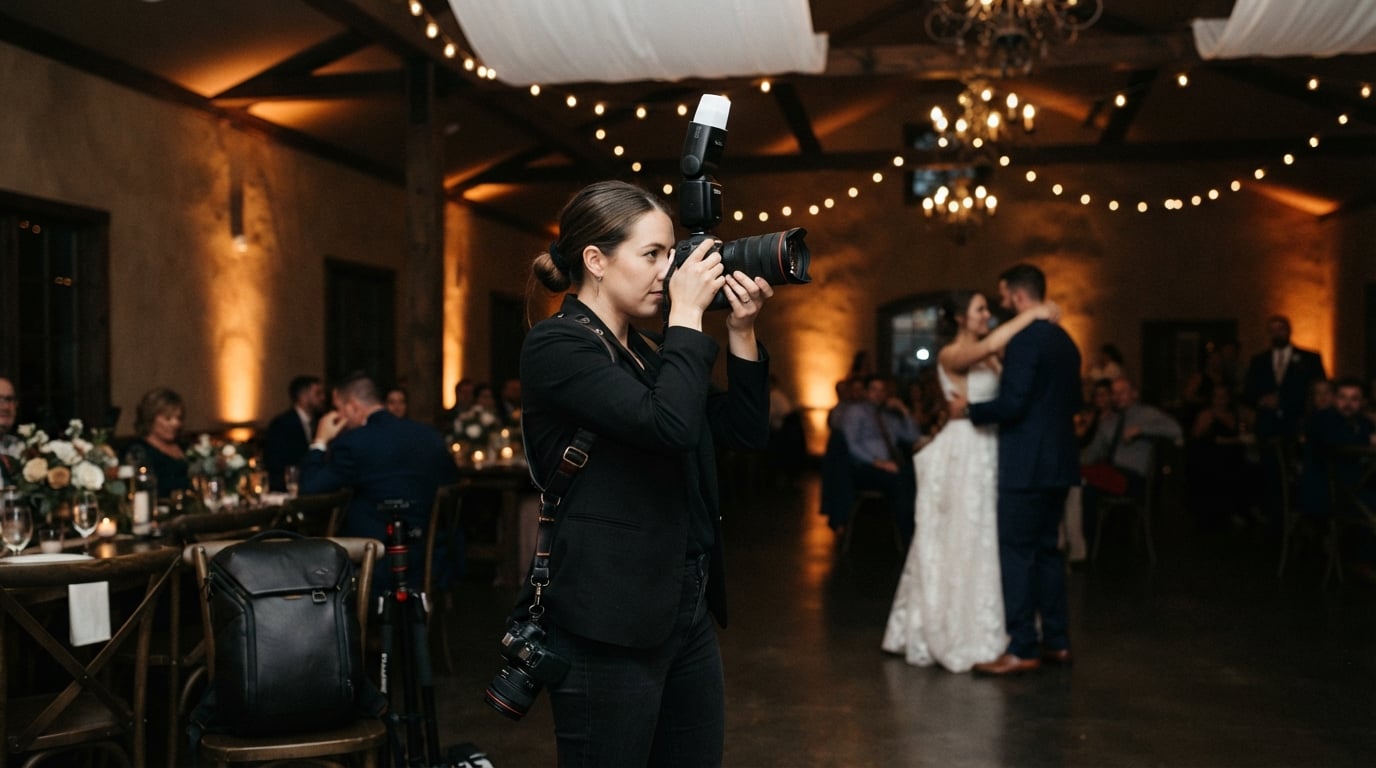
Flash wedding photography is the practice of using portable flash units, speedlights, or strobes to light wedding scenes, especially in dim venues, churches, and evening receptions where natural light falls short. I learned this the hard way shooting my first indoor wedding with only ambient light, ending up with grainy, blurry frames of the first dance. That night pushed me to actually master flash, and it changed how I shoot every wedding since.
This guide walks through everything I wish someone had told me before that first wedding: the techniques that work, the settings that hold up, the gear worth buying, and the problems you will hit at 9 pm when the dance floor is packed. Whether you are shooting your first wedding or trying to tighten up your existing flash work, you will find practical advice here you can use on your next job.
Table of Contents
Why Flash Matters for Wedding Photography
Flash matters because wedding venues rarely give you the light you want. Churches are dark to keep guests focused. Ballrooms rely on colored uplighting and tiny candles. Barns have one string of Edison bulbs across a forty-foot ceiling.
I have shot weddings where the only light at the reception came from a few tea candles on the cake table. Without flash, every image from that night would have been unusable. With flash, I delivered sharp, well-exposed photos of the first dance, the toasts, and the cake cutting.
Flash also gives you control over consistency. Natural light shifts as the sun moves, as clouds pass, as the ceremony moves from indoors to outdoors. Flash stays the same, which means a bride’s skin tone looks the same in the getting-ready room as it does during the ceremony, even though the actual ambient light is wildly different.
Finally, flash opens creative options you cannot get any other way. Dramatic direct flash, soft bounced light, off-camera rim lighting, motion-blurred dance floor shots. None of these are possible without mastering your speedlight.
Flash Wedding Photography Techniques You Need to Know
The three flash techniques that cover 90% of wedding scenarios are bounce flash, direct flash, and off-camera flash. Each one solves a different problem and produces a different look.
Bounce Flash Technique for Soft, Even Light
Bounce flash is the workhorse of wedding photography. Point your flash at a ceiling or wall instead of at your subject, and the light scatters before it reaches the bride and groom, creating soft, flattering illumination without harsh shadows.
A good starting point is to point your flash directly up at the ceiling, directly to the side at a wall, or at a 45-degree angle up and behind you. Each angle produces a slightly different look:
- Straight up: Most flattering for portraits, mimics soft overhead light, no harsh shadows under the chin.
- 45 degrees up and behind you: Best for ceremonies and processionals, gives gentle fill that looks natural.
- Directly to the side: Use when ceilings are dark wood or beams, walls are white or off-white.
The surface matters more than the angle. White ceilings bounce clean light. Beamed or wood ceilings absorb light and create color casts. Mirrored surfaces turn into disasters. Test by snapping a test shot against your hand and checking for any color tint before the ceremony starts.
I bring a small collapsible bounce card that slips into my camera bag. When ceilings are too high or too dark, I tilt the flash back at the card and aim the card at the subject. It is a backup plan that has saved me more weddings than I can count.
Direct Flash for Dramatic Retro Style
Direct flash means pointing the flash straight at your subject with no diffusion. It creates sharp shadows, bright catchlights, and a stark contrast that screams 1990s wedding photo. That retro look is back in style, and wedding photographers are leaning into it for receptions.
The trick to direct flash that looks intentional rather than amateur is pairing low camera settings with high flash power. Drop your ISO to 400, your aperture to f/4 or f/5.6, and your shutter speed to around 1/30 or slower. Then crank your flash power to 1/1 or 1/2.
This combination darkens the background while freezing the subject. The result is a punchy, almost editorial look that works beautifully on a crowded dance floor. Slow your shutter speed even more, down to 1/8 or 1/4, and you get motion blur on dancers around a sharp couple, which adds energy to the frame.
Off-Camera Flash for Professional Receptions
Off-camera flash (OCF) means triggering one or more flashes away from your camera, usually on light stands. It is how reception photos get that dimensional, magazine-quality look without flat shadows.
The basic setup uses one flash on a stand about 45 degrees to the side of the dance floor, slightly behind the action. The light skims across the couple, sculpting their faces and creating depth. With a second flash placed across the floor, you get even coverage and can avoid harsh shadows when guests move between the couple and the main light.
You trigger OCF with a radio transmitter mounted on your camera’s hot shoe. PocketWizards, Godox X system, Profoto Air, and similar radio triggers fire the remote flashes the instant your shutter opens. Make sure your transmitter and receiver are on the same channel before the reception, or you will spend the first dance troubleshooting.
Best Camera Settings for Wedding Flash Photography
The right camera settings depend on whether you want to balance flash with ambient light or let flash dominate the scene. These three settings work together: ISO controls sensor sensitivity, aperture controls how much ambient light enters, and shutter speed controls ambient brightness without affecting flash exposure.
For most wedding flash work, start with these baseline settings:
- ISO: 400 for indoor ceremonies, 800 for receptions, 1600 only for very dark dance floors
- Aperture: f/2.8 to f/4 for couples portraits, f/5.6 for groups, f/8 for large group shots
- Shutter speed: 1/200 for ceremonies, 1/125 to 1/160 for receptions when balancing ambient light
Sync speed is the maximum shutter speed your camera can use with flash. Most cameras sync at 1/200 or 1/250. Push past that limit and you get a black bar across your frame because the shutter curtain closes before the flash fires fully. Stay at or below your camera’s sync speed unless you have high-speed sync enabled.
For scenarios where you want some ambient light visible behind your flash-lit subject, slow your shutter speed down to 1/60 or 1/30. This is how you keep window light and string lights visible while still lighting the bride and groom with flash.
Quick Reference Settings by Wedding Scenario
Different parts of the day need different settings. Here is a quick reference card I keep in my camera bag:
- Getting ready: ISO 800, f/2.8, 1/125, TTL mode, flash bounced off ceiling
- Ceremony (indoor): ISO 1600, f/2.8, 1/200, manual flash at 1/4 power
- Couples portraits: ISO 400, f/4, 1/200, TTL with flash exposure compensation -1
- Reception toasts: ISO 800, f/2.8, 1/125, TTL bounced
- Dance floor: ISO 1600, f/4, 1/100, OCF at 1/8 power
TTL vs Manual Flash Mode for Weddings
TTL (Through The Lens) flash mode lets your camera and flash talk to each other. The flash fires a tiny pre-flash, the camera measures how much light bounces back, and the flash adjusts its power before the actual exposure. TTL is fast and forgiving, ideal for moving wedding moments.
Manual flash mode means you set the flash power yourself, and the flash fires at that exact power every shot. Manual is consistent across shots, which is critical for reception photos where you want every frame to match.
I shoot TTL during the ceremony and getting-ready moments because conditions change quickly. For the reception, I switch to manual because the lighting is predictable and I want consistent output from frame to frame.
Flash power is measured in fractions of full power: 1/1 (full), 1/2, 1/4, 1/8, 1/16, 1/32, 1/64, 1/128. Lower fractions mean less light and faster recycle times. Higher fractions mean more light but slower recycle, which can cost you shots during fast-paced moments.
Flash exposure compensation (FEC) lets you nudge TTL output brighter or darker without leaving TTL mode. Most wedding flash photographers run FEC at -1 to -2 stops because TTL tends to slightly overexpose faces in close-up wedding shots.
Handling Different Wedding Venues and Scenarios
Each part of the wedding day brings different lighting challenges. Knowing which technique to reach for saves time and avoids the wedding photographer’s worst enemy: missing the moment.
Getting Ready Spaces
Hotel suites and bridal suites usually have bright overhead lights but ugly color casts. Bounce flash off the ceiling to soften the light, then set your white balance to match. Tungsten light plus flash often needs a custom white balance around 4000-4500K to keep skin tones looking right.
Watch your recycle time during the makeup application and detail photos. Continuous firing drains batteries and slows recycle. Wait between shots and let the flash catch up.
Indoor Ceremonies and Church Flash Policies
Many churches and religious venues restrict flash during the ceremony. Some ban it entirely because it distracts guests and interrupts the service. Others allow flash only during the processional and recessional. Always ask the officiant or venue coordinator about flash rules before you arrive.
If flash is banned, push your ISO to 1600-3200 and use a fast lens (f/1.8 or f/2.8). Modern full-frame cameras handle high ISO well, and a slight grain on a memorable moment is better than a blurry frame with no flash at all.
If flash is allowed, turn it off during quiet moments like the vows and the ring exchange. The harsh burst of light during an intimate moment breaks the atmosphere. Save flash for the processional, recessional, and any quiet wide shots where ambient light fails.
Some photographers negotiate a compromise: no flash during the vows, but flash allowed for the processional, recessional, and any group shots the venue asks for. Get this agreement in writing from the officiant if possible.
Reception and Dance Floor Lighting
Receptions are where flash wedding photography earns its keep. Colored uplighting, dim chandeliers, and DJ lighting create inconsistent color and exposure. Flash flattens all that into something clean and consistent.
For the first dance, set up one OCF on a stand with a small softbox. Aim it at 45 degrees from the couple. Bounce another flash off the ceiling for fill. This setup captures the moment without flattening the romance.
For toasts, I usually run TTL with bounce because the speaker moves around. Manual flash with FEC adjustment works too, but TTL adapts faster when the speaker turns away from the main light source.
For cake cutting, you have seconds, not minutes. Pre-set your flash before the couple arrives at the cake. One OCF on the couple’s side, no flash on the camera. Move once they cut, freeze the moment, move on.
Sparkler and Grand Exits
Sparkler exits look amazing with the right flash setup. Use a slow shutter speed of 1/8 to 1 second and let the sparklers write light trails across the frame. Use rear-curtain sync so the flash fires at the end of the exposure, freezing the couple sharply while the sparklers streak behind them.
Set your flash to low power (1/16 or 1/32) because the sparklers already provide ambient light. Too much flash and you wash out the warm sparkler glow.
Essential Flash Equipment for Wedding Photographers
You do not need a truckload of gear to shoot flash wedding photography well. A solid speedlight, one or two modifiers, a radio trigger, and reliable batteries cover most situations.
Speedlights: A speedlight is a portable flash that mounts on your camera’s hot shoe or sits on a light stand. Look for TTL support, high-speed sync, and a fast recycle time. I keep two speedlights in my bag at every wedding so a backup is always within reach.
Flash modifiers: Modifiers shape and soften flash output. The MagMod system clips onto your speedlight magnetically and lets you swap diffusers quickly. A MagSphere creates soft, omnidirectional light. A MagGrid focuses light into a tighter beam for dramatic portraits.
Other modifier options include small softboxes for OCF setups, snap-on diffusers for on-camera bounce, and bounce cards that fold flat in your bag.
Radio triggers: Radio triggers fire your off-camera flashes wirelessly. Brands like Godox, Profoto, and PocketWizard make reliable systems. Make sure your trigger and receivers match. Mismatched systems are the most common cause of “flash is not firing” problems at weddings.
Batteries: Rechargeable AA batteries power most speedlights. High-capacity rechargeables (2500 mAh or higher) recycle faster than alkaline batteries. Bring at least 8 spares to a wedding, more for an all-day shoot. Cold weather kills battery life, so pack even more for winter weddings.
Common Flash Problems and How to Fix Them
Every wedding photographer hits flash problems. The difference between a pro and a beginner is knowing how to fix them fast without missing the moment.
Grainy photos: You are shooting at too high an ISO for the available light. Lower your ISO and bring your flash closer to the subject, or use a higher flash power.
Harsh shadows on faces: Your flash is hitting the subject too directly. Bounce off a ceiling, wall, or bounce card. Add a diffuser if you have one.
Flash not firing or sync issues: Check that your flash is seated firmly on the hot shoe. Confirm your trigger and receiver are on the same channel. Make sure your shutter speed is at or below your sync speed.
Recycle time delays: Your flash battery is low or your flash power is too high. Lower the flash power to 1/4 or 1/8. Switch to fresh batteries. Avoid rapid-fire shots that do not give the flash time to recycle.
Battery drain during long weddings: Rotate your batteries between shots. Carry a small battery case in your bag so dead batteries do not bounce around with fresh ones. Turn off your flash when you are not using it for 10 minutes or more.
Inconsistent flash between shots: If TTL is giving you inconsistent exposure, switch to manual flash mode and lock in your power. Manual gives you the same output every frame, which is what you want for reception sequences.
The fastest way to internalize all of this is practice. Shoot a friend at home with one speedlight and a wall to bounce off. Then shoot a friend in a dark room with OCF. Then shoot a real wedding. Each session teaches you something the next one builds on.
Frequently Asked Questions About Flash Wedding Photography
How do you use flash photography at a wedding?
Use flash at weddings by setting your camera to manual mode (ISO 400-1600, aperture f/2.8-f/5.6, shutter speed 1/200 or slower), mounting a speedlight on the hot shoe, and bouncing the flash off a white ceiling or wall for soft, flattering light. Use TTL mode for fast-moving moments and manual flash for consistent reception shots. Adjust flash exposure compensation between -1 and -2 stops to avoid overexposing faces.
What is the best setting for wedding flash photography?
The best starting settings for flash wedding photography are ISO 400, f/2.8 aperture, and 1/200 shutter speed with TTL flash bounced off the ceiling. For receptions, raise ISO to 800-1600 and slow shutter to 1/125 to capture ambient light alongside flash. Always stay at or below your camera’s sync speed (typically 1/200 or 1/250) unless high-speed sync is enabled.
Do professional wedding photographers use flash?
Yes, nearly all professional wedding photographers use flash regularly. Even venues with beautiful natural light often have dim corners, indoor ceremonies, and evening receptions that require flash for sharp, properly exposed images. Flash gives pros control over consistency across an entire wedding day, regardless of how the ambient light changes.
How do you bounce flash at a wedding venue?
Bounce flash at a wedding venue by pointing your speedlight at a white ceiling, a neutral-colored wall, or a 45-degree angle up and behind you. Start by aiming the flash straight up, then test by snapping a shot against your hand to check for color casts from the surface. If ceilings are too high or too dark, use a collapsible bounce card tilted back at your subject as a backup.
What is off-camera flash wedding photography?
Off-camera flash (OCF) wedding photography means triggering one or more flash units on light stands away from your camera, usually with radio transmitters. OCF produces dimensional, professional reception images because the light skims across subjects from the side rather than coming straight at them from the camera. A basic setup uses one flash at 45 degrees to the side of the dance floor, with a second flash across the room for even coverage.
When should you not use flash at a wedding?
Avoid flash during quiet ceremony moments like the vows, the ring exchange, and any prayer or reflection, where the burst of light is distracting. Skip flash during the first dance if the venue has romantic uplighting you want to preserve, and skip flash during speeches when a sudden burst breaks the emotional tone. Always respect venue and officiant rules, especially in churches with strict no-flash policies.
Bringing It All Together
Flash wedding photography is what separates photographers who hope the light works out from photographers who know they will get the shot. Mastering bounce flash, direct flash, and off-camera flash covers the vast majority of wedding scenarios you will encounter.
Start with one speedlight, learn bounce flash on the ceiling of your own home, then add OCF once that feels automatic. Practice at every wedding, review your images after, and adjust your settings the next time. Within a season, flash will stop feeling like a chore and start feeling like the most reliable tool in your camera bag.