
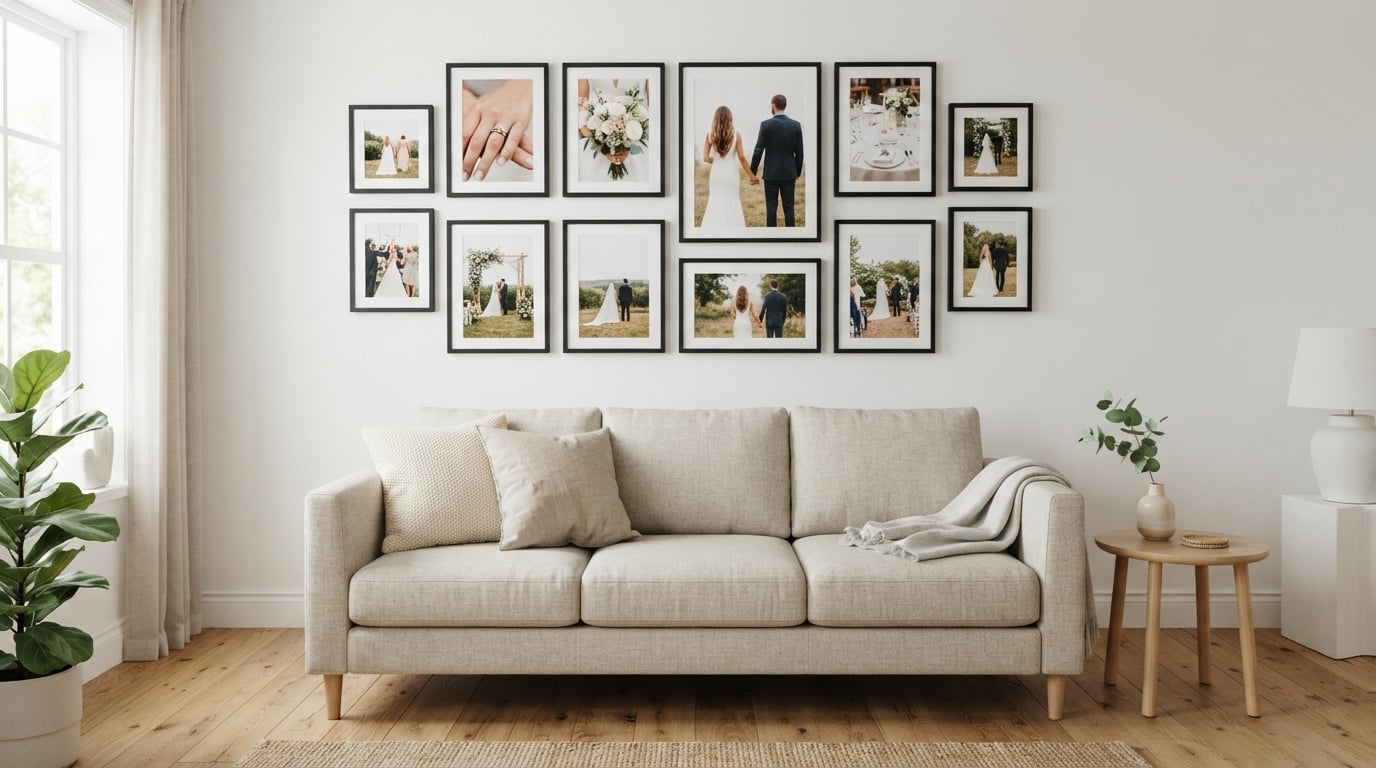
You finally received your wedding gallery, scrolled through a thousand stunning images, and now the question hits: how to display wedding photos so they actually look good in your home? We have helped hundreds of couples turn their digital galleries into living-room focal points, and the truth is that tasteful display has less to do with money and more to do with intentional choices. In this guide, our team walks you through every proven method we have seen work in 2026, from gallery walls to Feng Shui placement, so your favorite memories stay visible without overwhelming your space.
Table of Contents
Best Places to Display Wedding Photos in Your Home
Choosing the right room sets the tone for everything else. Start with the spaces you walk through every day, because those are the photos you will actually see and enjoy. Here are the spots that consistently work for our couples.
- Living room above the sofa. A single large canvas or a tight 3-piece set keeps the focal point clean and easy on the eyes.
- Hallway gallery. Long, narrow walls are perfect for a series of matching frames spaced evenly apart.
- Staircase ascent. Hanging photos along the staircase creates a chronological walk down memory lane as you climb.
- Bedroom wall opposite the bed. You will see the photo the moment you wake up and the moment you fall asleep.
- Entryway or foyer. One statement piece greets every guest and tells your love story before they sit down.
- Home office. A personal touch on the wall behind your desk keeps you motivated throughout the workday.
- Dining room sideboard. Lean framed prints against the wall on a buffet or shelf for an effortless, layered look.
If you want your photos to feel intentional rather than scattered, choose two of these locations and commit. Most couples we work with end up displaying their favorites in just three or four frames total, and that is the real secret.
How to Build a Wedding Photo Gallery Wall
A gallery wall is the most popular way to display wedding photos because it lets you tell a full story across one wall. Done right, it looks curated. Done wrong, it looks cluttered. Here is the process we recommend.
Step 1: Choose Your Photos and Lay Them Out on the Floor
Pull 7 to 15 of your absolute favorite images and arrange them on the floor in your intended configuration. Take a photo with your phone so you remember the layout. Skip any photo that does not spark an emotion when you look at it twice.
Step 2: Pick a Cohesive Frame Style
Stick with one frame color (black, white, or natural wood) and one or two frame profiles. Mixing too many finishes is the fastest way to make a gallery wall look chaotic. Matte black gallery frames work in nearly every home style.
Step 3: Create a Paper Template
Cut kraft paper to match the size of every frame and tape the templates to the wall with painter’s tape. Step back, adjust spacing, and only start hanging once the paper arrangement looks right. This step saves hours of nail holes.
Step 4: Hang at 57 Inches to Center
The standard gallery hanging height is 57 inches from the floor to the center of the arrangement. Your eye level should land naturally on the middle photo. Use a level and a measuring tape rather than eyeballing it.
Step 5: Use Two-Hook Wire for Heavy Frames
Wire hangers on the back of frames are often uneven. Add two separate D-ring hooks on the back of each frame so it hangs straight every time. This is the trick interior designers use for clean lines.
Most couples finish a gallery wall in a single afternoon once they have done the floor mockup. The result feels designed rather than thrown together, which is exactly the look you want.
Wedding Photo Albums and Coffee Table Books
Not every photo belongs on a wall. Albums and coffee table books are the best home for the candid, emotional, and detail shots that do not need to be seen from across the room. We love this option for couples who want to share memories with guests.
A traditional wedding photo album is a bound, archival book with thick pages and lay-flat binding. It is designed to be passed around and to last for generations. Think of it as the heirloom version that your future grandchildren will flip through.
A coffee table book is more like a magazine. It has a hard cover, often a dust jacket, and is meant to be left out for guests to browse. It is lighter, more casual, and works well if you want to show off 60 to 100 of your favorite images in a stylish format.
Pick an album if you want a keepsake you store safely and bring out on anniversaries. Pick a coffee table book if you want something decorative that doubles as conversation starter every time someone visits. Many of our couples do both, and the coffee table book sits in the living room while the album lives in a drawer or safe.
Canvas Prints and Statement Pieces
Sometimes one hero image beats a dozen small ones. Canvas prints are the easiest way to make a single wedding moment feel like wall art rather than a personal snapshot. They add texture, depth, and weight to a room.
Choose the canvas for your most emotionally important photo. The first look, the ceremony kiss, a quiet portrait with your grandparents, or the dance that ended the night. A 24×36 or 30×40 canvas over the sofa or fireplace turns that moment into a permanent fixture.
Pair a hero canvas with one or two small framed prints and leave the rest of the wall empty. Negative space is what separates a statement piece from a cluttered wall. If everything is a focal point, nothing is.
For canvas prints, invest in quality. Cheap canvases warp and fade within a few years. A professional-grade canvas with a solid wood stretcher bar and UV-protective coating will look as good in 20 years as it does the day you hang it.
Picture Ledges and Floating Shelves
Picture ledges are the most underrated display method for wedding photos. A single 3-foot ledge at eye level can hold 6 to 10 frames of varying sizes, all leaning against the wall. The best part is that you can swap photos out in seconds without ever touching a nail.
Use ledges when you cannot commit to a final arrangement. Newlyweds often change their minds about which photos they want to feature, and a ledge gives you the freedom to rotate seasonally. Holiday cards, anniversary portraits, and family milestones can all take a turn on the same ledge.
Layer larger frames in the back and smaller frames in the front. Mix one or two canvas prints in with your framed photos to add height variety. Keep the color palette of the frames consistent so the wall still feels curated even when you are swapping the photos inside them.
Digital Frames and Modern Display Options
Digital photo frames have come a long way from the clunky screens of a decade ago. Today’s smart frames look like regular photo frames on the wall or shelf, but they can rotate through hundreds of your favorite images on a quiet timer.
Set a digital frame in your kitchen, hallway, or office for a constant rotation of moments. Many frames let you send new photos from your phone over Wi-Fi, so you can add a fresh anniversary portrait the moment it lands in your gallery.
Pair one digital frame with three or four traditional framed photos in the same room for a balanced look. The digital frame handles the volume of favorites, while the framed prints anchor the space with permanence. This combination works especially well in smaller apartments where wall space is limited.
How to Display Wedding Photos Without Looking Tacky
Tackiness is the fear we hear most often from couples planning their displays. The good news is that tasteful display is mostly about restraint and quality. Here are the rules our design team swears by.
Edit Your Selection Ruthlessly
If you display 40 photos, none of them feel special. Choose your top 10 to 15 and let the rest live in the album or on your phone. Quality of selection always wins over quantity of frames.
Match the Frame to the Room
A rustic farmhouse frame looks out of place in a modern condo, and a sleek metal frame looks cold in a traditional Victorian. Match the frame material to the room style and your photos will feel like they belong.
Skip the Overlays and Effects
Heavy filters, vignettes, and “vintage” overlays scream amateur. Print your photos straight from your photographer’s edited gallery. Trust their color grading and resist the urge to add more effects in a phone app before printing.
Space Your Frames Apart
Photos crammed together on a wall look like a college dorm. Space frames at least 2 to 3 inches apart for a clean, intentional look. Use the paper template trick to test spacing before committing to nail holes.
Use Proper Lighting
Picture lights above framed photos, or natural light from a nearby window, make a huge difference. Avoid hanging photos in direct sunlight, which will fade the prints over time, but do plan for some light to hit them.
Feng Shui Placement for Wedding Photos
If you care about energy flow in your home, Feng Shui offers specific placement rules for wedding photos. Most rules come down to where the photos feel most loving and supported rather than where they look decorative.
Avoid the bedroom wall behind the bed. Feng Shui suggests the wall above the headboard should remain calm and uncluttered. Wedding photos can overstimulate that space, so consider a wall opposite the bed instead.
Use the southwest corner of the home. The southwest sector is associated with love, marriage, and partnership in traditional Feng Shui. Hanging a wedding photo in this area is said to strengthen the relationship.
Skip mirrors facing the photo. A mirror directly opposite a wedding photo can reflect the energy away. Hang photos on walls without mirrors, or place the mirror on a perpendicular wall.
Display happy photos only. Avoid displaying any image that brings up stress or regret. Choose photos where both partners are smiling and relaxed, because Feng Shui treats the wall space as an active energy zone.
You do not need to follow every Feng Shui rule, but even one or two of these guidelines can shift the energy of a room for the better.
Budget-Friendly Wedding Photo Display Ideas
You do not need a massive budget to display your wedding photos beautifully. Our team has seen gorgeous walls created for under a few hundred dollars when couples get creative.
Print at a consumer lab. Online print shops like the major chain stores offer 8×10 and 11×14 prints for a fraction of professional framing prices. The print quality is excellent when you upload high-resolution files.
Thrift store frames. Secondhand stores carry beautiful vintage and antique frames for very low prices. Buy mismatched sizes, then paint all the frames in one color for a cohesive look.
DIY canvas wraps. Glue printed photos around pre-cut canvas boards from a craft store. It takes an hour and gives you the look of a custom canvas print at a tiny cost.
Photo books first. If the budget is tight, skip framing entirely and start with a high-quality photo book. Many couples fill their walls slowly over years, adding one framed piece at a time as budget allows.
Start with the photo book and add frames as you find them. Within a year, you will likely have a wall that feels full without spending much at all.
FAQ
Where should wedding photos be displayed?
Wedding photos look best in high-traffic areas you see every day. The most popular spots are the living room above the sofa, the hallway, the staircase, the entryway, the home office, and the wall opposite the bed in the bedroom. Start with one or two locations rather than scattering frames across every room.
How do you display wedding photos tastefully?
Display wedding photos tastefully by editing your selection down to your top 10 to 15 favorites, matching frame styles to your home decor, spacing frames at least 2 to 3 inches apart, hanging at 57 inches to center, and using proper picture lighting. Quality of selection and frame always beats quantity of frames on the wall.
What are some unique ways to display wedding photos?
Unique wedding photo display ideas include a picture ledge for easy rotation, a single oversized canvas as a statement piece, a digital smart frame for daily slideshows, a coffee table book for casual guests, leaning frames on a sideboard, and creating a chronological photo timeline up the staircase.
How to display photos without being tacky?
Display photos without looking tacky by printing directly from your photographer’s edited gallery without extra filters, sticking to one frame color across the whole display, leaving negative space around hero images, avoiding heavy vintage effects, and rotating photos seasonally so the wall does not feel frozen in time.
What to do with 1000 plus wedding photos?
With 1000 plus wedding photos, you cannot and should not display them all. Pick 10 to 15 favorites for framed display, build a high-quality wedding album for the heirloom shots, design a coffee table book for casual guests, and store the rest digitally on a backup drive and cloud service for safekeeping.
Where to hang wedding photos Feng Shui?
In Feng Shui, wedding photos work best in the southwest corner of the home, on walls opposite the bed rather than above the headboard, on walls without mirrors reflecting them, and in rooms where both partners feel relaxed. Avoid placing wedding photos in the bathroom or directly above sharp furniture edges.
Final Thoughts on Displaying Your Wedding Photos
How to display wedding photos is really a question about how you want to feel in your home every day. Pick your absolute favorite moments, choose one or two display methods from this guide, and start small. A single framed print on the entryway wall, a thoughtful gallery in the hallway, or a beautifully bound album on the coffee table will always look better than twenty cluttered frames.
Your wedding photos deserve to live somewhere you will actually see them. Start with one wall this month, add another next year, and let your collection grow with you. The memories are too good to leave on a hard drive forever.
1 thought on “How to Display Wedding Photos (October 2026) Complete Guide”