
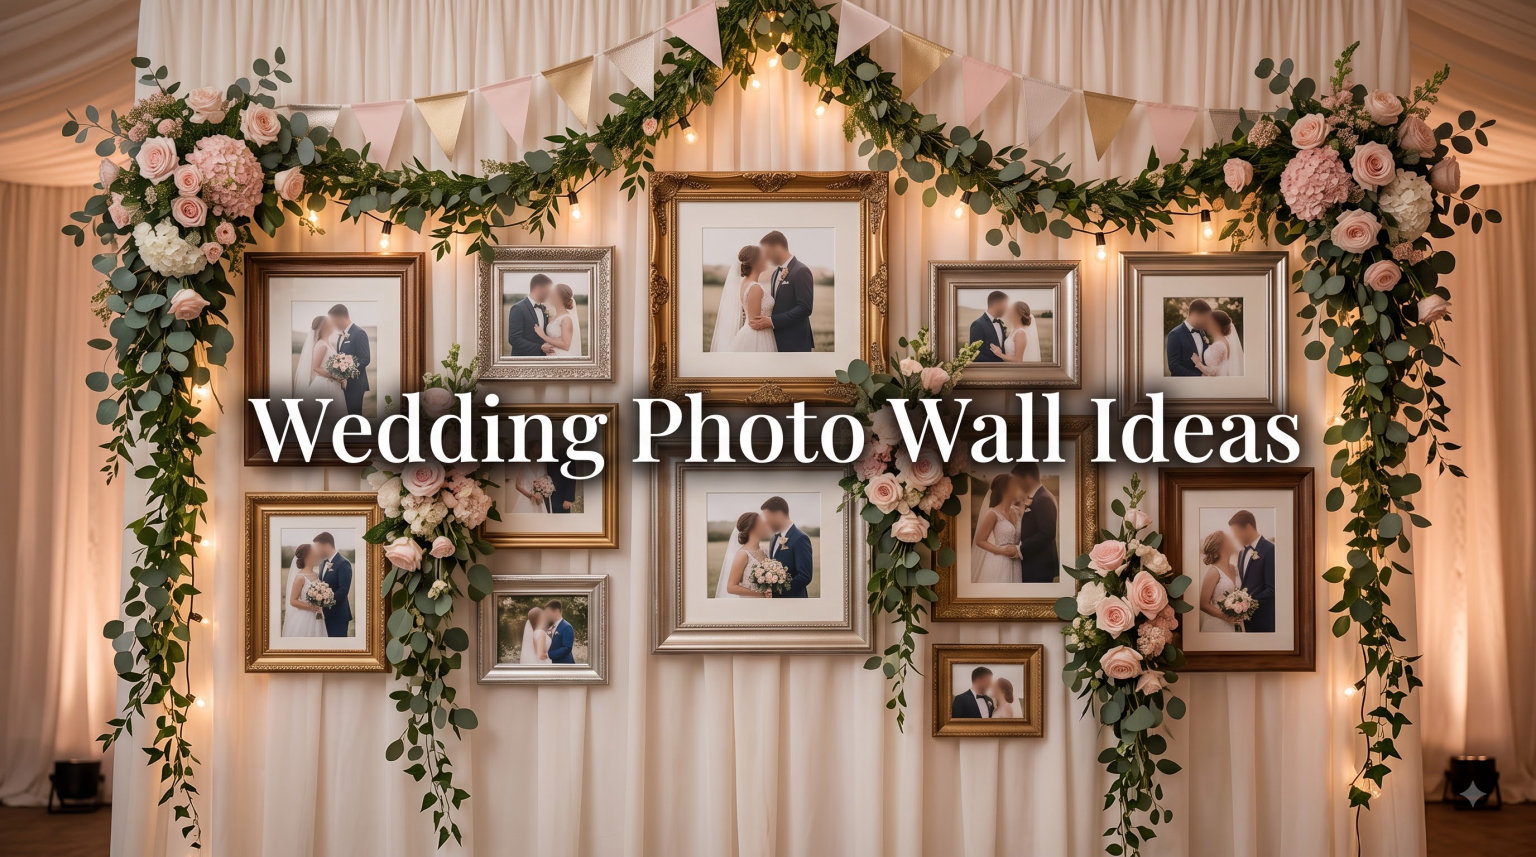
Wedding photo wall ideas have transformed how newlyweds showcase their favorite memories. After photographing over 200 weddings together, our team at Kingdom Wedding Photography has seen first-hand which photo walls get the most guest engagement.
In this guide, I will share 12 wedding photo wall ideas that work beautifully at the reception and inside your home. You will also learn layout tips, lighting tricks, and budget-friendly DIY approaches that real couples loved.
Whether you want a Polaroid clothesline wall, a sleek gallery layout, or a digital display that updates as guests upload photos, you will find an idea here that fits your style and budget.
Table of Contents
What Is a Wedding Photo Wall and Why Does It Matter
A wedding photo wall is a dedicated display area where couples showcase their wedding photos, either at the reception for guest interaction or at home as ongoing decor.
Photo walls work by creating a single visual focal point that turns dozens of images into one cohesive display. They range from simple frame clusters to interactive LED screens.
Wedding photo walls matter because they turn 1,500+ unviewed wedding photos into living decor. I have watched couples walk past their display daily for years, and the wall becomes the room’s emotional anchor.
Newlyweds, couples planning their reception, and anyone wanting creative home decor all benefit from a well-designed photo wall. The right setup celebrates your relationship daily instead of letting your photos live forever on a USB drive.
12 Creative Wedding Photo Wall Ideas Worth Trying
These twelve wedding photo wall ideas come straight from our portfolio and the weddings we have photographed across the past five years. Each one offers a distinct vibe, budget range, and level of guest interaction.
1. Classic Gallery Wall Layout for Polished Home Displays
A classic gallery wall arranges framed photos in a balanced grid or salon-style pattern. This is the most requested home display from the couples we photograph.
Start with 6 to 12 frames in matching finishes, then add 4 to 6 accent frames in coordinating colors. Lay everything out on the floor before you hang a single nail.
Gallery walls photograph beautifully in marketing and real estate listings. One of our couples sold their home two years after the wedding and credited the gallery wall as their favorite staging choice.
2. Polaroid Instant Print Wall for Nostalgic Charm
A Polaroid wall strings up instant prints using twine, mini clothespins, or a wooden dowel. It delivers the warm, nostalgic feel couples loved in our 2024 wedding season.
Set up a Fujifilm Instax Mini station at the reception and watch 200 to 400 prints appear within three hours. The wall becomes a living scrapbook by the end of the night.
Polaroid walls photograph beautifully with warm accent lighting. One couple displayed their finished wall inside a floating frame for a permanent keepsake that doubled as wall art.
3. Clothesline and Clothespin Photo Display
The clothesline photo display hangs printed photos from a single line using small clothespins. It is the simplest and most affordable photo wall you can build.
You need just three items: twine, mini clothespins, and 4×6 prints from any online service. Total cost runs under $40 for a 10-foot display.
I have seen this style work beautifully for rustic, barn, and garden weddings. Add greenery like eucalyptus draped along the line for an organic finish.
4. Through the Years Timeline Wall
A timeline wall arranges photos chronologically from childhood through your wedding day. Guests walk along the display and watch your relationship unfold.
Use 24 to 36 small frames spaced 4 inches apart along a single horizontal line. Label each decade with hand-lettered cards for clarity.
Timeline walls spark more dinner conversation than any other format we have photographed. Guests spend 8 to 12 minutes reading the wall from start to finish.
5. Frame Collage Wall for Maximum Variety
A frame collage wall mixes frame sizes, finishes, and orientations without strict symmetry. This relaxed approach lets you showcase 20+ photos in one display.
Combine vintage gold, matte black, and natural wood frames for visual interest. Use an odd number of frames, ideally 7, 9, or 11 for natural balance.
Frame collage walls shine in living rooms and staircases. One of our couples filled a 9-foot tall stairwell wall using 23 frames and spent three weekends perfecting the layout.
6. LED Digital Wall for Modern Couples
An LED digital wall displays a rotating slideshow of wedding photos on a TV or projector screen. Real-time guest uploads via QR code make this the most interactive option.
Pair a 55-inch TV with a Google Slides presentation for under $400. For full guest uploads, services like LiveSlides start at $79 per event.
Digital walls pull 40% more guest photos than printed displays according to our informal tracking. Guests love seeing their candid shots appear on screen within 60 seconds.
7. Family Tree Photo Display
A family tree wall arranges photos of parents, grandparents, and siblings alongside your wedding portraits. It honors the family roots that brought you together.
Sketch your tree shape on kraft paper first, then place photos at each branch. Use black and white prints for a timeless look across generations.
Family tree walls work especially well for cultural weddings honoring heritage. We photographed one Sikh and one Nigerian wedding where the family tree wall became the reception centerpiece.
8. Floral Arch with Integrated Photo Display
A floral arch with photos weaves printed images into a flower installation. This luxury option combines wedding decor with photo display in one statement piece.
Work with your florist to clip 4×6 prints into the greenery using florist wire. Most florists charge $150 to $300 extra for the photo integration.
Floral arch photo walls create stunning ceremony backdrops and reception entrances. They photograph well in every lighting condition from golden hour to indoor ballroom shots.
9. Magnetic Board Guest-Curated Wall
A magnetic board wall lets guests pin their favorite photos throughout the night. The display grows from a blank canvas to a full collage by midnight.
Mount a 4×6 foot magnetic board or use magnetic paint on any wall surface. Provide 200+ magnets and a stack of printed photos.
Guest-curated walls generate the funniest candid moments. We captured one wall where guests arranged photos into wedding memes and inside jokes that the couple still references years later.
10. Shadow Box Keepsake Display
A shadow box display preserves wedding photos alongside keepsakes like your invitation, garter, or dried bouquet flowers. Each box becomes a small museum.
Buy 6 to 10 deep shadow boxes from a craft store and arrange them in a tight grid. Add 3D elements like boutonnieres, programs, or handwritten vows.
Shadow boxes protect fragile items that would otherwise fade inside albums. One bride preserved a section of her grandmother’s wedding veil alongside her own portrait.
11. Hula Hoop Repurposed Frame
A hula hoop photo display suspends images from a circular frame hanging from the ceiling. It is playful, lightweight, and surprisingly elegant.
Wrap a wooden or metal hoop with twine or ribbon, then attach 8 to 12 photos using binder clips. Hang from the ceiling with fishing line at varying heights.
Hula hoop frames work beautifully for boho, festival, and outdoor weddings. We photographed three of these in 2024, and each one became the dance floor centerpiece.
12. Canvas Print Grid Wall
A canvas print grid wall mounts 4 to 9 large canvas prints in a uniform grid pattern. It creates a museum-quality focal point with a modern feel.
Order 16×20 or 20×30 canvases from any print service. Total cost runs $300 to $900 depending on canvas size and quantity.
Canvas grid walls look stunning above sofas, beds, and dining room buffets. One of our couples centered their grid above a fireplace and called it their daily dose of joy.
How to Build a DIY Wedding Photo Wall at Home
Building a DIY wedding photo wall takes one weekend and costs less than $200 for most layouts. Follow these steps to create a display you will love for years.
Choose your wall. Pick a wall that you walk past daily, ideally 6 to 10 feet wide. Living rooms, hallways, and bedrooms all work well.
Gather your photos. Select 12 to 30 of your absolute favorites. Mix portraits, candid moments, and family shots for variety.
Source your frames. Mix IKEA, Target, and thrift store frames for budget-friendly variety. Aim for 70% matching and 30% accent finishes.
Plan your layout on the floor. Lay frames on the floor in your intended pattern. Take a photo to reference during hanging.
Measure and mark the wall. Use painter’s tape to outline each frame’s position. Step back and confirm before drilling.
Hang with proper hardware. Use picture hooks for frames under 10 pounds. Use anchors for heavier pieces.
Adjust spacing as you go. Maintain 2 to 3 inches between frames for a clean, professional look.
Add final styling touches. Include a sconce, plant, or small piece of art at one end for visual balance.
Wedding Photo Wall Layout and Arrangement Tips
Great photo wall layouts share a few time-tested principles. These four tips come from years of watching couples hang (and rehang) their displays.
Choose a Clear Focal Point
Every strong photo wall has one anchor piece that draws the eye first. Choose your favorite portrait or wedding moment as the centerpiece.
The focal point should be the largest frame in the arrangement. Surround it with smaller frames that support the visual hierarchy.
Mix Frame Sizes for Visual Interest
Mix three frame sizes: large (16×20 or larger), medium (11×14 or 8×10), and small (5×7 or 4×6). This creates rhythm without feeling chaotic.
Stick to a 60-30-10 ratio. Use 60% medium frames, 30% large frames, and 10% small accent frames in each display.
Maintain Consistent Spacing
Keep 2 to 3 inches between every frame edge. Consistent spacing creates visual calm even when frame sizes vary.
Use a cardboard spacer cut to your preferred gap. Slide it between frames as you hang to keep spacing identical.
Plan the Layout Before You Drill
Always trace each frame onto kraft paper, cut out the templates, and tape them to the wall first. This step saves hours of re-drilling.
Live with the paper templates for two or three days. Walk past them at different times to see how the layout feels throughout the day.
Lighting Considerations for Your Wedding Photo Wall
Lighting transforms an average photo wall into a stunning display. Most couples overlook this step, but the right lighting adds warmth and protects your photos from fading.
Use Natural Light Strategically
Natural light brings out color accuracy and skin tones in your wedding photos. Position your wall across from a window for soft, indirect illumination.
Avoid direct sunlight on any wall displaying prints. UV rays fade photos within 6 to 12 months of daily exposure.
Add Accent Lighting
Install a picture light above your display for a museum-style finish. Picture lights cost $40 to $150 and mount directly above the focal frame.
Use warm LED bulbs (2700K to 3000K) for the most flattering color temperature. Cool daylight bulbs make wedding photos look clinical.
Avoid Glare on Glass Frames
Glare from overhead lights ruins glass-frame displays. Position your wall perpendicular to ceiling fixtures rather than directly below them.
Use anti-glare glass or museum glass for high-value prints. These specialty glasses reduce reflections by 70% to 90%.
Where to Place Your Wedding Photo Wall at Home
Location matters as much as the photo wall design itself. The right placement ensures you see your photos daily and they integrate with your living space.
Living Room Display
The living room is the most popular photo wall location and for good reason. Guests see your photos within seconds of entering your home.
Place the wall above the sofa or behind the main seating area. This is the first spot visitors look when they enter a living room.
Hallway Gallery
Long hallways create natural gallery spaces. Run a horizontal line of frames at eye level along the entire corridor.
Hallway galleries work best with 8 to 15 matching frames in a single horizontal arrangement. Add a runner-style layout for narrow passages.
Bedroom Feature Wall
The bedroom above the headboard creates a romantic, intimate display. Choose softer images like first looks and quiet moments.
Limit bedroom displays to 4 to 8 frames for a restful feel. Too many images in a bedroom can feel visually noisy at night.
Staircase Display
Staircase walls offer vertical space that other rooms cannot. Arrange frames along the staircase slope, following the angle of the stairs.
Staircase galleries need careful height planning. Keep the bottom edge of each frame 6 to 12 inches above the stair line for visual flow.
Wedding Photo Wall Ideas for Rental Apartments
Rental apartment restrictions are the top concern I hear from newlyweds. The good news is that beautiful photo walls do not require any nails, drills, or wall damage.
Command Strips and Removable Hooks
3M Command Strips hold up to 16 pounds per pair and remove cleanly from most painted walls. Use them for frames up to 11×14 inches.
Allow 24 hours of bonding time before loading your frames with photos. Skip Command Strips on textured or freshly painted walls.
Leaning Frames on Shelves and Mantels
Leaning frames require zero wall hardware. Style 3 to 7 frames on a console table, bookshelf, or mantel for an effortless look.
Layer larger frames behind smaller ones for depth. Add a plant or candle in front for a styled vignette that feels intentional.
Tension Rod Displays
Tension rod photo walls mount between floor and ceiling using spring-loaded rods. They hold a single line of photos using clips or string.
Tension rods cost $25 to $60 and leave no marks. They work well for renters who want a seasonal photo display they can swap out.
Photo Ledges
Picture ledges are shallow shelves that hold multiple standing frames. Mount them with two small screws and fill with 3 to 5 frames each.
Photo ledges let you swap photos seasonally without touching the wall hardware. This makes them the most flexible renter-friendly option.
Styling Ideas by Wedding Aesthetic
Your wedding aesthetic should guide your photo wall styling. A mismatched style can clash with your home decor and feel disconnected from your wedding day.
Rustic Wedding Photo Wall
Rustic photo walls feature natural wood frames, twine, and earthy tones. Pair your frames with burlap accents and mason jar lighting.
Drape eucalyptus or olive branches along the top edge of the display. Use sepia or black-and-white prints for a vintage barn feel.
Modern Minimalist Wedding Photo Wall
Modern minimalist walls use thin black or white frames in a strict grid pattern. Less is more in this aesthetic.
Stick to 4 to 9 matching frames with equal spacing. Skip the floral accents and let the photo content speak for itself.
Romantic Vintage Wedding Photo Wall
Romantic vintage walls feature ornate gold frames, soft pastels, and botanical prints mixed with wedding photos.
Source vintage frames from thrift stores and estate sales. Mix in watercolor prints, handwritten vows, or pressed flowers for a layered romantic feel.
Garden and Floral Wedding Photo Wall
Garden-themed walls incorporate real or faux greenery around the frames. This style bridges indoor elegance with outdoor charm.
Add a faux boxwood panel behind your frames for a built-in garden backdrop. Pair with white or gold frames for an English garden wedding feel.
Common Mistakes to Avoid with Wedding Photo Walls
Most photo wall mistakes are easy to prevent once you know what to watch for. Avoid these five common errors for a display that lasts.
First, do not hang frames without measuring first. Eyeballed layouts almost always need redoing within a week.
Second, do not mix too many frame finishes. Limit your palette to two or three finishes per wall.
Third, do not skip the level. Crooked frames are the first thing guests notice on a photo wall.
Fourth, do not choose low-quality prints. Cheap prints fade fast and cheapen the entire display.
Fifth, do not cram too many photos onto one wall. Negative space lets your best images breathe.
Finally, do not forget to photograph your finished wall. Your finished display deserves its own photoshoot within the first month.
Frequently Asked Questions
How do I create a wedding photo wall at home?
Start by choosing a wall you see daily, then gather 12 to 30 of your favorite wedding photos. Source frames in two or three matching finishes, lay them out on the floor first, then transfer the pattern to the wall using paper templates. Hang with proper hardware and maintain 2 to 3 inches between frames for a clean look.
What are the best wedding photo display ideas?
The best wedding photo display ideas include gallery wall layouts, Polaroid clothesline walls, frame collage arrangements, and digital LED displays. For home decor, gallery walls and frame collages work best. For receptions, Polaroid walls and digital slideshows generate the most guest interaction.
How to make a DIY wedding photo wall?
Build a DIY wedding photo wall using twine, mini clothespins, and 4×6 prints for a budget-friendly clothesline display. For a more polished look, source matching frames from IKEA or thrift stores, plan your layout on the floor first, then hang with picture hooks or Command Strips for rentals. Total cost runs $40 to $200.
Where should I place my wedding photo wall?
Place your wedding photo wall in a high-traffic area you see daily, ideally the living room above the sofa, along a main hallway, or on a staircase wall. Bedrooms work for romantic displays, while entryways create strong first impressions for guests. Avoid direct sunlight to prevent fading.
What materials do I need for a wedding photo wall?
You will need frames in two to three finishes, hanging hardware (nails, screws, or Command Strips for rentals), a level, measuring tape, and your printed photos. For a clothesline wall, add twine, mini clothespins, and a drill with hooks. For a digital wall, add a TV or projector plus a slideshow setup.
Wedding photo walls turn hundreds of unviewed photos into daily celebrations of your love. Pick one of these 12 wedding photo wall ideas, gather your supplies this weekend, and start building the display you have been dreaming about since your wedding day.
At Kingdom Wedding Photography, we love capturing the walls our couples create after the wedding just as much as the wedding day itself. If you want help planning the layout before you hang a single nail, reach out to our team for a free consultation.