
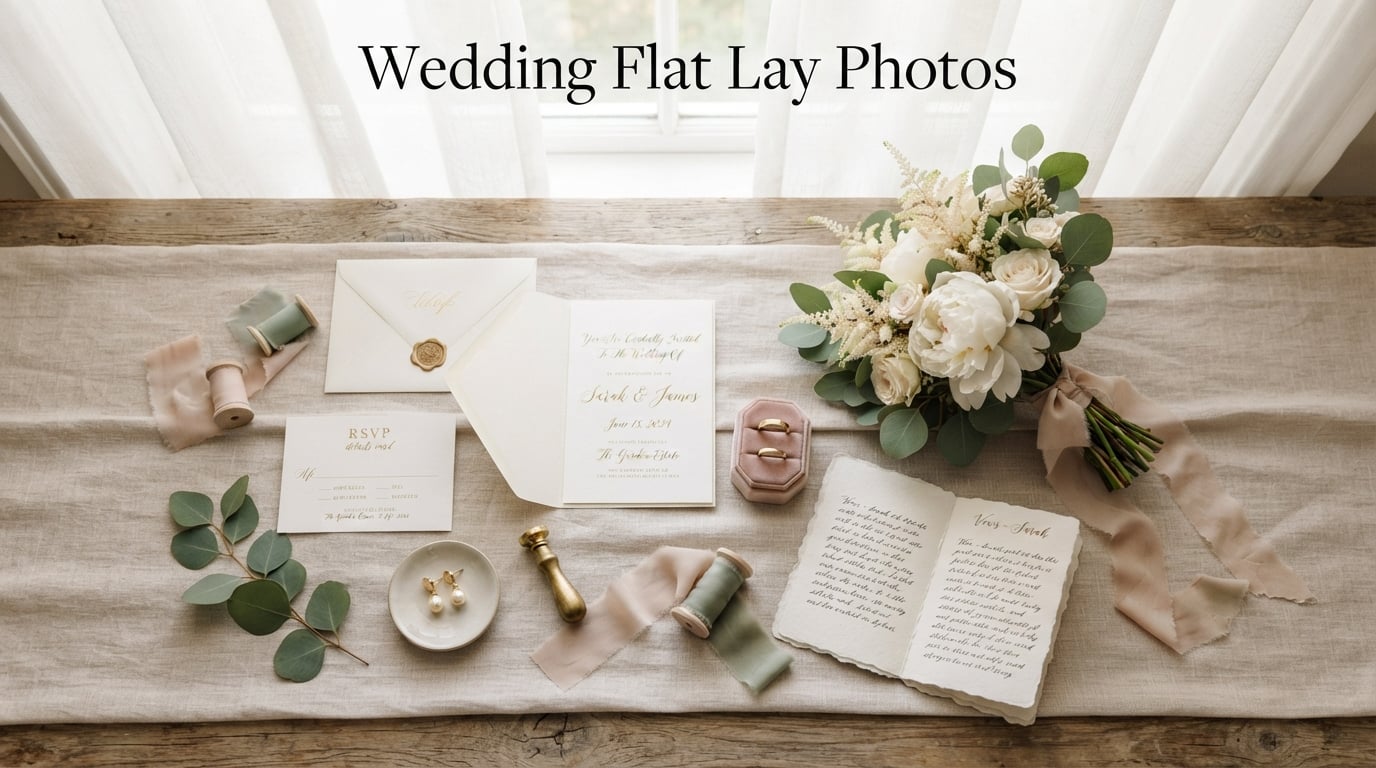
A wedding flat lay photo is a top-down image of arranged wedding details like invitations, rings, jewelry, and accessories, typically captured during the getting-ready portion of the wedding day.
Hi, I’m part of the team at Kingdom Wedding Photography, and we have spent the last several years shooting detail shots like these for hundreds of weddings across every season, venue, and budget. From candlelit farmhouses to high-rise hotel suites, from coastal beach houses to mountain lodges, we have styled flat lays in every kind of getting-ready space imaginable.
Along the way, we have refined our approach to wedding flat lay photos down to a repeatable 15-minute workflow that still leaves room for personality, romance, and the small surprises that make each couple unique. We have learned what works through trial and error, and through studying the work of photographers we admire.
In this guide, I will walk you through everything we have learned, organized in a way that lets you read it once and apply it on your next wedding morning. You will get the gear we rely on, the styling choices that consistently make our images stand out, the lighting setups that work in tricky hotel rooms, and the time-management tricks that keep flat lays from eating your entire morning.
This is a craft-based topic, not a shopping list. Whether you are a new wedding photographer building a portfolio, a second shooter trying to add value on a wedding day, a couple who wants to understand what your photographer is doing during those quiet getting-ready moments, or a planner who wants to communicate expectations clearly, this article will help.
By the end, you will know exactly what to pack in your flat lay kit, how to set up your camera for crisp detail shots, how to style a flat lay that feels editorial rather than cluttered, and how to finish the editing so the images feel cohesive with the rest of your gallery. Let’s start with the basics.
Table of Contents
What Is a Wedding Flat Lay Photo
A wedding flat lay photo is a top-down image where the camera sits directly above a flat surface and captures carefully arranged wedding items from a 90-degree angle. The viewer looks down at the scene as if hovering above a tabletop, seeing every detail exactly as the photographer composed it.
Flat lays are not just detail photos. They are deliberately styled compositions that combine invitations, rings, florals, ribbons, and accessories into a single storytelling image. They live somewhere between editorial still life and documentary memory-keeping, and they are one of the few styles of wedding photography that is entirely photographer-controlled.
Most photographers capture wedding flat lay photos during the getting-ready window. This is when the bride, groom, or both are finishing hair and makeup, and the wedding party has laid out everything important for the day. Hotel suites, bridal cabins, Airbnb living rooms, and even tents become the studio.
The reason flat lays have become a standard part of every wedding gallery is simple. They slow the viewer down. A reception photo captures a moment in time, but a flat lay captures the texture of a couple’s choices, from the deckle edge of an invitation to the patina on a grandmother’s brooch to the soft curl of unwritten vow pages.
Flat lays also serve a marketing function. They are among the most-shared images from any wedding. Couples post them on Instagram within hours of the ceremony, and vendors use them in their portfolios for years. A strong flat lay can anchor a couple’s wedding hashtag, a venue’s marketing page, and a florist’s lookbook all at once.
If you are a photographer, think of the flat lay as a portrait of a couple’s taste. If you are a couple, think of it as the still life that anchors your wedding album. If you are a planner, think of it as a visual summary of the design work your team has done.
Essential Items to Include in Wedding Flat Lay Photos
The items you include set the story. Here is the comprehensive checklist our team uses to gather details before we style a single frame. We have organized it by category so couples and planners can check things off quickly.
- Invitation suite: the main invitation card, RSVP card, details card, envelope with a wax seal, vellum overlay, ribbon sample, and any custom postage stamps.
- Rings: the engagement ring, both wedding bands, the ring box (open or closed), and any ring dish or velvet pillow.
- Jewelry: earrings, necklace, bracelet, hair pins, anklet, and any heirloom pieces handed down from family members.
- Bridal accessories: shoes, perfume bottle, veil or hairpiece, garter, getting-ready robe, and a handwritten letter from the partner.
- Groom details: cufflinks, tie or bow tie, pocket square, boutonniere, watch, pocket knife, flask, socks, and a handwritten vow book.
- Florals: the bridal bouquet, bridesmaid bouquet, boutonniere, loose petals, and any extra blooms your florist can spare.
- Paper goods: vow books, menu cards, place cards, custom signage, and any printed programs.
- Sentimental items: family photographs, heirloom textiles, religious items, and gifts exchanged the morning of the wedding.
I always send couples a flat lay checklist 30 days before the wedding. The list lives in a printable PDF they can share with their wedding planner and family. Couples who follow this list save us an average of 20 minutes on the wedding morning because nothing is missing and nothing arrives at the last minute.
If the couple has minimal items, that is okay. A simple wedding flat lay with just the invitation, two rings, and a sprig of eucalyptus can be more powerful than a cluttered tray with twenty objects fighting for attention. The story matters more than the inventory.
One detail we often add that couples do not think to include is the gift they exchanged the morning of. Even a small box with a handwritten note tells a beautiful story and adds emotional weight to the flat lay. We also include a single loose bloom from the bridal bouquet in nearly every flat lay because it ties the image back to the rest of the wedding.
Flat Lay Kit: Equipment and Props Every Photographer Needs
Your flat lay kit lives in a single rolling case that you can grab from the car and unpack in under three minutes. Here is what ours contains after eight years of refinement, organized by function.
- Camera body: a full-frame mirrorless camera with a tilting screen makes overhead composition much easier on the neck and back.
- Lens: a 50mm f/1.4 or 35mm f/2 prime is our workhorse for full flat lays. A 100mm macro handles tight ring shots and stationery texture.
- Tripod and boom arm: a tripod with a horizontal center column or a dedicated overhead rig keeps the camera parallel to the ground and eliminates your own shadow.
- Reflectors and diffusers: a 5-in-1 32-inch reflector and a small pop-up diffuser solve 90 percent of lighting problems on location.
- Styling surfaces: marble tile, linen runner, raw wood board, velvet fabric, and a neutral gray cardstock backdrop cover most wedding palettes.
- Props: ribbon spools in five colors, wax seal kit, loose greenery, brass tray, ring dish, vintage stamps, and a small glass cloche.
- Cleaning kit: microfiber cloth, lens blower, and a small bottle of glass cleaner for ring shots and mirror-reflective items.
- Tethered capture: a tether cable and laptop allow immediate review with the couple and instant feedback on composition.
I rotate props seasonally. In autumn, I add dried wheat, mini pumpkins, and warm-toned ribbon. In spring, I bring ranunculus clippings, garden ribbon, and a softer linen. In summer, I carry wildflower sprigs and natural twine. The kit evolves with the weddings we shoot, and each season gets its own dedicated tray inside the rolling case.
One item that often gets overlooked is a small step stool. Elevating yourself slightly above the table reduces back strain during long detail sessions and lets you shoot straight down without leaning awkwardly over the items. We added it after one too many sore-back Mondays.
Another item worth packing is a small piece of foam core. It doubles as a reflector and as a clean backdrop for tight ring shots. We also carry a roll of artist tape in black and white to mark positions, hold ribbons in place, and label which items belong to which wedding when we shoot back-to-back detail sessions.
Lighting Setup and Techniques for Wedding Flat Lay Photos
Lighting makes or breaks a flat lay. Even the most beautiful invitation suite looks flat under overhead hotel fluorescents. Here is how we set up lighting in almost any getting-ready room we encounter, from dark cabins to bright coastal rentals.
Window light first. Position your styling surface within three to four feet of the largest window in the room. Side light creates gentle shadows that show texture in paper and fabric. Direct overhead light flattens everything. If the window has sheer curtains, leave them closed to act as a giant diffuser.
Turn off the room lights. Mixed color temperatures are the number one cause of flat lays that look orange or green in editing. Switch off ceiling lights and rely on the window as your single source. This also helps your eyes read the scene with consistent color and contrast.
Use a reflector on the shadow side. Place the white side of a 5-in-1 reflector opposite the window. This fills shadows and reveals detail on the dark side of rings and jewelry without needing a second light. If the shadows are still too deep, switch to the silver side for a stronger fill.
Avoid your own shadow. This is the most common mistake I see from newer photographers. The photographer leans over the table and casts a shadow across the entire scene. A boom arm or overhead tripod solves this completely. If you must shoot handheld, wear dark clothing and stand with the sun directly at your back.
Artificial light fallback. When window light is unavailable, a single continuous LED panel with a softbox positioned 45 degrees above and to the side of the table works well. Aim for a soft, even wash across the entire scene. Use a diffuser cap to avoid hot spots on shiny ring metal or glass perfume bottles.
Backlight for translucent objects. Veils, ribbons, vellum, and wax seals look stunning when lit from behind. Position your LED or window behind the item and let the light pass through. This single technique turns a basic ring shot into something cinematic and adds depth that front light alone cannot achieve.
For most of my flat lays, I shoot between 9 a.m. and 1 p.m. The sun angle is high enough to bounce light deep into the room but soft enough to avoid harsh contrast. Late afternoon light works for evening weddings, but expect warmer color temperatures and plan your white balance accordingly.
If you are shooting in a dimly lit bridal suite with no window access, a small portable LED with adjustable color temperature is worth its weight in gold. Set it to around 5500K for a daylight look, or 4500K for a slightly warmer mood. Match this setting to your white balance in camera to avoid correction in post.
Composition and Styling Principles
Composition is where flat lays separate from snapshot detail shots. These are the rules I teach every second shooter on our team before their first wedding, and they apply whether you are styling one item or twenty.
- Choose one anchor piece. The anchor piece is the largest, most visually dominant item. Place it slightly off-center, then build everything else around it. Common anchors include the invitation suite, the bridal bouquet, or the open ring box.
- Apply the rule of thirds. Imagine a tic-tac-toe grid over your scene. Place the anchor piece on one of the four intersections. Empty space in the other two-thirds of the frame creates breathing room.
- Use triangular arrangements. Triangles are inherently pleasing to the eye. Position three key elements at the three corners of an imaginary triangle, then fill in supporting items along the edges.
- Layer for depth. Place taller items at the back, mid-height items in the middle, and flat items in front. This layering creates dimension and prevents the flat lay from looking like a sticker sheet.
- Create lead lines. Ribbons, stems, jewelry chains, and the edges of cards can all draw the eye through the frame. Position them so they point toward your focal point.
- Leave negative space. Resist the urge to fill every corner. Empty space lets the eye rest and makes the rest of the composition feel intentional.
- Maintain color flow. Limit your palette to three or four colors. Repeat those colors in different items across the scene to create visual rhythm.
I always take at least three test shots before settling on a composition. The first shot tells me what is missing. The second tells me what to remove. The third is usually the keeper, with only minor adjustments needed.
Odd numbers of objects photograph better than even numbers. Three rings, five ribbons, seven small items. Our brains read odd groupings as natural and even groupings as forced. When in doubt, remove one item.
Another styling trick is to angle items slightly toward the camera lens. A ring box angled 15 degrees reads better than one perfectly square to the lens. The same goes for shoes, perfume bottles, and even ring dishes. A subtle tilt creates visual movement.
For invitation suites, place the main invitation flat with a slight diagonal tilt, then layer the RSVP and details card on top at a different angle. Tuck a sprig of greenery or a ribbon tail under the bottom corner to soften the edge and tie the composition together.
Camera Settings Guide for Crisp Wedding Flat Lay Photos
Flat lays are forgiving because your subject is not moving. That means you can take your time with settings and prioritize image quality over speed. Here is the exact technical recipe we use.
Aperture: I shoot most flat lays between f/4 and f/5.6. This gives just enough depth of field to keep all key items sharp while gently softening the background. For ring-only shots with extreme close focus, I stop down to f/8 to f/11 for edge-to-edge sharpness.
Shutter speed: Since you are on a tripod, shutter speed mostly affects ambient light and flash sync. I default to 1/125s with a tripod and no flash. For handheld shots, I keep shutter speed above 1/200s to eliminate camera shake, even with stabilized lenses.
ISO: Keep ISO at 100 or 200 for the cleanest possible file. With a tripod and proper lighting, you will rarely need to push ISO above 400. Lower ISO means less noise and more flexibility when recovering shadows or pulling detail out of dark florals.
White balance: Shoot a custom white balance using a gray card placed in the same lighting as your flat lay. Kelvin-based white balance is also reliable. Window light typically lands between 5500K and 6500K depending on cloud cover, while interior tungsten light runs around 3200K.
File format: Always shoot RAW. Flat lays often need precise color adjustments, shadow recovery, and white balance correction. JPEG compression will crush the subtle tonal differences in stationery, paper textures, and florals that make the image feel rich.
Focus: Use single-point autofocus and place the focus point on the most important detail, usually the anchor piece. For ring-only shots, manual focus with focus magnification on the camera’s tilting LCD is more reliable than autofocus, which can hunt on shiny metal surfaces.
Tethered capture: Plug your camera into a laptop and review every shot on a calibrated screen. This lets you spot dust, fingerprints, and composition problems in real time. It also lets the couple preview the flat lay, which usually produces delighted reactions and keeps the timeline moving.
If you are shooting mirrorless with eye-detection autofocus, turn it off for flat lays. The camera will hunt for non-existent eyes and slow you down. Use face-detection only when you switch back to portraits. Turn off image stabilization as well when the camera is on a tripod, since stabilized systems can sometimes introduce micro-blur at slow shutter speeds.
Choosing the Right Background and Surface
The background sets the tone for the entire image. Choose wrong, and even beautiful items will look disconnected. Choose right, and the same items will feel cohesive and intentional.
- Marble: classic and bright, pairs well with white invitations and silver jewelry, perfect for traditional or luxury weddings.
- Raw wood: warm and organic, ideal for outdoor, rustic, and barn weddings, brings out the warmth in floral tones.
- Linen: soft texture that flatters florals and ribbon work, the most versatile background we carry.
- Velvet: rich and saturated, makes jewelry and rings look luxurious, perfect for moody or jewel-toned weddings.
- Tile: modern and graphic, suited to urban and minimalist weddings with clean lines.
- Paper backdrops: matte cardstock in cream, blush, or charcoal is a clean alternative for tight ring shots.
I always ask couples about their color palette and overall wedding style before selecting a background. A blush invitation suite on a bright marble tile will clash. The same suite on a cream linen runner will sing. This is a five-second question that saves a flat lay.
Texture matters more than color. A subtle linen weave adds dimension even when the color is neutral. A high-gloss surface creates reflections that can distract from the items. Test your surface with a quick test shot before committing to the composition, and watch for unwanted reflections on rings.
Carry three to five backgrounds in your kit and rotate them based on each wedding’s palette. The right background is the single fastest way to make a flat lay feel custom to the couple. I rarely use the same background twice in a row, because variety keeps the portfolio fresh.
One tip that has saved me many times: always have a neutral gray cardstock in your kit. When the wedding palette is unusual or the items are highly varied, a clean gray background ties everything together and lets the items be the stars.
Time Management and Wedding Day Workflow
Flat lays can either anchor your morning or swallow it whole. Our target is 15 minutes per flat lay, and we hit that target by following the same six-step workflow every time.
Step 1: Communicate before the wedding. Send a flat lay checklist 30 days out and confirm items 7 days out. The day before, ask the wedding planner to set the items on a single tray in the getting-ready space so they are easy to find when you arrive.
Step 2: Walk the room first. Identify the window with the best light. Move furniture if needed. Clear a 3 by 3 foot area on a flat surface, ideally a table, ottoman, or cleared floor space. Wipe the surface clean before laying down your background.
Step 3: Sort and cluster. Spend 2 minutes grouping items into anchor, supporting, and accent categories. Place them in small piles around your styling surface so you can grab them quickly without searching.
Step 4: Set up camera and light first. Mount the tripod, attach the camera, position the reflector or LED panel, and tether to the laptop. This takes 4 minutes but saves 15 minutes of fiddling later when the timeline is slipping.
Step 5: Build composition in layers. Start with the anchor, then place three to five supporting items, then add accents and props. Shoot between every two additions so you have options to choose from in editing.
Step 6: Shoot wide, medium, and tight. Capture the full flat lay, then crop into detail shots of rings, florals, and stationery. These tight crops often become album favorites and Instagram teasers the day after the wedding.
Second shooters are invaluable during flat lay capture. While I am styling, my second shooter gathers items, cleans jewelry with the microfiber cloth, and preps florals. We swap roles when the bride is ready for portraits, which keeps the morning moving and avoids gaps in coverage.
Coordinate with your florist for an extra bundle of loose blooms. Most florists will set aside a small bucket of stems, petals, and greenery at no charge if you ask a week ahead. These extras are flat lay gold and tie the detail shots to the bridal bouquet.
Finally, communicate timing to the wedding planner. Tell them you need 15 uninterrupted minutes once hair and makeup finish. Most planners will hold the bridal party in another room during that window, which keeps the styling space calm and gives you room to work.
Common Mistakes to Avoid in Wedding Flat Lay Photography
After reviewing hundreds of flat lays from our own work and others, here are the mistakes I see most often. Each one is easy to fix once you know to look for it.
- Forgetting to clean items. Fingerprints on rings, dust on invitations, and smudges on perfume bottles all show up in close detail shots. Always clean before styling, and recheck between compositions.
- Overcrowding the frame. More items do not equal better. A focused flat lay with five items often outranks a chaotic one with twenty. Edit ruthlessly.
- Mismatched color palettes. Items that look great individually can clash when placed together. Step back and check the overall color story before each shot.
- Ignoring the angle. Even a 5-degree tilt can introduce unwanted perspective distortion. Use a level or your camera’s electronic level to confirm a perfectly perpendicular shot every time.
- Spending too long. Beyond 20 minutes, diminishing returns kick in. Capture the strong frames and move on. The couple is waiting and so is the timeline.
- Over-editing. Heavy HDR, over-sharpening, and extreme clarity adjustments on stationery can introduce halos and crunchy textures. Edit flat lays to match the rest of your gallery, not louder than it.
- Not varying the composition. Shoot the same flat lay at multiple compositions. Different angles and crops give the couple options for their album and let you choose the strongest frame in editing.
I keep a small printed checklist on top of my kit case with these seven mistakes. Quick visual reminders prevent most of them, especially on the back half of a long wedding day when decision fatigue starts to set in.
Two more mistakes deserve mention. First, do not shoot through tinted windows or curtains without adjusting white balance. Second, never place items on a wrinkled background. Smooth it out before every composition, because wrinkles distract the eye.
Post-Processing Workflow for Polished Flat Lay Photos
Flat lays should edit quickly because your exposure and white balance were dialed in on location. A consistent editing workflow keeps them aligned with the rest of your wedding gallery.
Step 1: Cull and rate. Import into Lightroom, flag keepers, and remove duplicates. I usually keep 8 to 12 frames per flat lay and pick the strongest 3 to deliver to the couple.
Step 2: Apply base preset. Start with a preset that matches the day’s lighting. Flat lays often benefit from a slightly warmer preset than portrait frames because paper and florals benefit from warm tones that flatter their texture.
Step 3: Correct white balance. Use the eyedropper on a neutral part of the background to set accurate white balance. Adjust exposure if the histogram shows clipping in either direction.
Step 4: Spot removal. Dust, fingerprints, and small distractions can be removed with Lightroom’s spot removal or Photoshop’s healing brush. A single pass makes a huge difference on close-up crops.
Step 5: Local adjustments. Use radial filters or adjustment brushes to brighten the anchor piece and darken edges for a subtle vignette that draws the eye inward without looking artificial.
Step 6: Match the gallery. Apply the same color grade used on portrait frames so the flat lay does not look like it was shot on a different day. Consistency is the secret to a polished wedding album.
I finish with a slight desaturation of greens and a small boost to oranges. This unifies florals with skin tones when the couple scrolls from detail shots to portraits. The greens in the bouquet stop competing with the grass in outdoor shots.
For delivery, export flat lays at the same resolution as your portrait frames, but consider creating a separate gallery folder labeled “Details” so couples can find them easily. Many couples use these images for thank-you cards, hashtag posts, and album openers.
Frequently Asked Questions About Wedding Flat Lay Photos
What is a flat lay in wedding photography?
A wedding flat lay is a top-down photo of carefully arranged wedding details like invitations, rings, jewelry, and accessories, captured from directly above the styling surface. Photographers usually shoot them during the getting-ready portion of the day.
What should I include in wedding flat lay photos?
Include the invitation suite, rings, jewelry, bridal shoes, perfume, veil, groom details like cufflinks and watches, florals, ribbons, vow books, and any sentimental heirlooms. Limit the scene to 8 to 15 items so the composition stays clean.
What is the best lighting for wedding flat lay photos?
Soft window light positioned 3 to 4 feet from the styling surface is the gold standard. Add a white reflector on the opposite side to fill shadows. When window light is unavailable, a single LED panel with a softbox at a 45-degree angle works well.
How long should wedding flat lay photos take?
A focused flat lay session takes 15 to 20 minutes once the items are gathered and the lighting is set. Pre-wedding communication with the couple and a printed checklist keeps the session on schedule.
Final Thoughts on Creating Wedding Flat Lay Photos
Wedding flat lay photos reward preparation, restraint, and a clear point of view. Build a kit, communicate early with couples, master window light, and trust the rule of thirds. Your flat lays will become the most shared images in every gallery and the still-life anchors of every album you deliver this year and beyond.
Practice at home with your own accessories before your next wedding. Build one flat lay a week for a month and watch your speed and consistency improve. The detail shots you deliver this year will anchor albums for decades, and the couples who see them will remember the care you put into every frame.
If you are getting ready for your own wedding, share this guide with your photographer and planner. The more aligned everyone is on items, timing, and expectations, the more time you get to spend in the moment rather than searching for the right cufflink.