
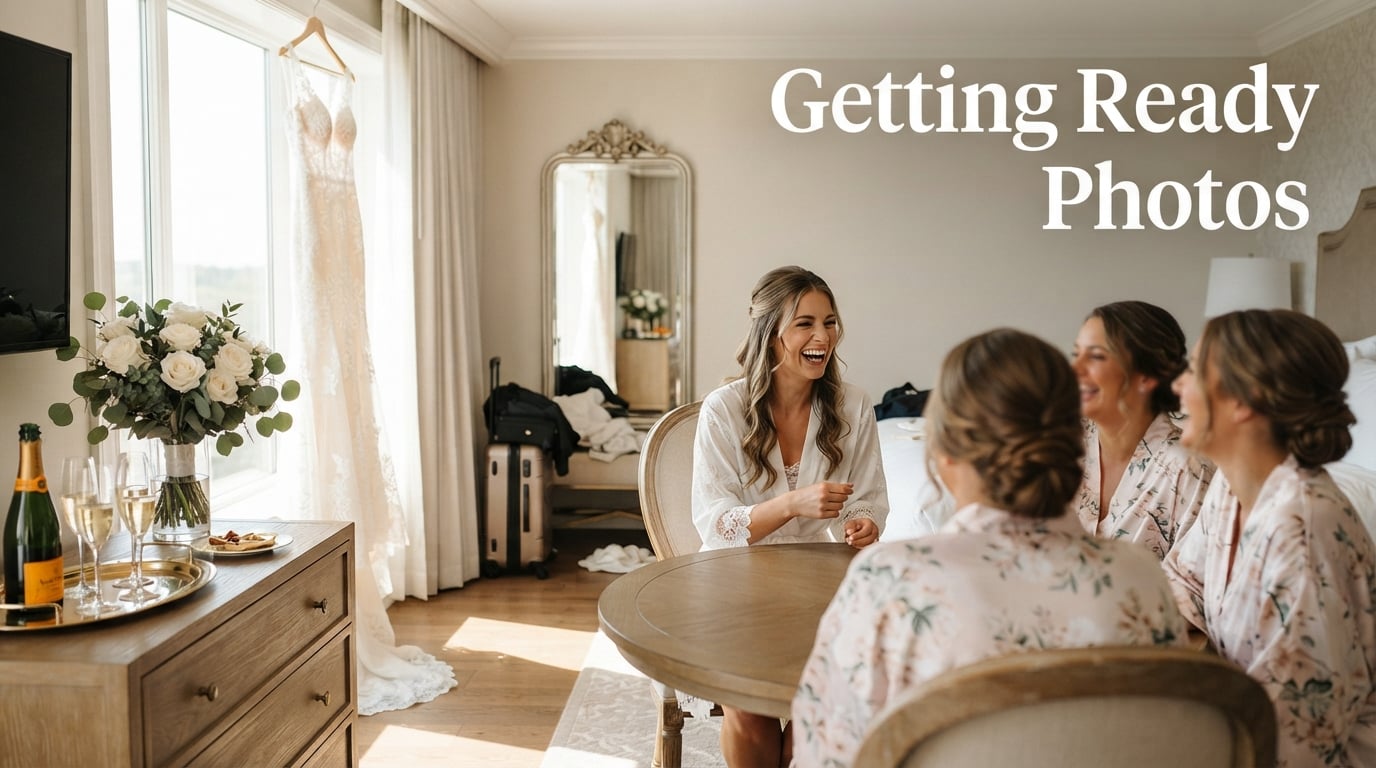
If you have ever flipped through a wedding album and felt the day rush past in a blur, you already know why getting ready photos matter. I have photographed hundreds of wedding mornings in 2026, and the couples who feel the most connected to their finished album always point to one phase first: the quiet, chaotic, laughter-filled hours before anyone walked down an aisle.
This guide pulls together everything I wish every couple knew before their wedding morning. You will get a realistic timeline, a must-have photo checklist, location and outfit advice, and the honest answers couples ask me about privacy, value, and what to skip. Whether you are planning a backyard wedding or a 300-guest ballroom affair, these getting ready photos ideas will help you plan a morning your photographer can actually capture.
By the end, you will know exactly how long to book your photographer, which shots to insist on, and how to keep the morning calm enough that the photos turn out beautiful.
Table of Contents
What Are Getting Ready Photos and Why They Matter
Getting ready photos are the candid and posed images your photographer captures on your wedding morning, starting when they arrive at your preparation location and ending when you leave for the ceremony. The set typically includes detail shots, hair and makeup in progress, bridesmaids and groomsmen getting dressed, group portraits, and the emotional exchanges that happen along the way.
These images matter because they tell the full story of your day. Your ceremony starts when you are already polished and put-together. Your reception shows you celebrating at the peak of the party. Only the wedding morning captures the anticipation, the nerves, the inside jokes, and the small quiet moments before everything begins.
Couples who skip these photos often tell me they regret it. The morning moves faster than anyone expects. Having a photographer there means someone is documenting the moments you would have been too excited to think about.
From a practical standpoint, getting ready photos also give your album breathing room. They create a beginning. Without them, the story jumps straight from getting dressed at home to walking down the aisle, and that gap shows in the final gallery.
How Long Getting Ready Photos Take on a Wedding Day
Plan for two to three hours of photographer coverage on each side. Most brides need around 90 minutes from the moment their photographer arrives to capture everything important, while grooms typically need 60 to 90 minutes. Here is how the time usually breaks down.
15 minutes: Detail shots of the dress, shoes, jewelry, invitations, and rings before anyone puts them on.
30 minutes: Bridesmaids getting their hair and makeup done, with candid moments and detail shots of robes and champagne.
30 minutes: Bridal hair and makeup final touches, getting into the dress, and the bridal party reveal.
15 minutes: First look with bridesmaids, group portraits, and father-daughter or mother-daughter moments.
15 minutes: Final touch-ups, last portrait of the bride alone, and walkout to the car.
For the groom’s side, expect a slightly faster pace. Suits take less time than dresses. Tie tying, boutonniere pinning, gift exchanges, and a quick round of portraits usually wrap up in just over an hour.
If you can only book one hour on one side, prioritize the bride’s preparation. It tends to offer more variety, more emotion, and more detail subjects to photograph. The groom’s coverage is shorter and more repeatable, which is why many photographers quote a smaller window for that side.
Where to Take Getting Ready Photos for Best Results
The single biggest factor in how your getting ready photos turn out is light. Choose a room with large windows and minimal clutter, and you will spend less time staging shots and more time capturing real moments.
Most couples prepare in one of these locations, and each comes with tradeoffs to think through.
Hotel suite: The most predictable lighting and the cleanest backdrops. Brides can hang the dress, lay out accessories, and stay close to the venue.
Home: The most personal. Family photos on the wall, a familiar childhood bedroom, or the kitchen where you grew up adds emotional depth to every image.
Airbnb or vacation rental: Often the best balance of styled interiors, large windows, and room for the whole bridal party to spread out.
Getting ready suite at the venue: Convenient, but usually cramped and lit by overhead fixtures. Ask to see the room before booking.
Whatever you choose, keep the room clear of clutter the night before. Trash bags, half-eaten breakfast plates, and gift wrap all end up in shots. A quick 10-minute clean-up before the photographer arrives saves an hour of moving things out of frame during the morning.
Proximity to the ceremony location matters too. I have driven couples an hour from their hotel to a venue and watched hair flatten in the wind. Aim for under 30 minutes between your getting ready location and your ceremony site so the dress stays crisp and the timeline stays relaxed.
The Essential Getting Ready Photo Checklist
There is no single right list, but after photographing hundreds of weddings, I have a core set of shots every couple should insist on. Use this as your starting point and add anything personal to your story.
The dress before you put it on. Hung in a window with the veil draped beside it, photographed in detail and then full length.
Stationery and details. Invitation suite, rings, jewelry, shoes, perfume, and any heirlooms laid out together as a flat lay.
Makeup in progress. A close-up of brushes, palettes, and the moment your makeup artist applies the final touch.
Hair reveal. The first look from your mom or maid of honor once your hair is finished, often photographed in the mirror.
Robes and getting-ready portraits. Bridesmaids in matching robes popping champagne, laughing, fixing each other’s hair.
The dress being zipped or buttoned. A behind-the-scenes moment with whoever helps you into the dress.
The accessories moment. Putting on earrings, the veil, the perfume, the shoes. Capture each as a small portrait.
First look with bridesmaids. The reaction is often louder than the first look with your partner.
Letter or gift exchanges. Reading a note from your partner or opening a gift, photographed in real time.
Group portraits. Bride with bridesmaids, mom with daughter, grandmother with the bride, and any other meaningful groupings.
Portrait of the bride alone. One clean, full-length portrait to anchor the whole getting ready section.
Walkout shot. Either heading down the hallway or stepping into the car, holding the bouquet.
For the groom’s side, swap dresses for suits, robes for suspenders and ties, and the bridesmaid reveal for a round of high-fives with the groomsmen. Cover the same categories in less time.
Bride Getting Ready Photos: Tips and Shot Ideas
The bride’s getting ready photos work best when the room feels lived in, not staged. Leave a few real items out: a coffee cup, a printed itinerary, your last gift from a parent. Small details like these make the images feel like your morning, not a Pinterest board.
Pick one person to be the photo lead. Usually this is the maid of honor or your photographer’s assistant. That person helps gather the girls for group shots, signals when to quiet down for portraits, and keeps the timeline moving when hair runs late.
Try to finish hair and makeup at least 30 minutes before you need to be dressed. The makeup artist touches up the face after the dress goes on, but a 30-minute buffer prevents the room from feeling rushed. If you are running behind on hair, that buffer is the first thing to protect.
For portraits of the bride alone, stand or sit near the largest window in the room. Face the light, not away from it. This single change transforms most natural light portraits and removes the need for flash on the dress.
If you have a dad-daughter or mom-daughter moment planned, schedule it right before you leave for the venue. These shots read better when emotion is peaking, not when the room has already cooled down from the dress reveal.
Groom Getting Ready Photos: What to Capture
Groom preparation photos are often underused because the morning is shorter, but they matter just as much. The suit jacket hanging on a chair, the cufflinks passed down from a grandfather, and the look on your dad’s face as you tie his tie together all deserve a frame.
Most groom coverage wraps up in about an hour. Use this time for the suit detail shots, the tie being tied, the boutonniere being pinned, and a quick round of portraits with the groomsmen. A round of whiskey or a beer with the guys is fair game, and it photographs well when kept simple.
Letter reading or gift exchanges between the bride and groom are often done separately. The morning is the perfect window for these, especially if you are not doing a first look. Your photographer can capture you reading her note and holding the gift, and the two of you see each other for the first time at the ceremony.
If you want true symmetry in the album, ask your photographer to spend equal time on both sides. Some couples underestimate this, then realize later that the wedding morning only shows one half of the story.
What to Wear for Getting Ready Photos
Choose something comfortable, photogenic, and intentional. Most brides now wear matching robes, custom pajamas, or a button-down shirt with their new initials embroidered. The point is consistency in the photos and comfort while your hair is being set.
A few outfit rules of thumb.
Avoid pure white. It blends into your skin and reads as overexposed in natural light. Pastel shades, blush, dusty blue, and soft florals work well.
Match the wedding palette. Robes in your bridesmaids’ dress color photograph beautifully and create a unified look.
Pick something you can change out of quickly. Robes and button-down shirts beat jumpsuits and onesies when you need to get into the dress fast.
Skip logos and large graphics. They date the photos and pull attention away from faces.
For the groom’s side, the equivalent choices are usually a white dress shirt with rolled sleeves, a fun printed tie with the groomsmen, or matching suspenders in a shared color. Plain t-shirts work too, but a little texture goes a long way in the final image.
Privacy Considerations During Bridal Preparation
This is the one section most guides skip, and the one couples ask me about most. If you want privacy at any point during getting ready photos, say so clearly to everyone in the room, including parents.
Privacy concerns usually fall into three buckets. Some brides want only the photographer and a single attendant during the dress reveal. Some want to keep the room small to manage stress. And some want the photographer to step out during a letter or gift exchange. All of these are reasonable requests, and your photographer will adjust to whatever you choose.
The easiest way to set boundaries is to write them into the schedule. Add a note in your day-of timeline that says, for example, “10:00 – mom and maid of honor only in the room” or “10:30 – photographer steps out for 10 minutes.” When the schedule is clear, family members are less likely to push back in the moment.
From the photographer’s side, I always ask before the wedding day how private the morning should be. Some brides invite me into every moment. Others want me shooting through a doorway for the dress reveal. Both options produce great images when planned in advance.
Emotional Moments Worth Capturing During Getting Ready
The most powerful getting ready photos almost never come from the planned shots. They come from the unplanned moments: a quiet tear on the morning of, a dad who pretends he is not nervous, a grandmother who walks in and stops everyone mid-stride.
Three emotional beats I always encourage couples to plan for.
Letter exchanges. Writing or reading a note from your partner. Photographed hands holding the paper, your face while you read, and the moment you fold the letter back up.
Gift exchanges. A watch, a piece of jewelry, a handkerchief with something embroidered. These feel natural to open in the morning and produce beautiful reaction shots.
First look with bridesmaids. Often louder and more emotional than the first look with your partner. Plan it shortly after you are fully dressed so the reaction is at its peak.
If you are including pets in getting ready photos, the morning is the natural moment. A dog in a “getting ready” bandana or a cat curled up at the foot of the bed makes for some of the most memorable detail shots of the day.
Common Getting Ready Photo Mistakes to Avoid
Most morning-of photography problems come down to three things: clutter, lighting, and time pressure. Avoid these and your photos will already be ahead of most weddings.
The biggest mistake is treating the room like a storage closet. Less is more. Pack up the suitcases, clear off the counters, and stash any plastic bags before the photographer arrives. Anything left in frame becomes a distraction later.
The second mistake is choosing a windowless room with harsh overhead lighting. If the venue suite has fluorescent fixtures only, ask your photographer to bring a small LED panel or scout the lobby for a better backdrop.
The third mistake is building a hair and makeup timeline that ends just as the ceremony starts. Build in a 30-minute buffer on each side and the morning will breathe. The biggest stress on a wedding morning is rarely the photos themselves. It is the running late feeling that comes from a timeline with no margin.
A final tip: invite fewer people, not more. The most beautiful getting ready photos come from rooms with two to five people who know you well. Crowds slow everything down and dilute the emotional focus.
Frequently Asked Questions
Where to take getting ready photos?
Choose a room with the largest windows and the cleanest walls. A hotel suite or vacation rental with natural light works well. Make sure the room is close to the ceremony venue, ideally within 30 minutes, so the dress and hair stay fresh through the drive.
How long do getting ready photos take?
Plan for two to three hours of coverage on each side. The bride typically needs about 90 minutes from photographer arrival to walkout. The groom usually needs 60 to 90 minutes for suit details, ties, and portraits. Build in a 30-minute buffer on top of that for hair and makeup delays.
What to wear for getting ready photos?
Wear something comfortable, photogenic, and consistent. Matching robes, custom pajamas, or a button-down shirt with your new initials all work well for brides. Grooms usually wear a clean dress shirt with rolled sleeves or printed ties that match the groomsmen. Avoid pure white and large logos.
Are getting ready photos worth it?
Yes, for most couples they are. In our experience, couples who skip getting ready photos are the ones who later regret it. The morning moves fast and these images capture emotion, family presence, and details that no other part of the day will show. They also give your album a true beginning.
Planning Your Wedding Morning for the Best Getting Ready Photos
If you only remember one thing from this guide, let it be this: getting ready photos work best when the morning feels calm, the room feels intentional, and the timeline has breathing room. Book the photographer for the full window you need, choose a room with natural light, clear the clutter the night before, and let the morning unfold without trying to direct every frame.
Pull your must-have shot list from this guide and share it with your photographer early. Add anything personal to your story: a grandmother’s handkerchief, a grandfather’s cufflinks, a note you wrote the night before. Those one-of-a-kind details are what turn a beautiful gallery into your gallery.
Most couples tell me, after the wedding, that the photos from the morning of are the ones they did not expect to treasure most. The 2026 version of your wedding album will thank you for slowing down and letting someone else capture it.